


32
——————
—————————————————————————————————————————————————————————————————————————————————————————
—
————————————————————————————————————————————————————————————————————————————————————————————————————————————————————————————————————————————————————————————————————————————————————
5
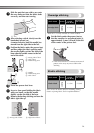
Using the blind stitch foot
This foot comes in handy not only for stretch blind hem
stitching, but also for sewing fabric edges and seams.
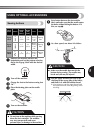
■ When edge stitching
1
Turn off the machine.
2
Attach the blind stitch foot.
Turn on the machine.
CAUTION
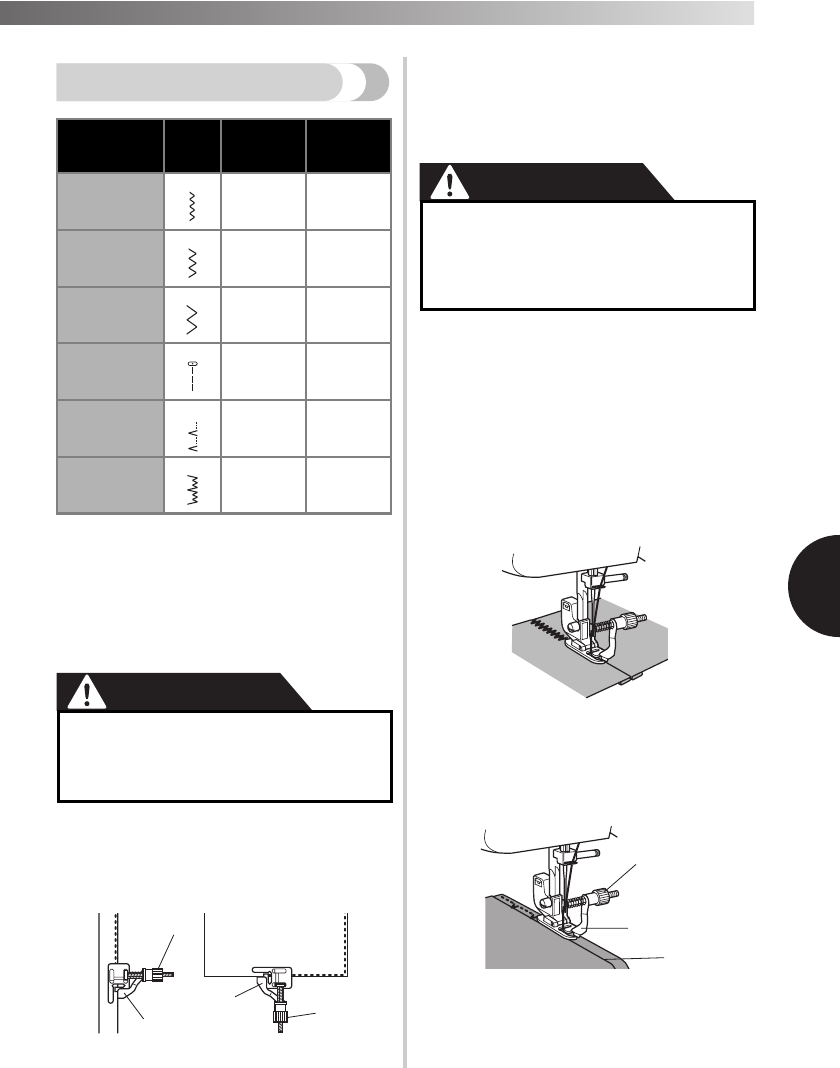
3
Position the needle the distance you want
the stitch to be from the edge of the fabric,
and then lower the needle in that position.
4
Turn the foot guide screw and carefully
adjust to guide the fabric.
1 Screw
2 Guide
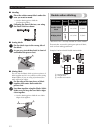
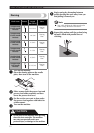
■ When sewing seams
1
Turn off the machine.
2
Attach the blind stitch foot.
Turn on the machine.
CAUTION
3
Set the pattern selection dial to the
Straight Stitch (Center Needle Position).
Align the foot guide with the needle
position.
4
Set the pattern selection dial to the Zigzag
Stitch with the desired width.
5
Place the fabric under the foot so the foot
guide is aligned between both edges of the
fabric.
6
Lower the presser foot and start sewing.
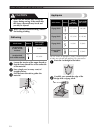
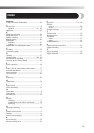
■ When stretch blind hem stitching
When stretch blind hem stitching using the blind
stitch foot, turn the screw to adjust the guide to the
folded hem.
• For more details on blind hem stitching, see
page 23.
1 Screw
2 Guide
3 Folded hem
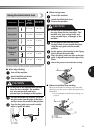
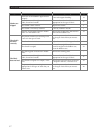
Stitch Name Pattern
Stitch
Length
[mm (inch)]
Stitch Width
[mm (inch)]
Zigzag Stitch 0.7 (1/32) 1.8 (1/8)
Zigzag Stitch 1.5 (1/16) 3.3 (3/16)
Zigzag Stitch 2 (1/16) 5 (3/16)
Straight Stitch
(Center Needle
Position)
3 (1/8) —
Blind Hem
Stitch
2 (1/16) 5 (3/16)
Stretch Blind
Hem Stitch
2 (1/16) 5 (3/16)
●
Do not turn on the machine while pressing
down the foot controller. The machine
may start unexpectedly and cause
personal injury or damage to the machine.
2
3
4
9
12
14
1
2
1
2
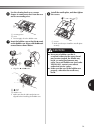
● Do not turn on the machine while
pressing down the foot controller. The
machine may start unexpectedly and
cause personal injury or damage to the
machine.
1
2
3