


24
——————
——————————————————————————————————————————————————————————————————————————————————————————————————————————————————————————————————————————————————————————————————————————————————————————————————————————————————————————————————————————————————————————————————————————————
3
7
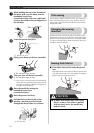
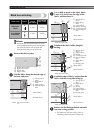
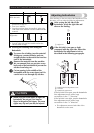
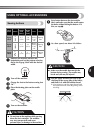
Slide the part that you wish to sew onto
the arm, make sure that the fabric feeds
correctly, and then start sewing.
1 Arm
8
After selecting a stitch, slowly turn the
handwheel toward you
(counterclockwise) until the needle has
moved from the right side to the left.
9
Position the fabric under the presser foot,
and then adjust the fabric position until
the needle slightly catches the fold of the
hem when the needle comes to the left
end of the stitch.
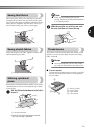
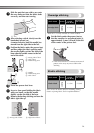
0
Lower the presser foot lever.
a
Sew at a slow speed holding the fabric
with your hands, so that the needle
slightly catches the fold of the hem.
b
Remove the basting stitching and turn the
fabric right side up.
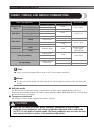
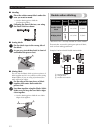
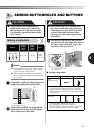
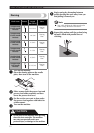
Overedge stitching
*
Stitch no. 15 is only available on certain models
.
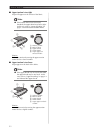
1
Put the fabric under the presser foot so
that the seamline (or arrowhead point) is
approximately 3 mm (1/8 inch) to the left
of the center of the presser foot.
• If the seam allowance is wider than the stitch
pattern, trim away any excess fabric after
stitching.
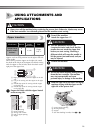
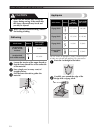
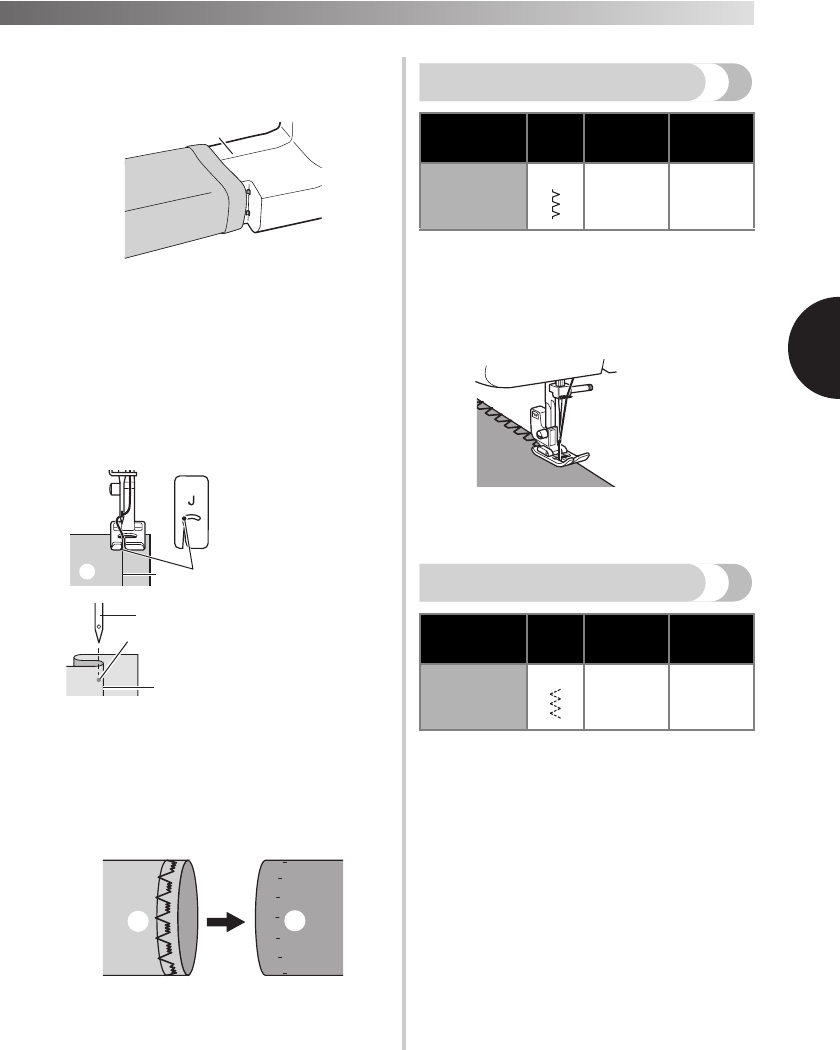
Elastic stitching
You can use the Elastic Stitch for mending, sewing
elastic or joining fabric. Each is explained below.
1 Wrong side of fabric
2 Fold of hem
3 Needle drop point
1 Needle
2 Needle drop point
3 Fold of hem
1 Wrong side of fabric 2 Right side of fabric
1
1
2
3
1
2
3
1
2
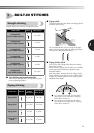
Stitch Name Pattern
Stitch
Length
[mm (inch)]
Stitch Width
[mm (inch)]
Overedge Stitch 2 (1/16) 5 (3/16)
Stitch Name Pattern
Stitch
Length
[mm (inch)]
Stitch Width
[mm (inch)]
Elastic Stitch 1 (1/16) 5 (3/16)
15
13