


1
2
3 4
7
8
9
4
5
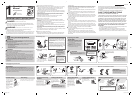
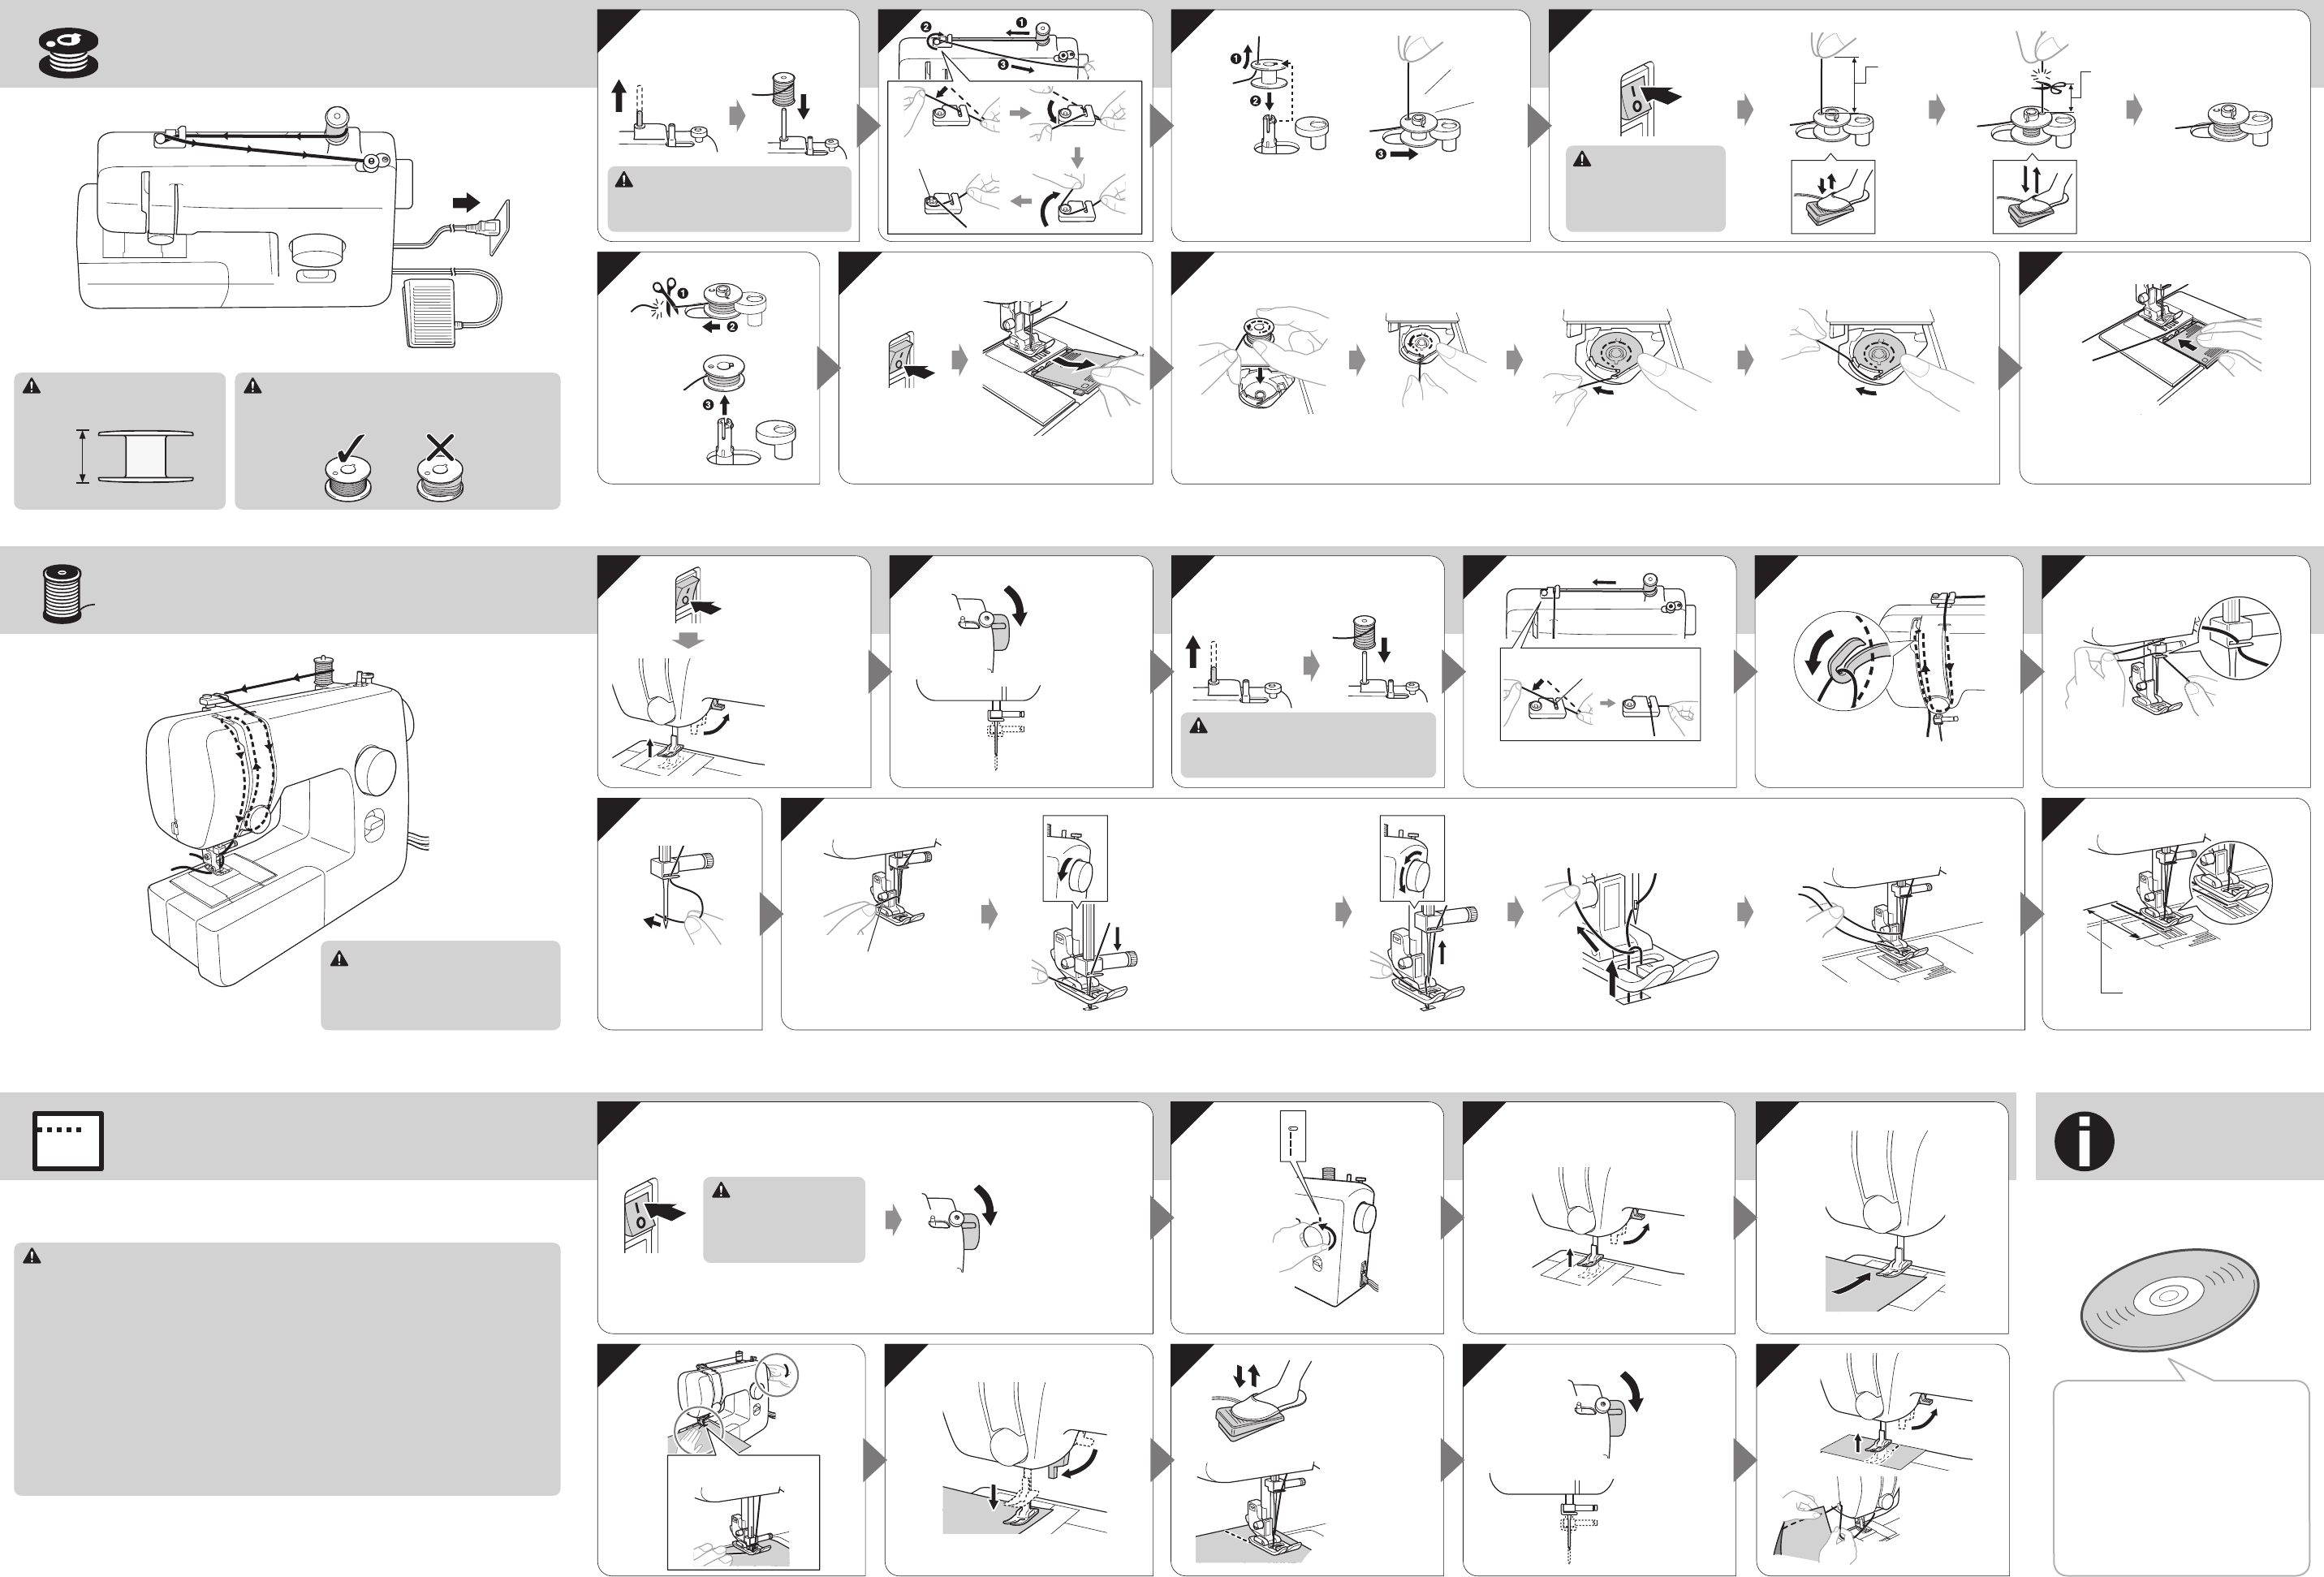
CAUTION
Be sure to use the correct bobbin.
CAUTION
To avoid being injured, watch the needle carefully while you are using the machine. Keep your ●
hands away from moving parts.
Do not stretch or pull the fabric during sewing, otherwise the needle may be damaged and you ●
may be injured.
Do not use bent or broken needles, otherwise you may be injured. ●
Take care that the needle does not hit basting pins or other objects during sewing. The needle ●
may break and you may be injured.
Always use the correct presser foot. If you use the wrong presser foot, the needle may hit the ●
presser foot and bend or break and you may be injured.
When you turn the handwheel by hand, always turn it toward you (counterclockwise). Turning it ●
the other way may cause the thread to tangle and damage the needle or fabric, and you may be
injured.
Do not start sewing without placing the fabric under the presser foot, otherwise the presser foot ●
may be damaged.
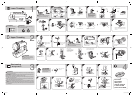
Lower Threading
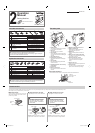
Upper Threading
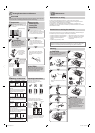
Start sewing
– Straight Stitch
CAUTION
Wind the bobbin properly, or the thread tension may
loosen, and the needle may break.
11.5mm
7/16”
Actual Size
1
1
1
2
3
2
2
3
7
4
8
5
3
4
7
6
6
5
6
9
8
Pull the thread completely
Align the notch to
the projection
Mark on the wheel
points up
Gently press down
to start sewing.
Take off your foot to
stop sewing.
Select a stitch
Mark on the wheel
points up to rise the
needle
Cut the thread
Hold the end of the upper
thread lightly
Thread the needle from
front to back
Slowly turn the
handwheel toward you
(counterclockwise) by
hand to lower and then
raise the needle
Pull on the upper thread to
draw up the lower thread
Make sure that the spring in the groove
catches the thread
Pull the thread behind the guide above
the needle
Mark on the wheel
points up to rise
the needle
Turn off the power
Raise the lever to
raise the presser
foot
Slide the bobbin to
the right
Turn the power on Hold the end of the thread
With the end of the thread comes out
from the cover toward the rear of the
machine
Click!
7 – 10 cm
(3-4 inches)
Wind the thread few times around the
bobbin
When the bobbin is
full, the bobbin will
spin slowly
1 cm (1/2 inch)
Pull up the spool pin completely
CAUTION
If the spool is set incorrectly, the thread may
tangle and the needle breaks.
Spring
1
2
3
4
5
5 cm (2 inches)
11
Place the needle to the
starting point
Pull up the spool pin completely
CAUTION
If the spool is set incorrectly, the thread
may tangle and the needle may break.
CAUTION
Do not turn the power on
while pressing the foot
controller down, otherwise
your may be injured.
Turn off the power
Hold the bobbin down Pass the thread through the
slit guide
Guide the thread
CAUTION
Do not turn the power on
while pressing the foot
controller down, otherwise
your may be injured.
Find more
information
about your
sewing machine
in the included
instructional DVD.
Turn the
power on
CAUTION
If the upper threading is not correct,
the thread may become tangled or the
needle may bend or break.
Jpro.indb 2 5/7/2012 9:53:56 AM