Winding/Installing the Bobbin 29
1
— — — — — — — — — — — — — — — — — — — — — — — — — — — — — — — — — — — — — — — — — — — — — — — — — — — —
Note
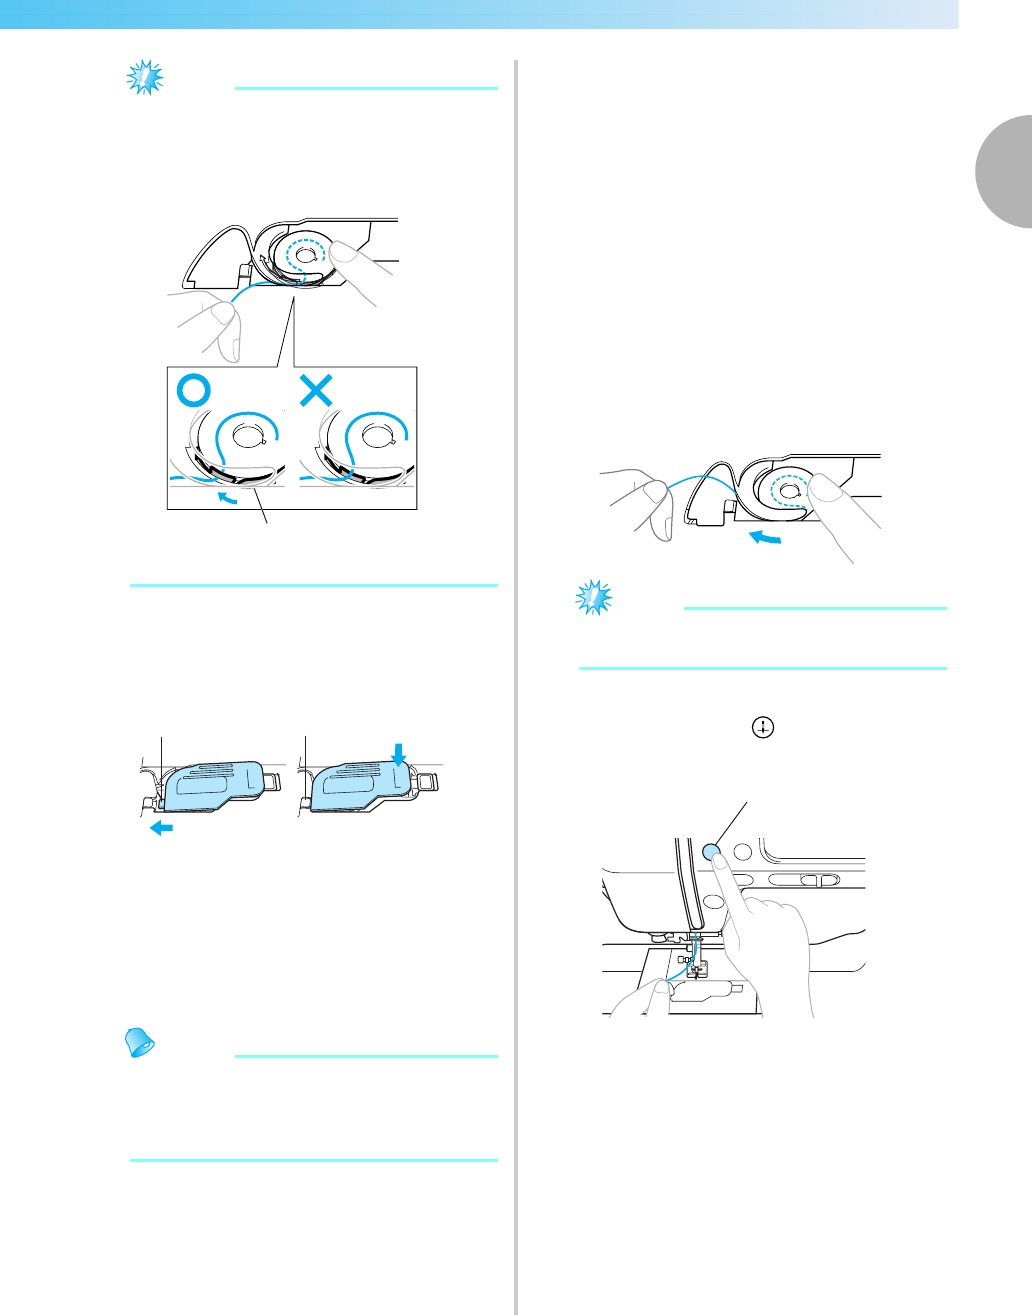
z If the thread is not correctly inserted through
the tension-adjusting spring of the bobbin
case, it may cause incorrect thread tension
(page 62).
a Tension-adjusting spring
i
Reattach the bobbin cover.
Insert the tab in the lower-left corner of the
bobbin cover, and then lightly press down on
the right side.
a Tab
b Lower-left corner
X The bobbin threading is finished. You can
begin sewing without pulling up the bobbin
thread.
Next, thread the upper thread. Continue with
the procedure in "Upper Threading" (page 31).
Memo
z When making gathers or before free-motion
quilting, pull up the bobbin thread by
following the procedure in "When pulling up
the bobbin thread may be necessary".
■ When pulling up the bobbin thread may be
necessary
When making gathers or before free-motion quilting,
first pull up the bobbin thread as described below.
a
Thread the upper thread.
• Refer to "Upper Threading" (page 31).
b
Insert the bobbin into the bobbin case.
• Refer to steps
c through f of "Installing the
bobbin" (page 28).
c
Pass the bobbin thread through the slot.
Note
z Do not cut the thread with the cutter.
z Remove the bobbin cover.
d
While lightly holding the upper thread with
your left hand, press (Needle position
button) once or twice to raise the needle.
a Needle position button
X The bobbin thread is looped around the
upper thread and can be pulled up.
a
1
2
a
b
a


