4. ASSEMBLY
KE-430B, 430C series
93
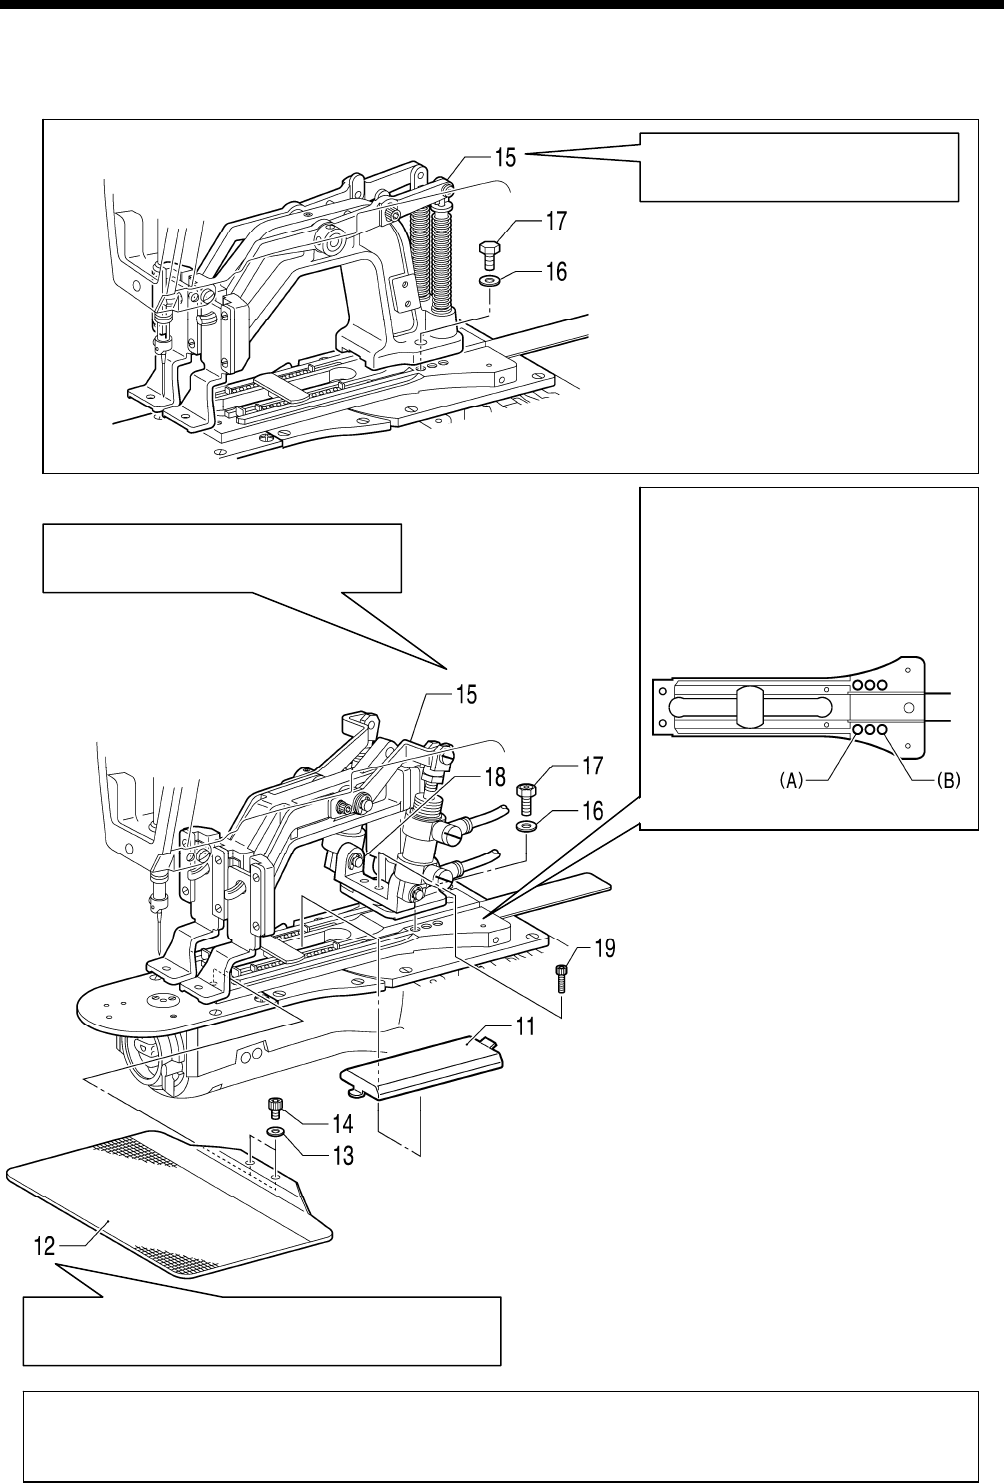
After installing, carry out test feeding and check that the needle hole is inside the work clamp and the
feed plate frame. If the needle hole is not inside the frame, adjust the position of the work clamp arm
assembly and feed plate.
Carry out the adjustment in “5-24. Adjusting the
home position” before installing the feed plate.
Refer to “4-20. Work clamp arm
mechanism (Applying grease)”
3434Q
3433Q
Refer to “4-20. Work clamp arm
mechanism (Applying grease)”
11. Feed bracket cover
12. Feed plate
13. Plain washers [2 pcs]
14. Bolts [2 pcs]
15. Work clamp arm assy
16. Washers [2 pcs]
17. Bolts [2 pcs]
18. Cylinder support [Pneumatic spec. only]
19. Bolts [2 pcs: Pneumatic spec. only]
Work clamp arm assembly
installation position
(A) When using solenoid-type
work clamp S
Pneumatic-type
(B) When using solenoid-type
work clamp L
3435Q


