


7.
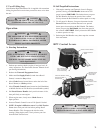
7. Speed Controller Setup
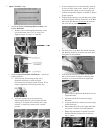
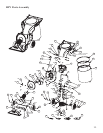
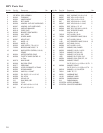
1. Attach the Lower Connecting Rod Assembly to the
Lower Bellcrank.
a. Attach Lower Connecting Rod Assembly to the
Lower Bellcrank with a 3/8”-24 Nyloc Nut.
Tighten using 9/16” and 1/2” wrenches.
2. Setup the Speed Controller Mechanism – Critical for
proper operation.
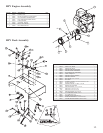
a. Verify that the Self-Locking Acorn Nut is
tightened sufficiently to hold the Upper
Connecting Rod Assembly firmly in place. If not,
slightly tighten the Self-Locking Acorn Nut.
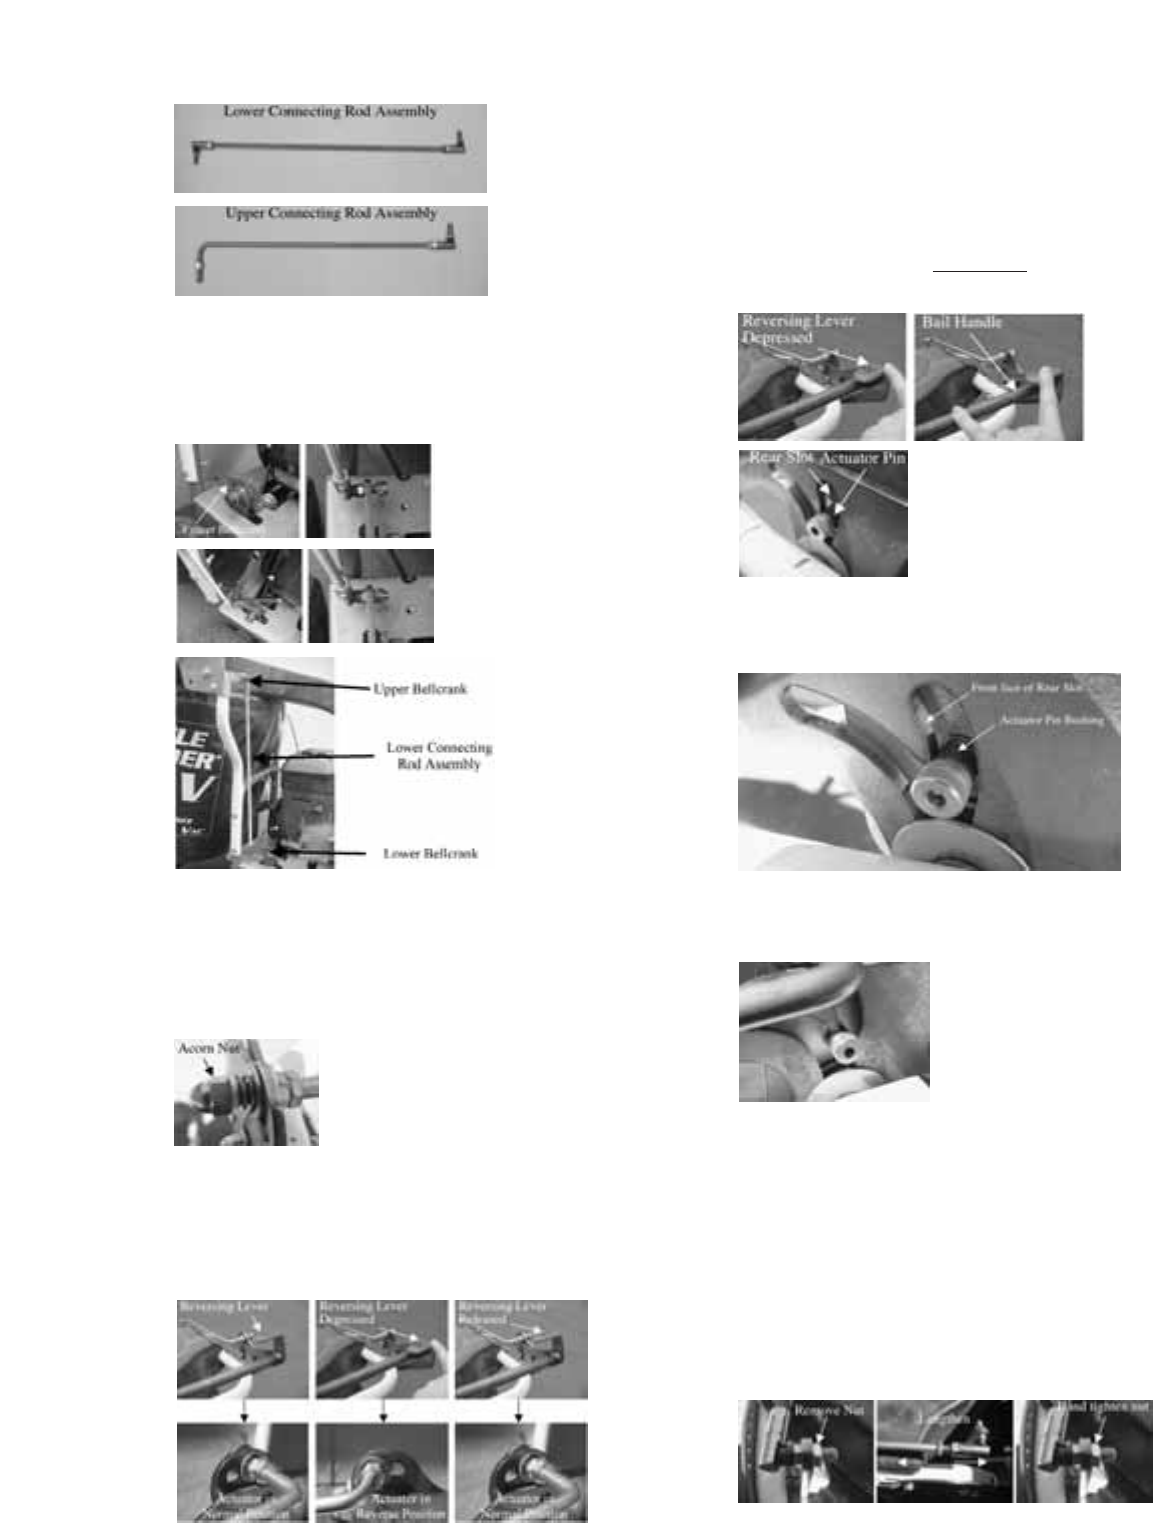
b. Verify the Actuator reversing function by
depressing the Reversing Lever (Red) and then
releasing it. It should work smoothly and, when
released, it should fully return to the “normal”
position.
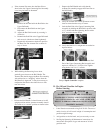
c. If the Actuator does not work smoothly, binds up,
or does not fully return to the “normal” position,
loosen the Self-Locking Acorn Nut slightly and
recheck the operation. Repeat as needed to achieve
proper operation.
d. Depress the Reversing Lever and then press lightly
on the Bail Handle until the Front Face of the Rear
Slot on the Bail Handle just touches
the Actuator
Pin (also refer to picture in step ‘e’ below).
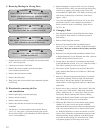
e. The Front Face of the Rear Slot and the Actuator
Pin Bushing should be in contact with each other
and appear as shown below:
f. If the Actuator Pin does not enter into the Rear
Slot as show below, the Upper Connecting Rod
Assembly is too short and must be lengthened.
i. Remove the nut that holds the Rod End to the
Upper Bellcrank.
ii. Disconnect the Rod End from the Upper
Bellcrank.
iii. Adjust the Rod End outwards by unscrewing it
counterclockwise.
iv. Reattach the Rod End to the Upper Bellcrank
and secure it with the nut (hand tightened).
v. Repeat this adjustment as needed to position
the Rear Slot and Actuator Pin as shown in
step ‘e’ above.