


50
CAUTION
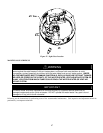
Before manually operating the valve, make sure that a drain line has been attached to the valve to direct the discharge
to an open drain. Failure to take this precaution could mean contact with extremely hot water passing out the valve
during this checking operation.
If the combination temperature and pressure relief valve on the water heater discharges periodically, this may be due to thermal
expansion in a closed water supply system. Contact the water supplier or local plumbing inspector on how to correct this situation.
Do not plug the combination temperature and pressure relief valve outlet.
WARNING
Above all, do not plug the temperature and pressure relief valve. This is not a solution and can create a hazardous
situation.
VENT AND AIR INTAKE SYSTEM
Examine the vent and air intake system at least annually. Points of inspection are as follows:
1. Check for obstructions and/or deterioration of vent piping and vent terminal. Replace immediately where needed.
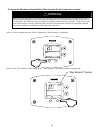
2. Vent pipe and vent terminal screen should be cleaned of any foreign material. The screen is located inside the vent terminal
outlet and is accessible from the outside of the vent terminal elbow. Do not reach inside the vent terminal when the water
heater is in operation.
3. Check all venting system connections for leakage and reseal as required.
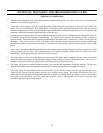
COMBUSTION SYSTEM INSPECTION
Inspect the operation of the combustion system annually. Use the following procedure to inspect the combustion system.
1. Adjust the thermostat to the Min. setting.
2. Turn off the main power switch of the water heater.
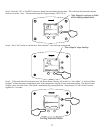
3. Remove the top of the combustion surround by unlatching it.
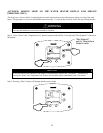
4. While observing the water heater display, turn on the main power switch.
5. Adjust thermostat to the Max. setting.
6. Watch the water heater display status indicator as the control goes through the sequence of operation as previously described.
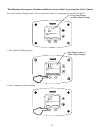
7. Upon ignition, observe the main burner flame.
8. Readjust thermostat to previous setting.
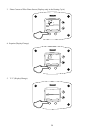
9. Replace combustion surround top and latch it securely in place.