


Exhaust Pressure Switch
Replacement
WARNING
120 volt potential exposure. Use caution
to avoid personal injury.
Step 7. Reconnect wires from step 5 to new pressure switch.
Step 8. Reconnect tubing to new pressure switch.
Step 9. Carefully position pressure switch into blower housing.
Step 10. Reconnect wires and tubing to inlet pressure switch.
Step 11. Position gas control power switch to “ON” position and verify proper heater operation.
Step 12. Replace control access cover from step 2.
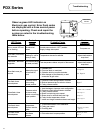
Step 1. Position gas control power switch
to “OFF” position.
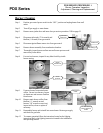
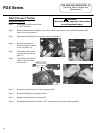
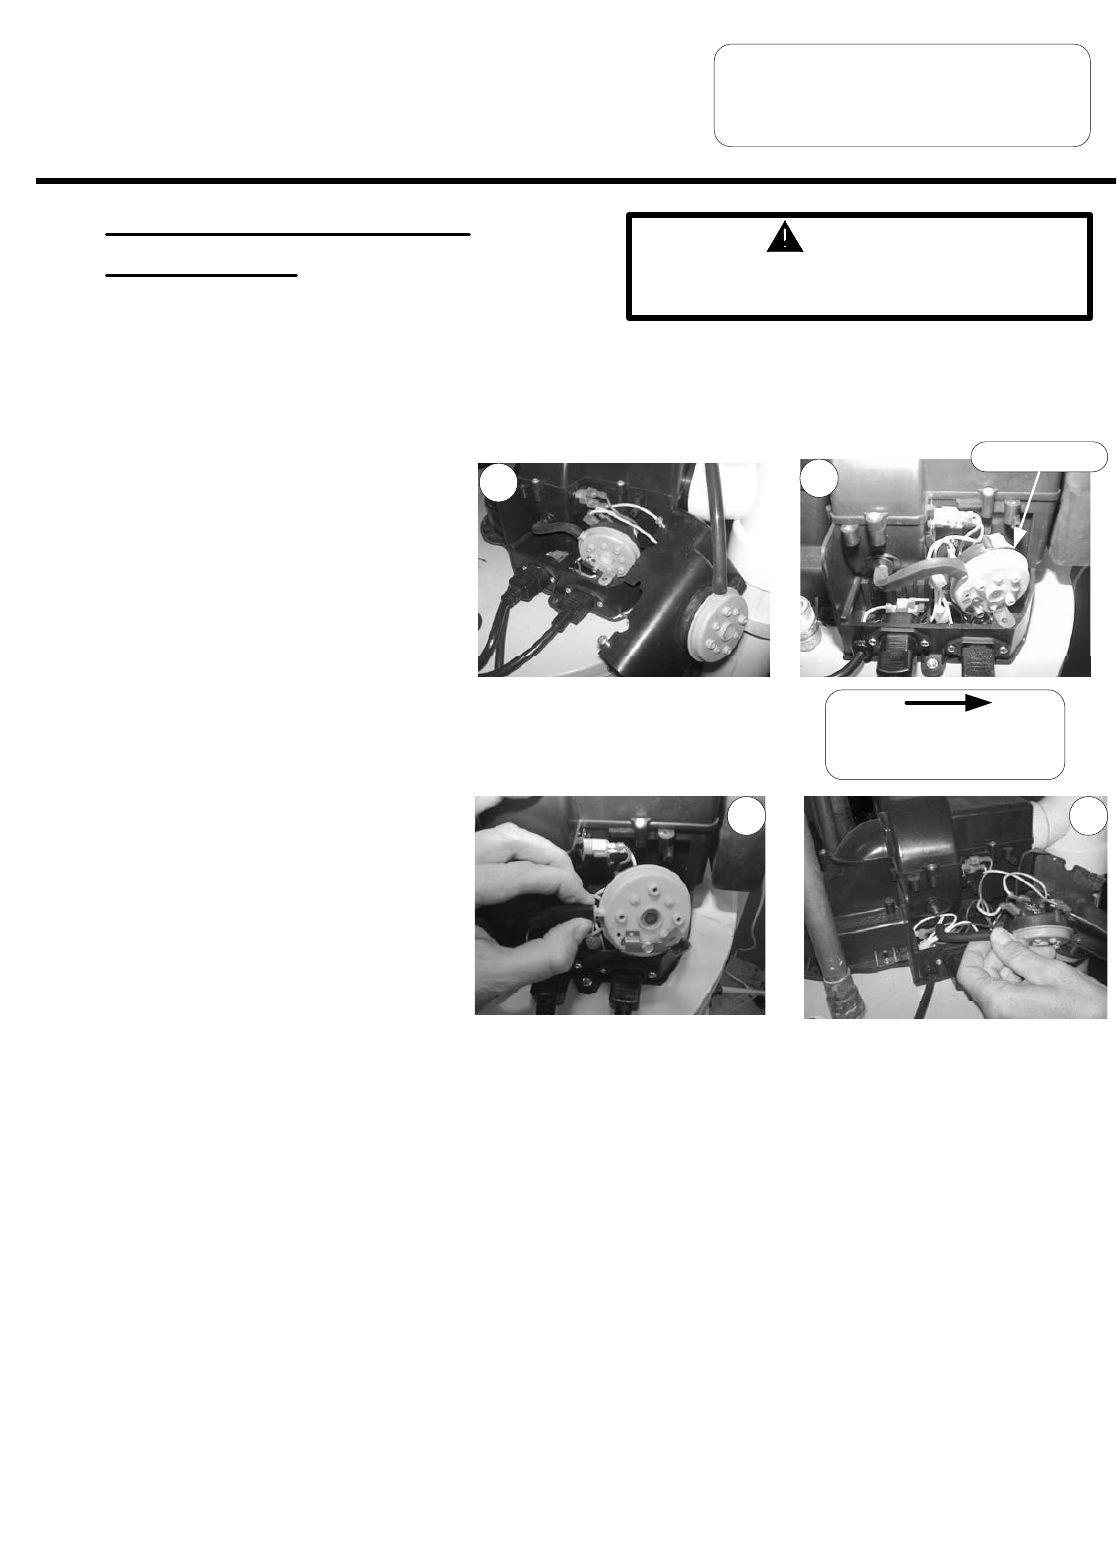
Step 2. Remove the three screws (Phillips screw driver) from control access cover on blower assembly and
remove cover (see photo 3).
Step 3. Disconnect the tubing and wires from inlet pressure switch.
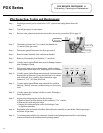
Pressure Switch
Slide pressure switch in direction
of arrow while tilting slightly away
from blower housing.
Step 4. Carefully remove pressure
switch from blower
housing (see photo 4)
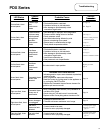
Step 5. Disconnect tubing from
pressure switch.
(see photo 5)
Step 6. Disconnect yellow wires
from pressure switch
(see photo 6)
PDX SERVICE PROCEDURE III
Pressure Switch Testing and
Replacement
Page 18
3
4
5 6
PDX Series
18