


6 720 608 034
18
Maintenance and service
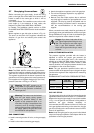
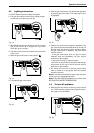
5.4 Main burners
The main burner flames should be blue, with a more
intense blue cone in the center core. Yellow flames
could be a sign of wrong size gas orifices or dirty
burners, a blockage on the heat exchangers fins. If
some burners have yellow flames while others have blue
flames, it is likely that dust, lint or spider webs have
partially clogged the burner venturis. To clean the
burners, contact a gas service person.
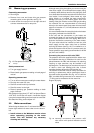
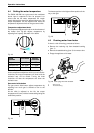
5.5 Vent assembly
Inspect the draft hood and heat exchanger fins for signs
of soot build-up or any other foreign material such as
spider webs. Clean out any debris found in the vent
hood. Signs of soot indicate insufficient combustion air
or exhaust draft. Check for vent assembly blockage or
combustion air blockage on the underside of the unit.
5.6 Mineral scale build-up
The GWH 425 PN, when operated at lower
temperatures settings, does not accumulate mineral
build-up. If however, the heater is used at the higher
temperature settings and the water has a high mineral
content, periodic descaling may be necessary. The
heating coils should be flushed with a descaling
solution.
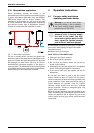
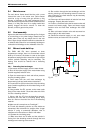
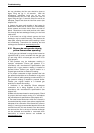
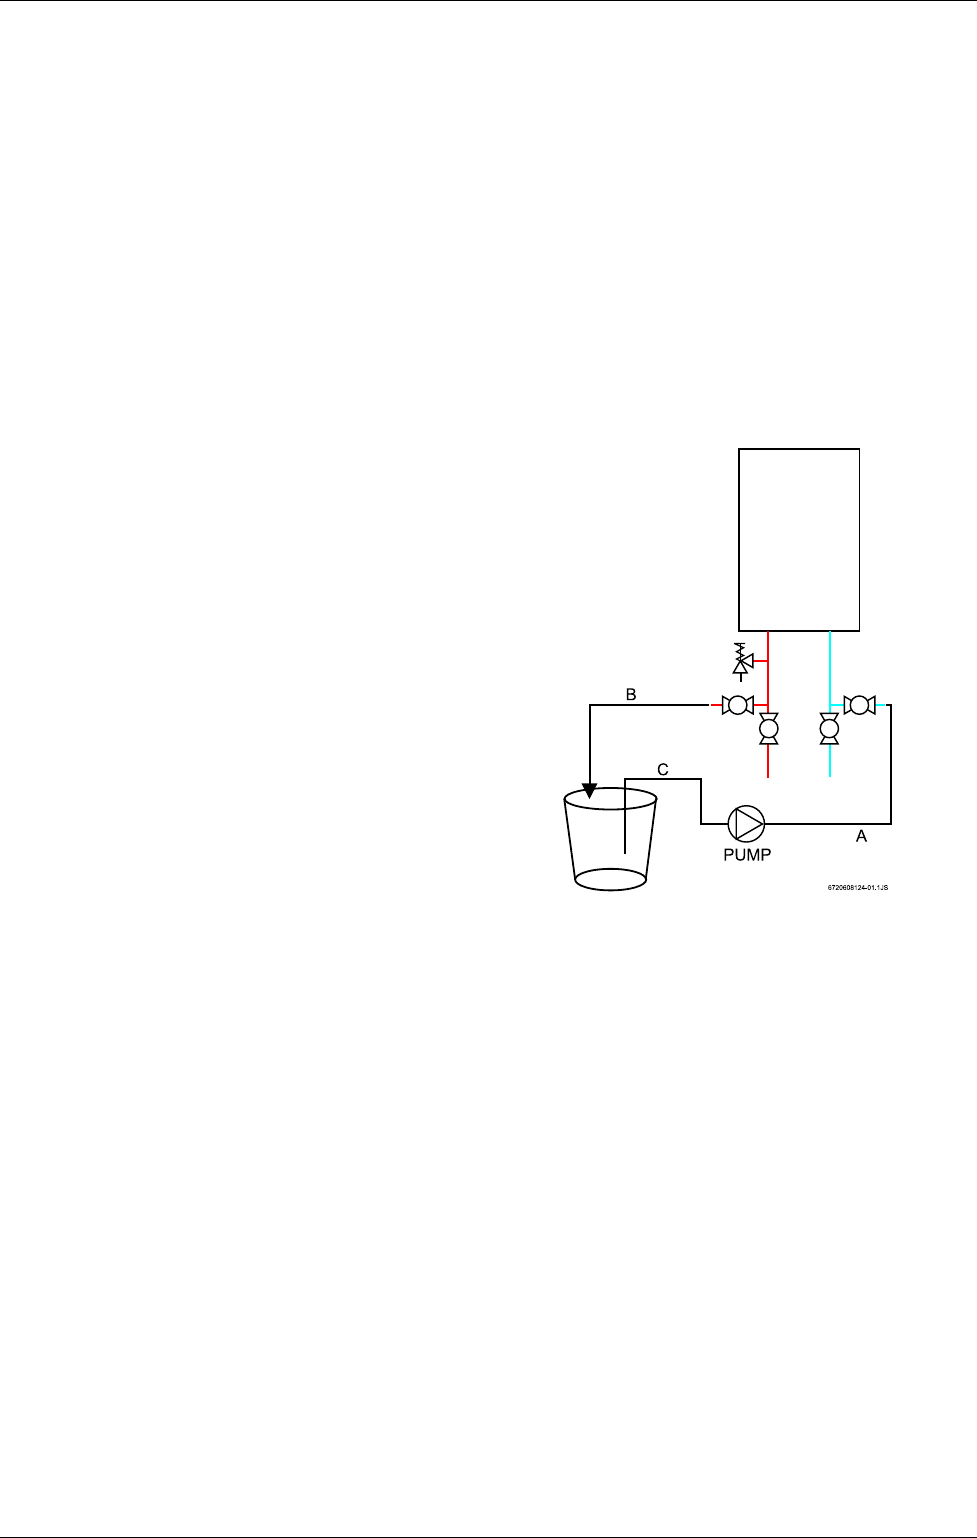
5.6.1 Descaling heat exchanger
1. Disconnect electrical supply from the water heater.
2. Shut off the water supply to the water heater using
(installer supplied) isolation valve.
3. Open hot water taps to drain and relieve pressure
from the plumbing system
4. Drain water from the unit's heat exchanger by
disconnecting inlet and outlet water connections
5. Connect the line (A) from the outlet of the circulating
pump (installer supplied) to the inlet water fitting on the
water heater
6. Using another line (B), connect to the water outlet
fitting on the water heater. Route the other end of this
line into a descaling reservoir
7. Using a 3rd line (C) from the descaling reservoir,
connect to the inlet side of circulating pump. Verify
there is a filter on the end of the line in the descaling
reservoir.
8. Make sure all connections are "hand tight."
9. Fill tank with descaling solution so lines inside are
submersed. We recommend a straight white vinegar
solution. If using a commercial descalant, refer to
manufacturer's instructions on dilution with water.
10. Operate the circulating pump.
11. Make sure there are no leaks and the solution is
flowing from the descaling reservoir through the heat
exchanger and returning to the reservoir.
12. Run solution through the heat exchanger until the
solution returning to the descaling reservoir comes out
clear. (Changing to a fresh solution may be necessary
during this process).
13. Disconnect all lines and drain all solution from heat
exchanger. Properly discard of solution
14. Position a container below the hot water outlet and
connect cold water supply. Open cold water supply
isolation valve and flush heat exchanger with clean
water.
15. Shut cold water isolation valve and reconnect hot
water supply to the water heater.
16. Reconnect electrical supply to unit, open water
isolation valves, and return the unit to service.
Fig. 27