


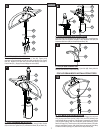
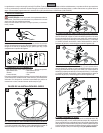
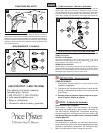
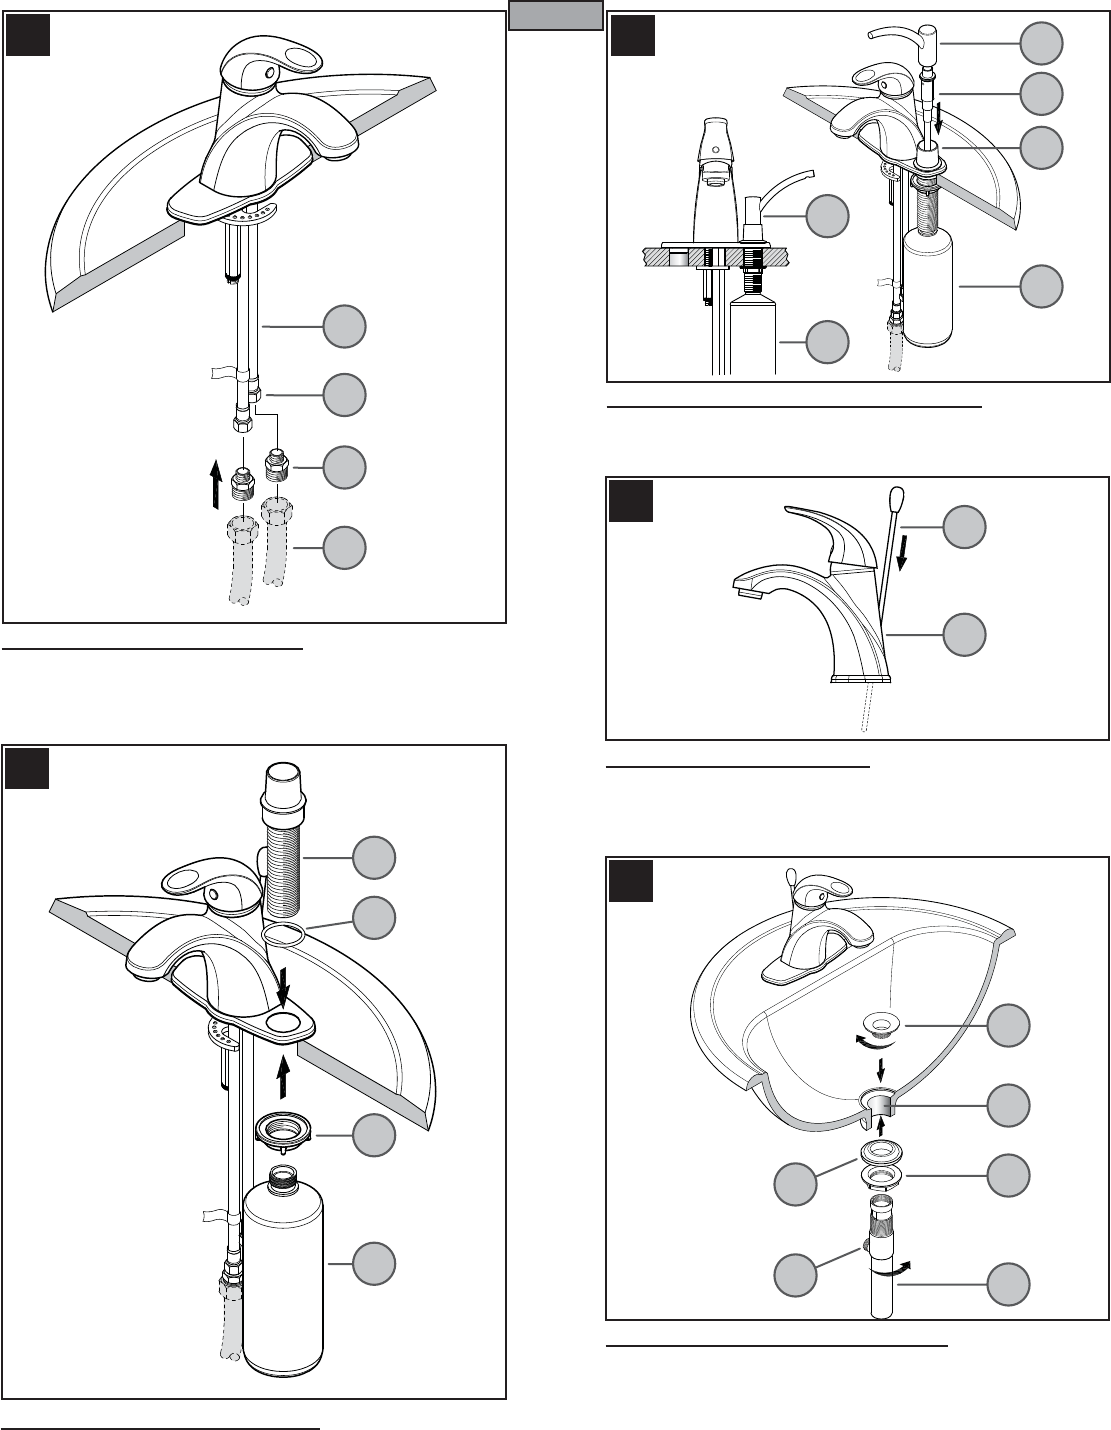
6 WATER SUPPLY CONNECTIONS
Thread the ½” NPSM Adapter (6A) into the ⅝” Nut (6B). Tighten using
wrenches on both the Adapter and the Nut. Make connection to the Faucet
Inlet (6C). Repeat for the other tube. Connect water Supply Lines (6D) to
Faucet Inlets (6C). (Supply lines and fi ttings are not included).
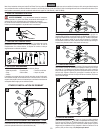
7 SOAP DISPENSER INSTALLATION
Insert threaded Shank (7A) of soap dispenser body through Rubber Gasket
(7B) and sink hole. Tighten Nut (7C) and thread on Bottle (7D) to Shank (7A).
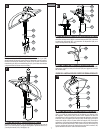
8 SOAP DISPENSER HEAD INSTALLATION
Pour liquid soap (not included) into the Shank Opening (8A). Install Dispenser
Mechanism (8B) into Dispenser Head(8D). Insert Dispenser Head (8D) and
Dispenser Mechanism (8B) into Soap Dispenser Body (8C).
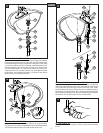
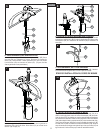
9 POP-UP ROD CONNECTION
Insert Lift Rod (9A) into hole at the back of Spout Hub (9B). Gently, slide Lift
Rod (9A) down the hole in Spout Hub (9B).
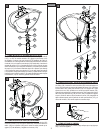
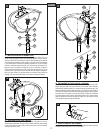
POP-UP DRAIN BODY INSTALLATION STEPS
10 ALL METAL POP-UP INSTALLATION
Apply a small bead of plumber’s putty underneath the Flange (10A) and place
a ring of putty around Drain Opening (10B) of sink. Use PTFE plumber’s tape
on all threaded fi ttings according to manufacturer’s instructions. Insert Flange
(10A) into Drain Opening (10B). From underneath, thread Drain Body (10C) to
bottom of Flange (10A). Thread Locknut (10D) until Rubber Washer (10E) seats
securely inside Drain Opening (10B). Hand tighten and adjust the Drain Body
so that the Ball Rod Opening (10F) faces the rear. Wipe excess putty.
6
9
7
8
10
3
ENGLISH
6A
6B
6D
6C
8B
8A
8C
8D
8D
8C
9A
9B
10A
10B
10C
10D
10F
10E
7A
7B
7D
7C