


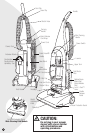
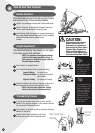
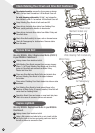
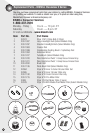
For standard models, remove the four screws as shown
with a Phillips Head Screwdriver. Lift the Brush Cover off.
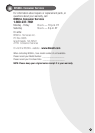
For wide cleaning path models, Lift tab 1 and release the
three latches in order 2-4 as marked. Lift the Brush Cover off.
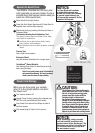
Grasp Rotating Floor Brush at both ends and lift.
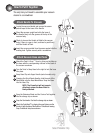
Clean strings, hair and other debris from Rotating Floor
Brush, paying particular attention to brush ends.
Clean strings, hair and other debris from Motor Pulley and
Drive Belt areas.
Check Drive Belt carefully for wear, cuts or stressed areas.
Check Air Passageway for obstructions. Remove debris
from this area.
Use only BISSELL Style 9 Replacement Belts (#32074)
in your BISSELL CleanView II.
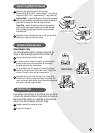
Unplug cleaner from electrical outlet.
With Rotating Floor Brush removed from vacuum cleaner
(Steps 1-4 of Check Rotating Floor Brush and Drive Belt),
grasp old Drive Belt and remove from Motor Pulley.
Discard old Drive Belt.
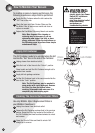
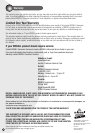
Place new Drive Belt over Motor Pulley and stretch other
end over Rotating Floor Brush in the space between
the bristles.
Place ends of Rotating Floor Brush down into slots on sides
as shown.
Turn Rotating Floor Brush by hand several times in the
direction of Motor Pulley. If properly installed, Drive Belt will
center itself on Rotating Brush.
Reposition Brush Cover and screw or snap back into place.
Check to be sure all screws or latches are secured.
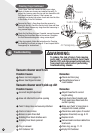
Use only BISSELL Replacement Bulbs in your BISSELL
CleanView II.
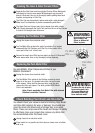
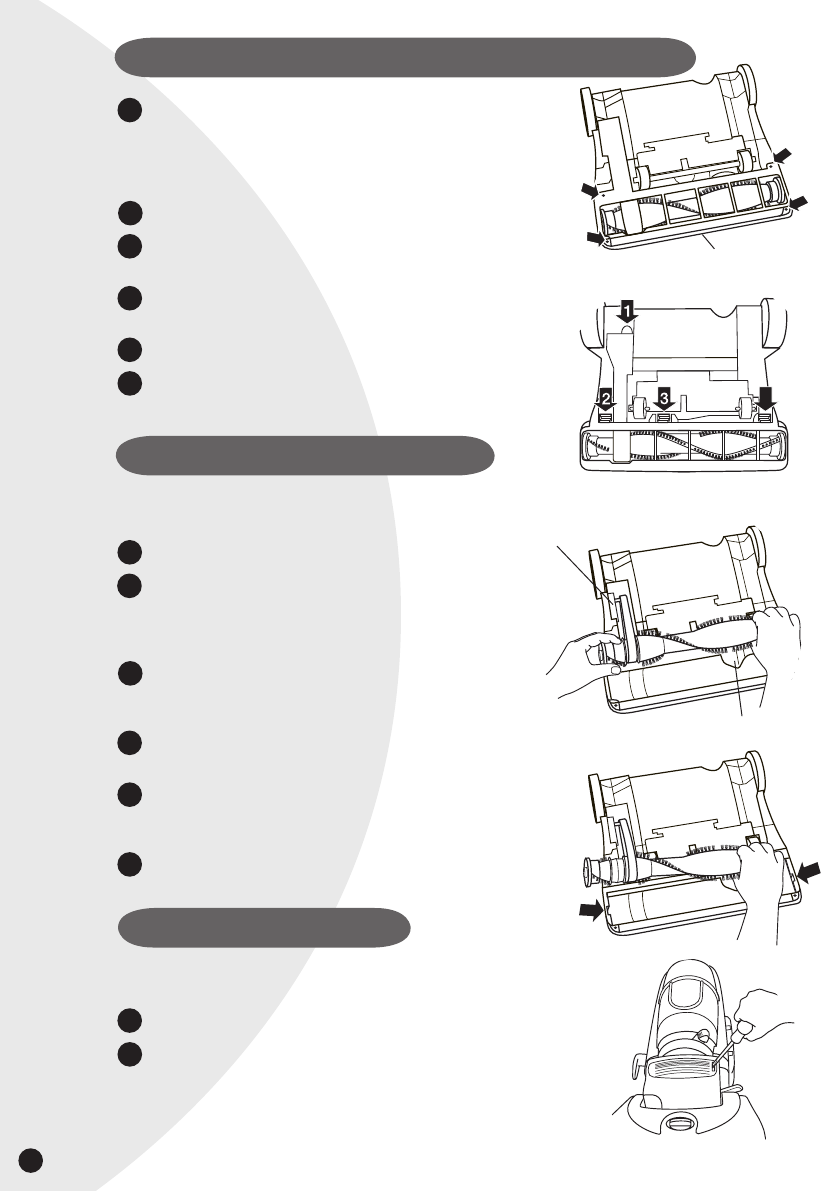
Unplug cleaner from electrical outlet
Using a flat screwdriver, table knife or coin, insert into the
slot on the right of the lens and gently push inner latch to
the left as shown to remove the lens.
10
3.
4.
5.
6.
7.
8.
Replace Drive Belt
1.
2.
3.
4.
5.
6.
4
Motor Pulley
1.
Replace Lightbulb
2.
Brush Cover
Standard models only
Check Rotating Floor Brush and Drive Belt Continued
Wide Cleaning Path models only
Air Passageway