


6
www.bissell.com 800.237.7691
This user’s guide has been designed to help
you get the maximum satisfaction from your
BISSELL deep cleaner. You’ll find assembly
and operating instructions, safety precautions,
as well as maintenance and troubleshooting
instructions. Please read this user’s guide
thoroughly before assembling your deep
cleaner.
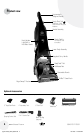
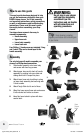
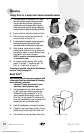
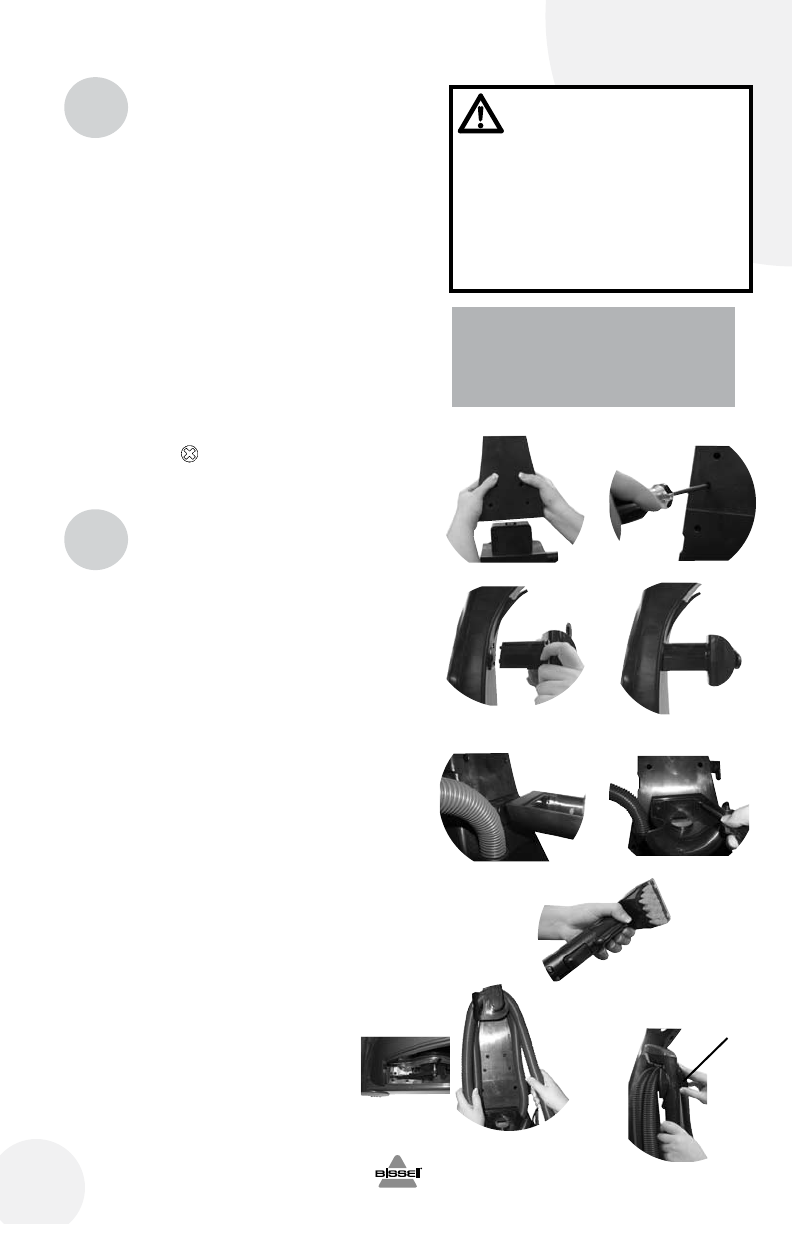
Your deep cleaner comes in four easy to
assemble components:
• Handleassembly
• Upperhoserack
• Lowerbodyassembly
• Lowerhoserack
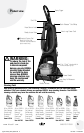
Four Phillips head screws are included, 2 long
and 2 short. They can be found taped to the
handle assembly.
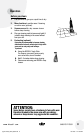
The only tool you will need to assemble your
cleaner is a Phillips head screwdriver.
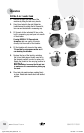
1. Slide handle assembly onto lower body
and secure with two long screws.
2. Attach upper hose rack to back of handle
assembly by pushing into open slots and
sliding down until it snaps into place.
3. Attach lower hose rack by sliding in place
on lower body assembly and securing with
2 short screws.
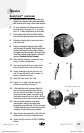
4. Attach Tough Stain tool to end of hose.
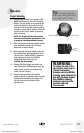
5. Wrap flex hose around hose rack and secure
it into notched out holder as shown.
6. Keep flex hose locked in place with hose
secure latch.
How to use this guide
Assembly
WARNING:
Do not plug in your cleaner
until you have completely
assembled it per the
instructions and are familiar
with all instructions and
operating procedures.
Tip: Deep cleaning carpeting
regularly can reduce dust and allergens
in your home.
1.
2.
3.
4.
5.
6.
Hose
Secure
Latch
ug120-4078_25A3_908.indd 6 10/14/08 1:20:59 PM