


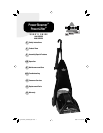
Operation
7
ww.bissell.com 800.237.7691
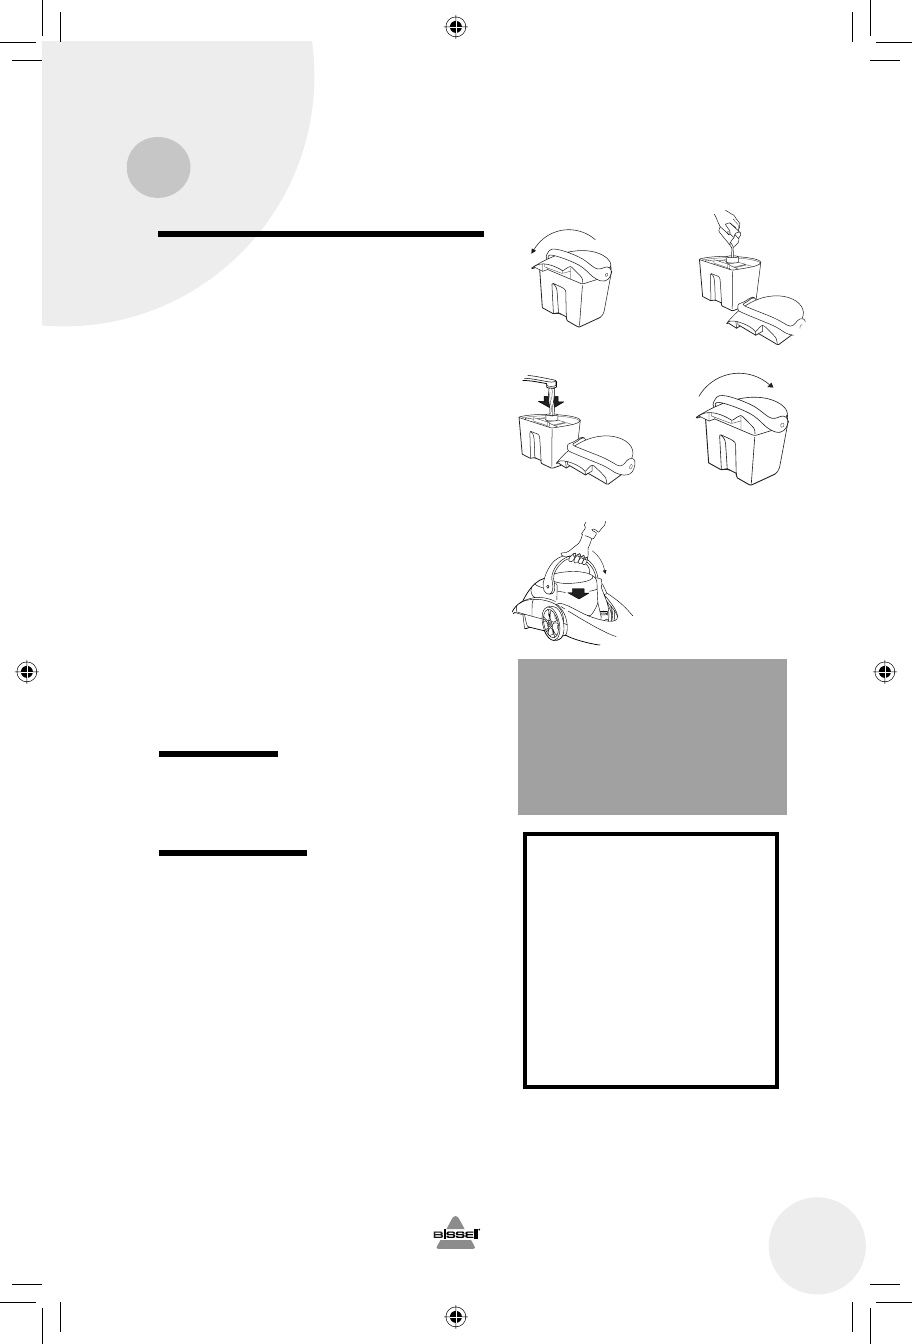
Fill the 2-in-1 water tank (continued)
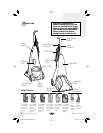
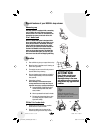
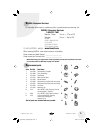
3. Carry like a bucket to the sink. Rotate the
handle forward to unlatch the lid. Lift off and set
the lid aside.
4. Using the measuring cup, pour BISSELL deep
cleaning formual into the mouth of the bladder.
4a. If using the BISSELL 3x Concentrated Fiber
Cleansing Formula: add 3 capfuls of 3x
Concentrated Fiber Cleansing Formula into
the mouth of the bladder.
5. Fill up the bladder with clean hot tap water.
*Do not boil or microwave water as it
can destroy the bladder.
6. Replace the top of the tank by matching
the lid and tank edges. Handle must be in
the forward position in order to replace lid.
Rotate the handle to the carrying position to
latch the lid.
Note: Remember to secure the lid and test to make
sure it is secure before picking up the tank.
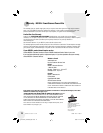
7. Place tank into machine base, seating firmly
in place. Rotate tank handle back into latched
position. Bring machine handle back into
upright position.
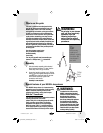
Power switch
Plug the deep cleaner into a proper outlet and
turn the power switch ON. The switch is found
on the side of the unit.
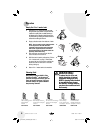
Cleaning strokes
1. While pressing the spray release trigger,
make one slow forward and backward wet
pass. Let the BISSELL advanced deep
cleaning formula and DirtLifter Power Brush
do the work for you.
Caution: Do not overwet.
2. Release the trigger and make one slow
forward and back pass over the same area
to remove any residual dirty water.
3. Repeat cleaning passes without pressing
the trigger until you can’t see any more
water being suctioned up.
4. When cleaning job is complete, refer to the
Maintenance care section on page 9 for
machine cleanup and storage instructions.
3. 4.
7.
Tip:
Thorough vacuuming before deep
cleaning will prevent early clogging
of the lint trap.
WARNING:
To reduce the risk of fire
and electric Shock due to
internal component
damage, use only BISSELL
cleaning fluids intended for
use with the deep cleaner.
Non-BISSELL cleaning
solutions may harm the
machine and void
the warranty.
5. 6.
ug120-4007_1694-8806_507.indd 7ug120-4007_1694-8806_507.indd 7 6/4/07 2:47:41 PM6/4/07 2:47:41 PM