7 8
REPLACING THE EVAPORATIVE WICK FILTER
To ensure peak efficiency of your humidifier, it is recommended
to replace the wicks a minimum of every season or more often
as needed. The wick cartridges should be replaced once they
become saturated with mineral deposits, which is indicated
by a brown filter. The frequency of replacement depends on
the hardness of the water being used and the amount of use.
1. Push the power button so the green power light is off.
2. Disconnect the power cord
from the wall outlet and the unit.
3. Remove the blower housing by
carefully lifting it off the humidifier
base. Do not plug unit in when
the blower housing is removed
from the base.
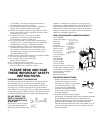
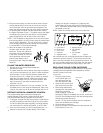
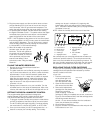
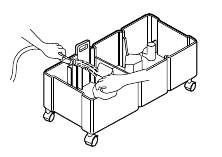
4. Lift the used wick filter cartridges
out of the base and discard (Figure 6).
5. Remove the replacement wick filter cartridges
from the printed box. Discard any protective
plastic wrapping and install them back into the base.
Do not remove the wicks from the frame; this may
damage the filter.
NOTE: It is recommended to clean the base when
replacing the wick filter cartridges. Refer to the "Cleaning
and Maintenance" for further details.
6. Place the blower housing back on the humidifier base.
7. Follow "Operating Instructions."
NIGHTLIGHT INSTRUCTIONS
This Bionaire humidifier is equipped with a nightlight which
illuminates the control panel screen in a dark room setting.
This nightlight operates on a sensor, and will illuminate when
the room becomes dark. When the room becomes light, the
nightlight feature will automatically turn off. To inactivate the
nightlight, simply press the nightlight button on the control
panel. To re-activate the nightlight feature, simply press the
light button again (to see if light is on, place finger over sensor).
CLEANING AND MAINTENANCE
Regular cleaning of your humidifier is important in order
to maintain efficient, healthy, odor-free operation. Water
quality varies widely depending on locality and, combined
with a build-up of mineral scale in your humidifier, may under
certain conditions promote the growth of micro-organisms
in the water reservoirs. Cleaning every week, depending
on your water conditions, is essential to avoid any
bacteria build-up.
Figure 6
Wick
Cartridges
Float
Before cleaning, please note the following:
DO NOT use soap, detergents, abrasive, gasoline, glass
or furniture polish, or boiling water to clean any part of
your BIONAIRE humidifier. These will interfere with the
proper operation of your unit. DO NOT use sharp or metal
objects to clean mineral deposits in the base. Contact
with sharp objects can result in damage to the plastic.
Mineral deposits should be soaked for up to 30 minutes
in BIONAIRE’s Clean-Away solution or in plain vinegar
and water to help with their removal.
CLEANING INSTRUCTIONS:
1. Push the power button so the power light is off
and disconnect the unit from the electrical outlet.
2. We recommend that you move your humidifier to
a kitchen or bathroom, with water-resistant floor
surfaces, before you proceed further with cleaning.
3. Remove the power cord from the unit.
4. Remove the water reservoirs and the blower housing
from the humidifier’s base and the reservoir caps from
the reservoirs.
5. Remove the wick filter cartridges and place in sink
or tub as they will leak water when removed from the unit.
6. DO NOT ALLOW WATER TO ENTER THE FLOAT SWITCH
OPENING (Figure 6)
OR ANY OTHER INLET TO
THE BLOWER HOUSING.
DO NOT PLACE BLOWER
HOUSING OR CORD
UNDER WATER FLOW,
POUR WATER ON TO IT, OR
IMMERSE IN LIQUID.
7. Remove the float from the
base and remove any scale using
Clean-Away. Fill the base using some Clean-Away solution.
Let solution soak for 20 minutes. Rinse thoroughly with
warm water to remove scale and all traces of Clean-Away
solution before disinfecting.
8. Disinfect the water reservoirs and the base using a solution
of one teaspoon of chlorine bleach in one gallon of water.
Let solution soak for 20 minutes, swishing every few minutes
to wet all surfaces. Empty the reservoirs and the base; rinse
thoroughly until bleach smell is gone. Install the wick
cartridges, float and blower housing in the base. Ensure
that the float is able to move freely in the base with no
binding. Fill the reservoirs with fresh water and replace
them into the unit.
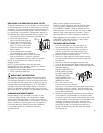
Figure 7


