


©2009 BERNINA of America, Inc. jpl Page 2 of 3
Divide the length of the blouse by the length of the
holly design to find out how many repeats it will take
to stitch along the placket. Make any adjustments
necessary to the size of the design so that it fits your
placket length.
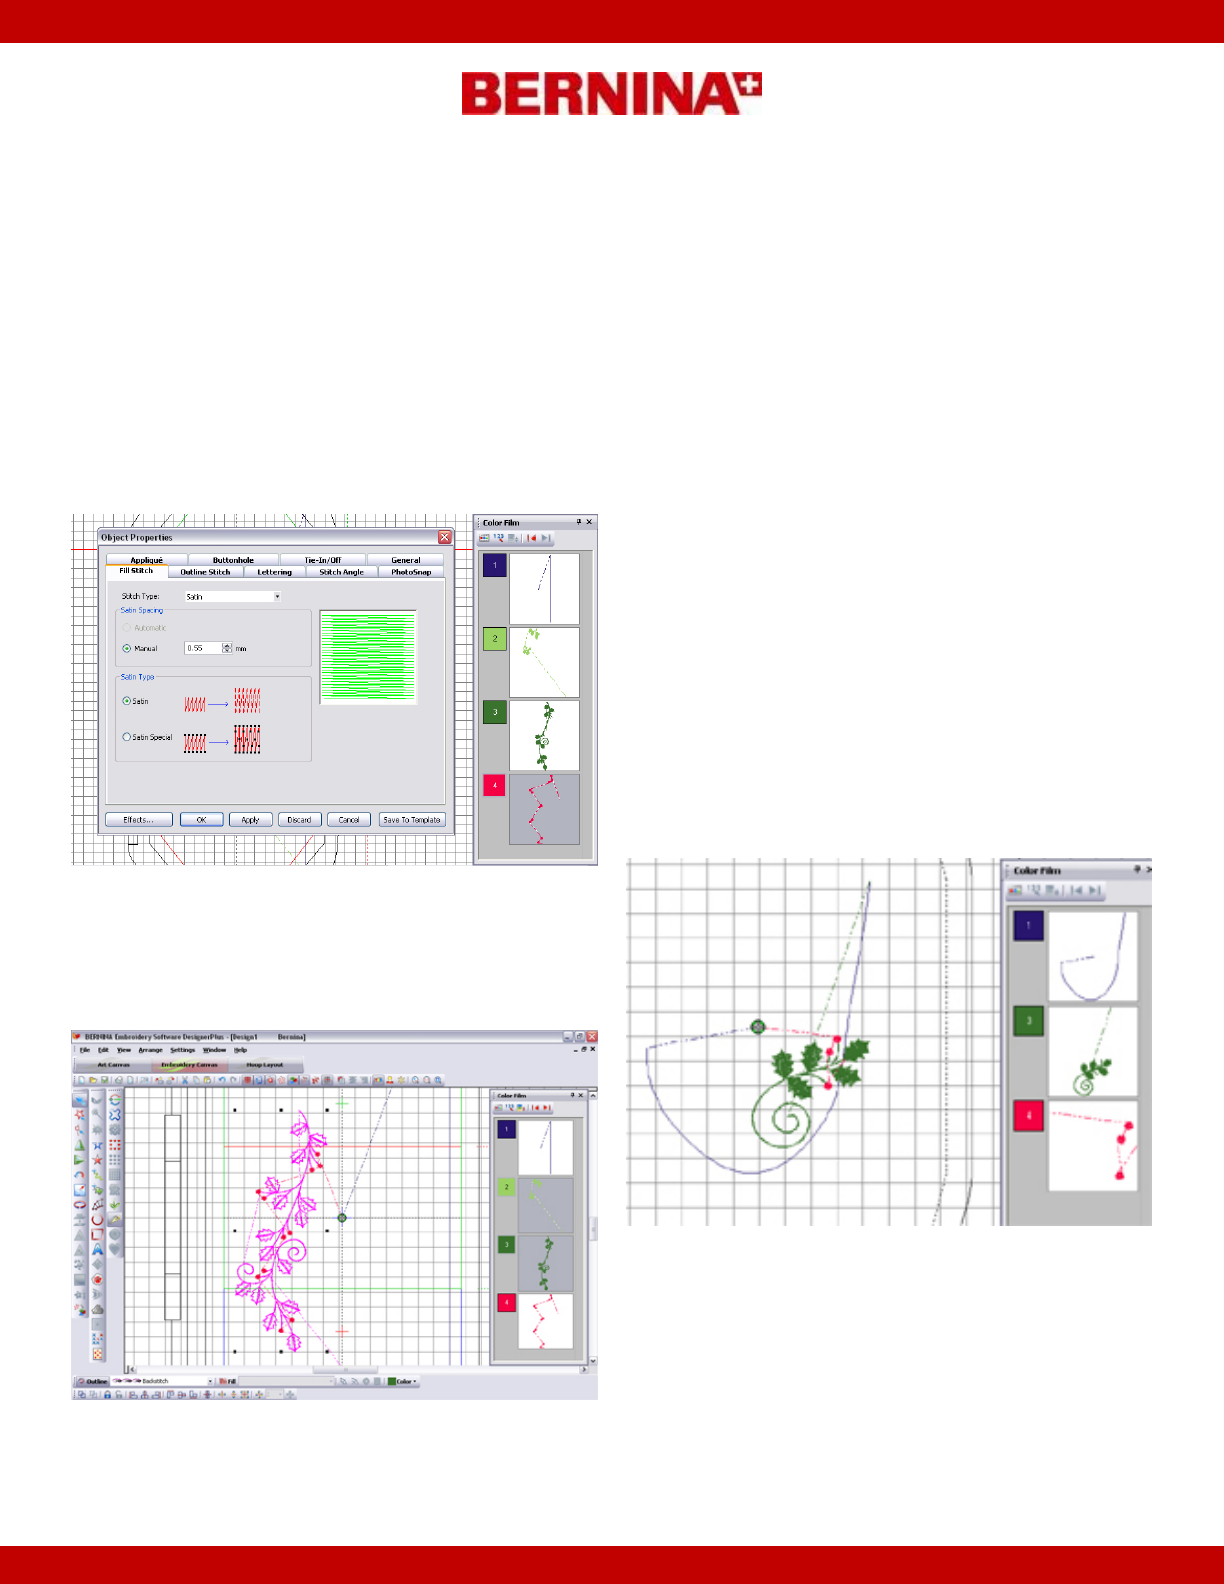
Select and Ungroup the design.
Select the red berries in the Color Film and left click
on the Object Properties icon. Highlight the manual
Satin Spacing value and change it to 0.55.
Hold the Control key on the keyboard and select all
the light and dark leaves. Click on the Outline Tab
to change the fill to a single outline.
While the leaves are still selected, change the single
outline to a backstitch with a stitch length of 4.
Select everything except the placement line and
Group the design.
Select the design, then right click and drag the
design to make a Quick Clone of the holly.
Select both designs and click on the Align Left icon.
Save the design as Holiday Blouse.
Preparing the Collar Design
Scan the left collar with a flat bed scanner and save
the file on your computer.
Select Picture View (v5) or Art Canvas (v6) > Load
Picture, then open the scanned collar.
Switch to Design View (v5) or Embroidery Canvas
(v6) and select the Open Object tool; draw a place-
ment line around the collar.
Reshape the line as necessary to outline the collar.
Select File > Insert Design; insert design HG051.
Ungroup the design.
Choose each of the berries of the light green leaves
and Delete them.
Delete the light green leaves
Change the density of the remaining berries by
clicking on Object Properties and changing the
manual Satin Spacing to 0.55.
Change the outline of the darker leaves by selecting
the Outline tab, changing the fill to a single outline,