


Installation (for qualified installers only) 9
© Travis Industries 4080123 100-01174_002
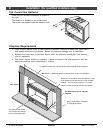
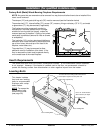
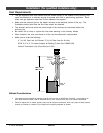
Factory-Built (Metal) Wood-Burning Fireplace Requirements
NOTE:Any parts that are removed must be removed in a way that would allow them to be re-installed if the
insert is ever removed.
The damper ("A") and grate (with log set) ("B") must be removed (see the illustration below)
The smoke shelf ("C"), internal baffles ("D"), screen ("E"), masonry lining or refractory ("G" & "I"), and metal
or glass doors ("F") may be removed (if applicable)
The fireplace must be permanently marked to
indicate that it has been altered and is no longer
suitable for burning solid fuel (wood), unless the
removed parts are re-installed. Cutting of any sheet
metal parts is prohibited (removal of rivets or screws
is acceptable).
The insulation ("H"), and any structured rigid frame
members must not be removed or altered (side and
top of door frame, side and top of the face of the
fireplace, metal sides, etc.).
The metal floor ("J") may be removed to allow
additional room for installation of the insert. If the
floor is removed the insert must be placed directly
on the metal base of the metal fireplace.
C
B
F
I
D
E
A
G
H
J
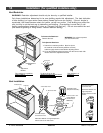
Hearth Requirements
The heater and face must not contact combustible surfaces. A non-combustible hearth extension
is not required. However, if the heater is installed next to the floor, we recommend a hearth to
protect the flooring surface from discoloration or other negative impact from the heater.
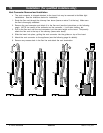
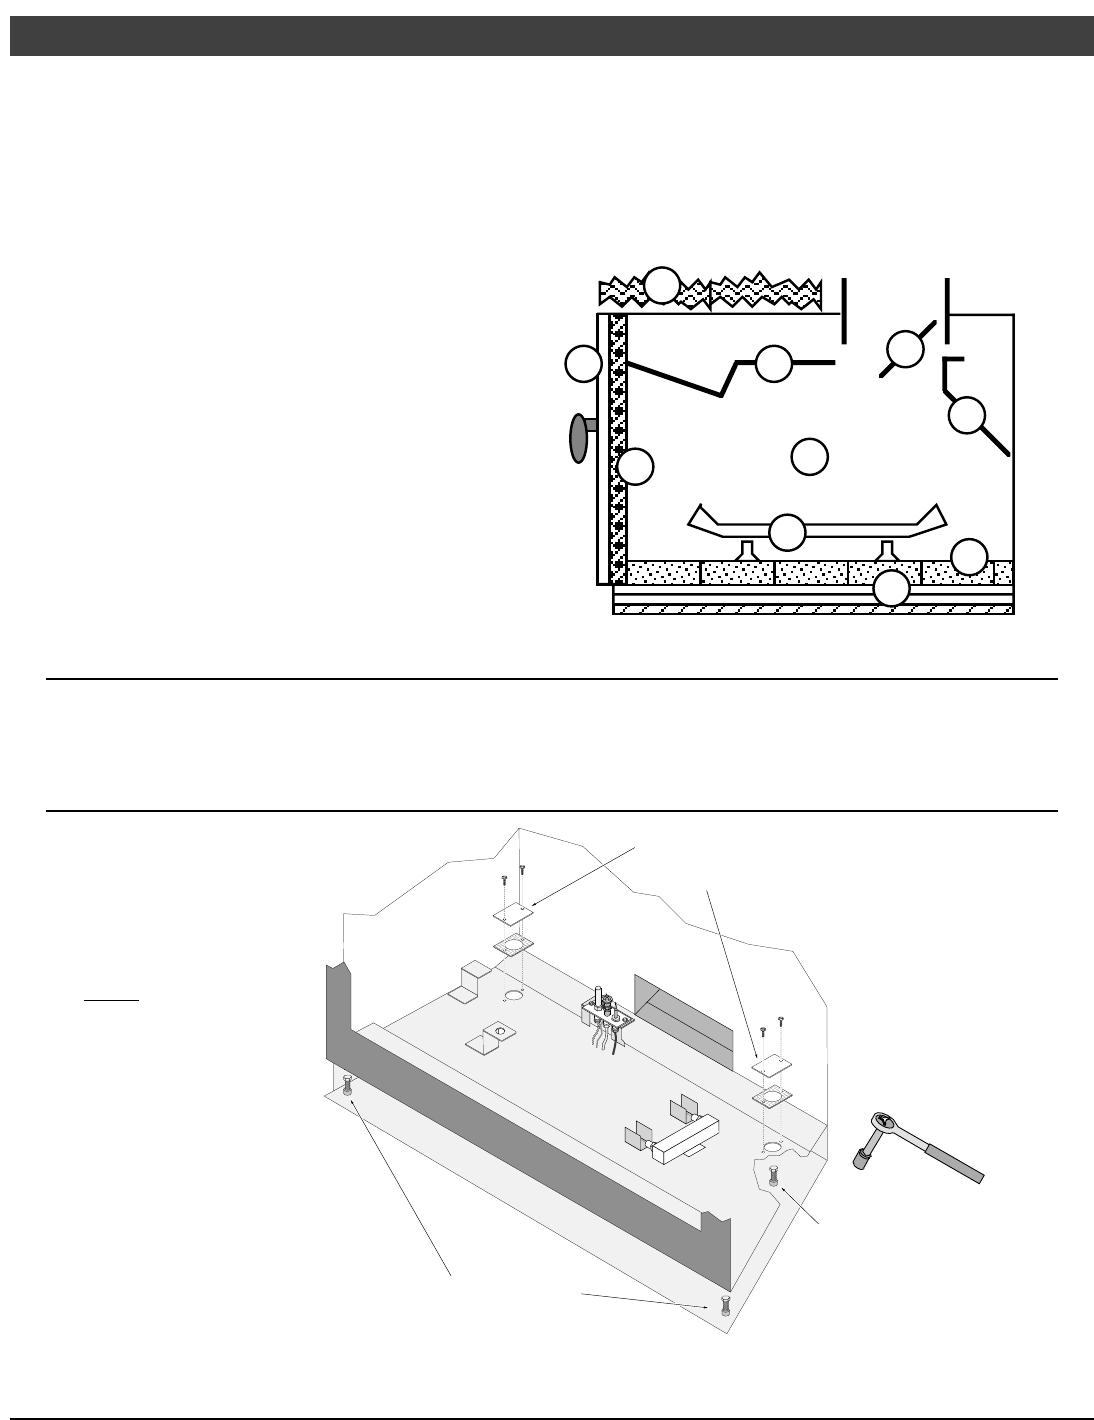
Leveling Bolts
This heater includes
front and rear leveling
bolts to accommodate
fireplaces with a step-
down firebox.
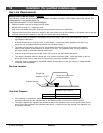
NOTE: To access the
rear leveling bolts,
remove the burner
(see page 39).
Use a 1/2” socket wrench
(with extension) to adjust
the leveling bolts.
To access the rear leveling bolts remove these
access plates (replace access plate and
gasket after adjustment).
Rear Leveling Bolt
Front Leveling Bolts