33
Water Flow (Pressure) Switch Adjustment
Occasionally, plumbing system design features will create a situation whereas the heater will abnormally cycle
on the water flow circuit. This situation will be evident if the circulator pump is operating, the filter is clean, and
all water valves are set to flow water through the heater– but the control panel FLOW light is not illuminated
(or lights only intermittently). In these rare instances where the factory water pressure switch setting will not
satisfy site conditions, a switch adjustment is possible to enable normal heater operation.
Water Switch Adjustment Procedure:
1. Before proceeding with switch adjustment, be absolutely certain the heater is receiving correct water
flow. Leave circulation pump operating during water pressure switch (WPS) adjustment process.
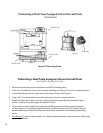
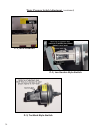
2. Remove heater front cover, and locate the water pressure switch. The switch is attached outside of the
electrical enclosure, at lower left corner (see photo P-1, located on page following).
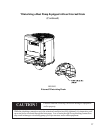
3. Heat Wave and AeroTemp heat pumps may come equipped with either of two (2) water pressure switches:
“Len Gordon” or “TecMark” brand (see photos P-2 and P-3 to determine which brand pressure switch is
installed). The adjustment procedures differ slightly between the two brands.
To Adjust a “Len Gordon” Switch:
1. Facing the switch, you will notice a black, rectangular plastic tab, located on the forward-facing side of
the switch (reference P-2). The black rectangle is a wheel lock tab; slide the tab fully left to unlock the
adjustment wheel.
2. With water pump operating, and electrical power supplied to the heater, slowly rotate the top of the
adjustment wheel TOWARDS you until the flow light (just) illuminates (the heater may start
simultaneously, depending on the state of the control circuit time delay).
3. Slide the wheel locking tab fully back to the right-hand, locked position.
To Adjust a “TecMark” Switch:
1. (Reference photo P-3.) TecMark switches do not have an adjustment wheel lock.
2. With water pump operating, and electrical power supplied to the heater, slowly rotate the top of the adjustment
wheel AWAY from you, until the flow light (just) illuminates (the heater may start simultaneously, depending
on the state of the control circuit time delay).
To Complete the Adjustment Procedure– Either Brand Switch:
1. With electrical power remaining ON to the heater, shut off the power to the circulating pump. If the
switch has been correctly adjusted, when the water pump stops, the flow light will go dim and, if the
heater was operating (operation dependant on the state of control circuit time delay), the heater should
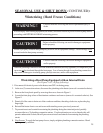
shut off. CAUTION: If flow light remains illuminated and/or the heater continues to operate with
water pump off, readjust water pressure switch to ensure heater will not run without water flow.
2. Reinstall heater front cover.
Should adjustment of the water pressure switch prove unsuccessful, contact AquaCal technical
support (800-786-7751); site-specific factors may require the installation of an external flow switch.
Adjustment procedure to be performed by experienced service personnel only; procedure is NOT a
homeowner-based task, and must not be attempted by individuals lacking adequate electrical and mechanical
experience. BEWARE: ROTATING FAN PROP HAZARD: fan may start during water switch adjustment.
Keep hands clear of fan blade at all times.
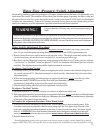
Failure to heed the following may result in permanent injury or
death.
WARNING !


