


4 5
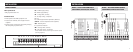
OUTDOOR TEMPERATURE SENSOR (OPTIONAL)
Outdoor temperature can be measured by attaching an
8052 sensor to the S1 and S2 terminals. System setting
#05 (Remote sensor) is used to enable sensor.
Heat pump applications can use the outdoor temperature
to effectively utilize the heat pump:
• When the outdoor temperature is less than the Low
Balance Point, the heat pump will be locked out and
only auxiliary heating will be used.
• When the outdoor temperature is higher than the High
Balance Point, the auxiliary heating will be locked out
and only the heat pump will be used to provide heating.
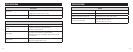
INSTALLATION
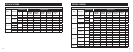
C
G
Y
W
R
L
S1
S2
O/B
W2
Y2
RC
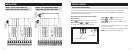
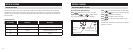
• Install on side of building out of direct sunlight
(north side recommended).
• Mount above snow line.
• Mount at least 3’ away from exhaust vents and
condensing lines.
• Maximum wire length is 300’.
• Do not route wires along 120 VAC lines.
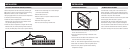
THERMOSTAT MOUNTING
1. Remove the back of the thermostat, by pressing the
tab on the bottom of the unit.
2. Pull wires through the opening on the back of the
thermostat.
3. Position and level the back of the thermostat on wall
and mark the hole locations with a pencil.
4. Drill 1/4” holes & insert supplied anchors (drywall only).
5. Place back over anchors, insert and tighten screws.
6. Seal wire entry holes to prevent drafts affecting
temperature readings.
INSTALLATION
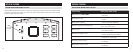
POWER & RESET OPTIONS
The thermostat is dual power. It can either be AC or
battery powered, or both (to provide backup power for
the clock). Batteries are optional if the thermostat was
connected to AC power when installed.
24 VAC must be connected in order for the system fault
and emergency heat indicators to operate.
The thermostat has a memory backup that saves the
thermostat’s settings in case of a power interruption.
The reset button located under the battery cover can be
used to reset the thermostat back to factory defaults.
The system settings will also be reset back to defaults.