26
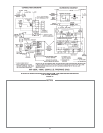
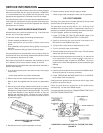
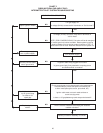
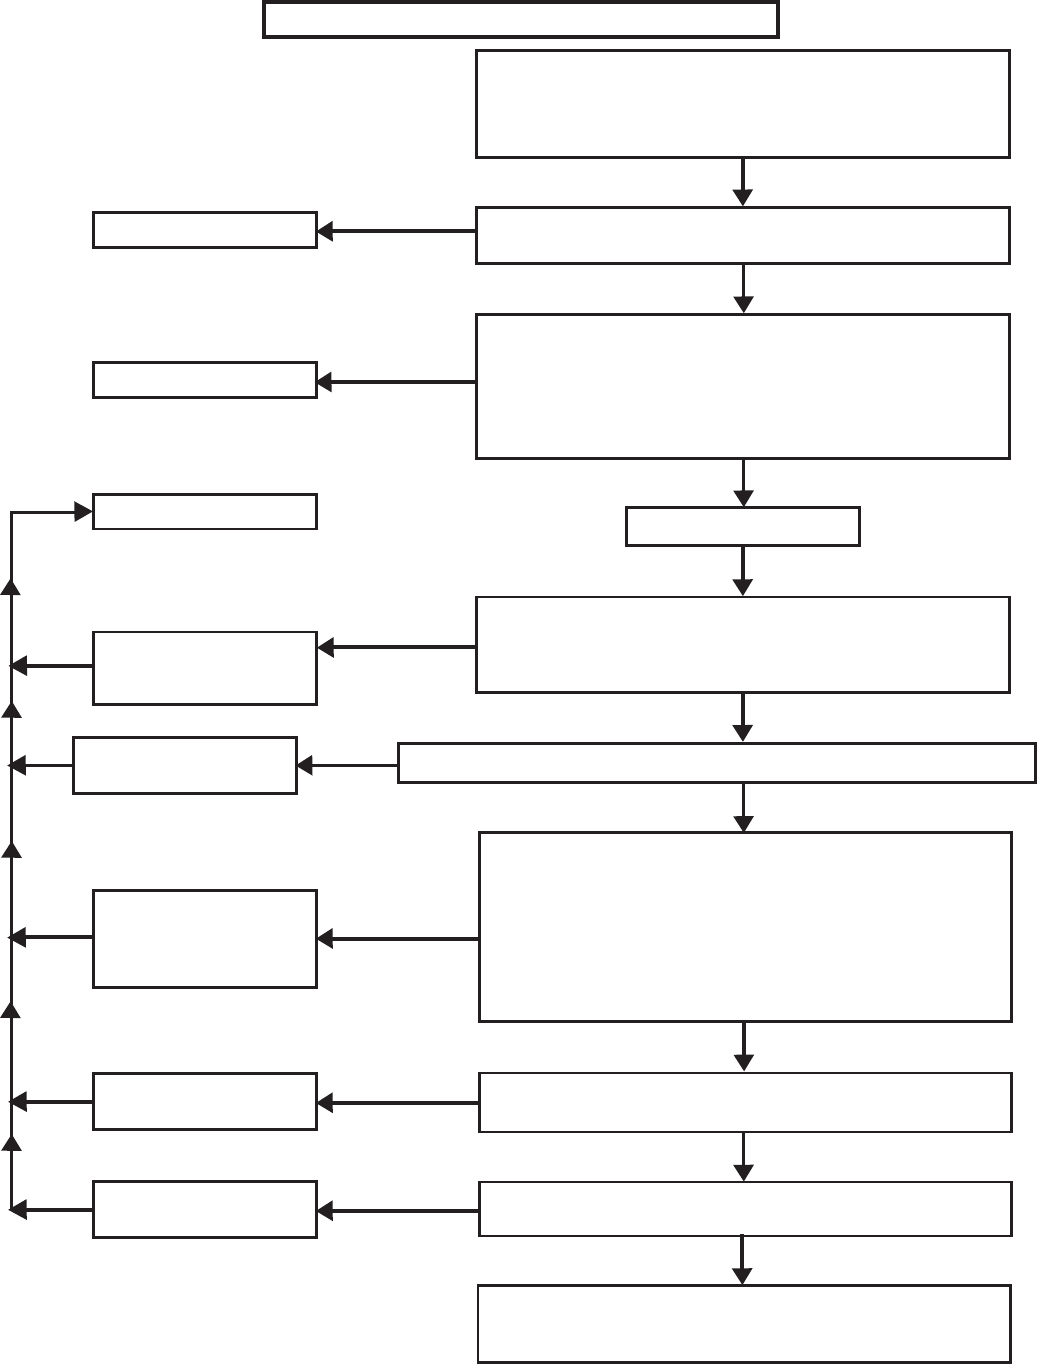
CHART 2
S8600 (NATURAL GAS AND LP GAS)
INTERMITTENT PILOT SYSTEM TROUBLESHOOTING
Ensure all manual shutoff valves are fully open; All filters are
clean; All gas connections are gas tight; Pilot tubing is not
damaged, obstructed or kinked; and pilot orifice is unclogged.
Check for air in gas line, purge (bleed) line if necessary.
Are the wires securely attached to the pilot operator on the gas
control and to the PV & MV/PV terminals on the ignition module?
Install a pressure gauge in the pilot tubing line between the gas
control and the pilot burner assembly. Ensure that the pilot
adjustment screw (under cap) is adjusted to a position that will
permit gas to flow.
Is pilot gas flowing during ignition attempt?
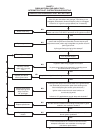
Turn off power supply.
Is ignition cable firmly plugged into module?
Is green ground wire firmly attached to mounting screw
and GND terminal on module?
Is pilot burner ignition cable in good condition (not brittle, burnt, or cracked)?
Ensure ground strap is the closest metal to the igniter/sensor
rod (electrode) to prevent the spark from shorting out to
other metal parts (pilot screen, pilot shield, etc.).
Ignition cable must not touch metal surfaces or
current carrying wires.
Is there a 1/8” gap between ground strap and electrode?
Are the ceramic insulators surrounding the electrode in good
condition (not cracked or broken)?
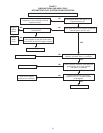
Is there excessive draft conditions that may cause pilot
burner ignition problems?
Correct draft problems in a manner that would ensure
adequate combustion and ventilation air and proper
pilot burner performance.
YES
YES
YES
YES
YES
YES
YES
NO
NO
NO
NO
NO
NO
NO
Attach wires firmly.
Replace gas valve.
Turn on power supply
Securely connect
cable and/or ground
wire.
Replace pilot burner
and/or ground wire.
Carefully bend down-
wards top of ground
strap to achieve
1/8” spark gap.
Replace pilot burner.
Replace ignition
module.
SPARK AT PILOT BURNER BUT PILOT WILL NOT LIGHT


