


16
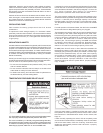
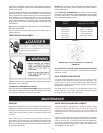
TEMPERATURE-PRESSURE RELIEF VALVE OPERATION
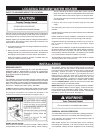
The TEMPERATURE-PRESSURE RELIEF VALVE must be
manually operated at least once a month. Lift the lever at the top
of valve several times until the valve seats properly and operates
freely, see Figure 2B.
When checking the temperature-pressure relief valve operation, make
sure that (1) no one is in front of or around the outlet of the temperature-
pressure relief valve discharge line, and (2) that the water discharge
will not cause any property damage, as the water may be extremely
hot. Use care when operating valve as the valve may be hot.
FIGURE 2B.
If after manually operating the valve, it fails to completely reset and
continues to release water, immediately close the cold water inlet
to the water heater, follow the draining instructions in the Operation
section of this manual, and replace the temperature-pressure relief
valve with a properly rated/sized new one, see Page 9.
If the temperature-pressure relief valve on the appliance weeps or
discharges periodically, this may be due to thermal expansion. Consult your
local water supplier or a Qualied Service Agency for further information.
DO NOT PLUG THE TEMPERATURE-PRESSURE RELIEF VALVE.
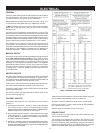
Component Operation Interval Required
Tank
Flushing Monthly
Sediment
Removal
As Needed
Elements
Lime Scale
Removal
As Needed UN-LIME delimer
and element
gaskets
TABLE 6. MAINTENANCE SCHEDULE.
FLUSHING
1. Turn off the electrical disconnect switch.
2. Open the drain valve. Allow water to ow until it runs clean.
3. Close the drain valve when nished ushing.
4. Turn on the electrical disconnect switch.
SEDIMENT REMOVAL
Water borne impurities consist of ne particles of soil and sand which
settle out and form a layer of sediment on the bottom of the tank. In time,
if not removed, the level of sediment might reach the heating elements
causing premature heating element failure.
For convenience, sediment removal and element lime scale removal
should be performed at the same time as follows:
WATER AND LIME SCALE REMOVAL
Water and lime scale accumulations on the heating elements is a
normal condition, common to all immersion type elements. Factors
which affect the amount of this formation are:
1. Amount of hot water used. As the volume of water heated
increases, more scale results.
2. Water temperature. As the temperature of the water is increased,
more scale is deposited on the elements.
3. Mineral level characteristics of the water supply. Regardless of
water treatment, the elements should be examined regularly.
STRANGE SOUNDS
Water scale accumulations may cause noises to occur during
operation.
It is recommended that a lower heating element be removed
periodically for examination. If it is scaled, all of the elements should
be removed and cleaned. If the tank bottom has an accumulation of
sediment, it should be cleaned.
Lime scale should be removed by dissolving the accumulation in
UN-LINE delimer. UN-LIME is a non-muriatic delimer, available
through water heater distributors. Do not use muriatic or
hydrochloric acid base deliming solutions to remove lime scale
from the elements.
DO NOT POUR DELIMER INTO TANK.
1. Turn off electrical disconnect switch.
2. Drain heater following DRAINING instructions, see Page 14.
3. Disconnect the wires attached to the elements terminals. Try not to
disturb the wiring unnecessarily and reconnection will be easier.
4. Remove the bolts from each element and remove the elements
from the openings.
Use a twisting, pulling action to remove elements scaled beyond
the size of the tank openings.
Brush loose scale from elements.
Silicates, sulfates and aluminates must be removed by scraping or
other mechanical means. Lime scale dissolvents will not remove
these types of scale which are occasionally encountered.
5. Lime scale removal:
Place limed ends of heating elements into UN-LIME delimer and
allow scale to dissolve. Do not permit delimer or water to contact
heating element electrical terminals.
6. Flush cleaned ends of elements with water when deliming or
cleaning is completed.
7. Remove sediment and scale from the tank bottom through the
access provided by the element opening or tank cleanout, if
furnished.
The cold water inlet valve and drain valve may be opened to air
the cleanout process.
8. Clean remaining gasket material from tank and element anges.
Do not reuse original element gasket.
9. Replace elements as follows:
Put a new gasket on each element.
Install into tank opening from which element was removed.
Uniformly tighten element bolts. Torque to approximately 32 ft/lbs.
10.Attach wires to element terminals from which they were
removed.
11.Follow FILLING instructions in the Operation section of this
manual to restore hot water service, see Page 14.
Check for water leaks around elements and proper operation
when heater is lled and during operation.