


M968637 Rev 1.3
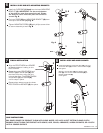
INSTALL SLIDE BAR INTO MOUNTING BRACKETS
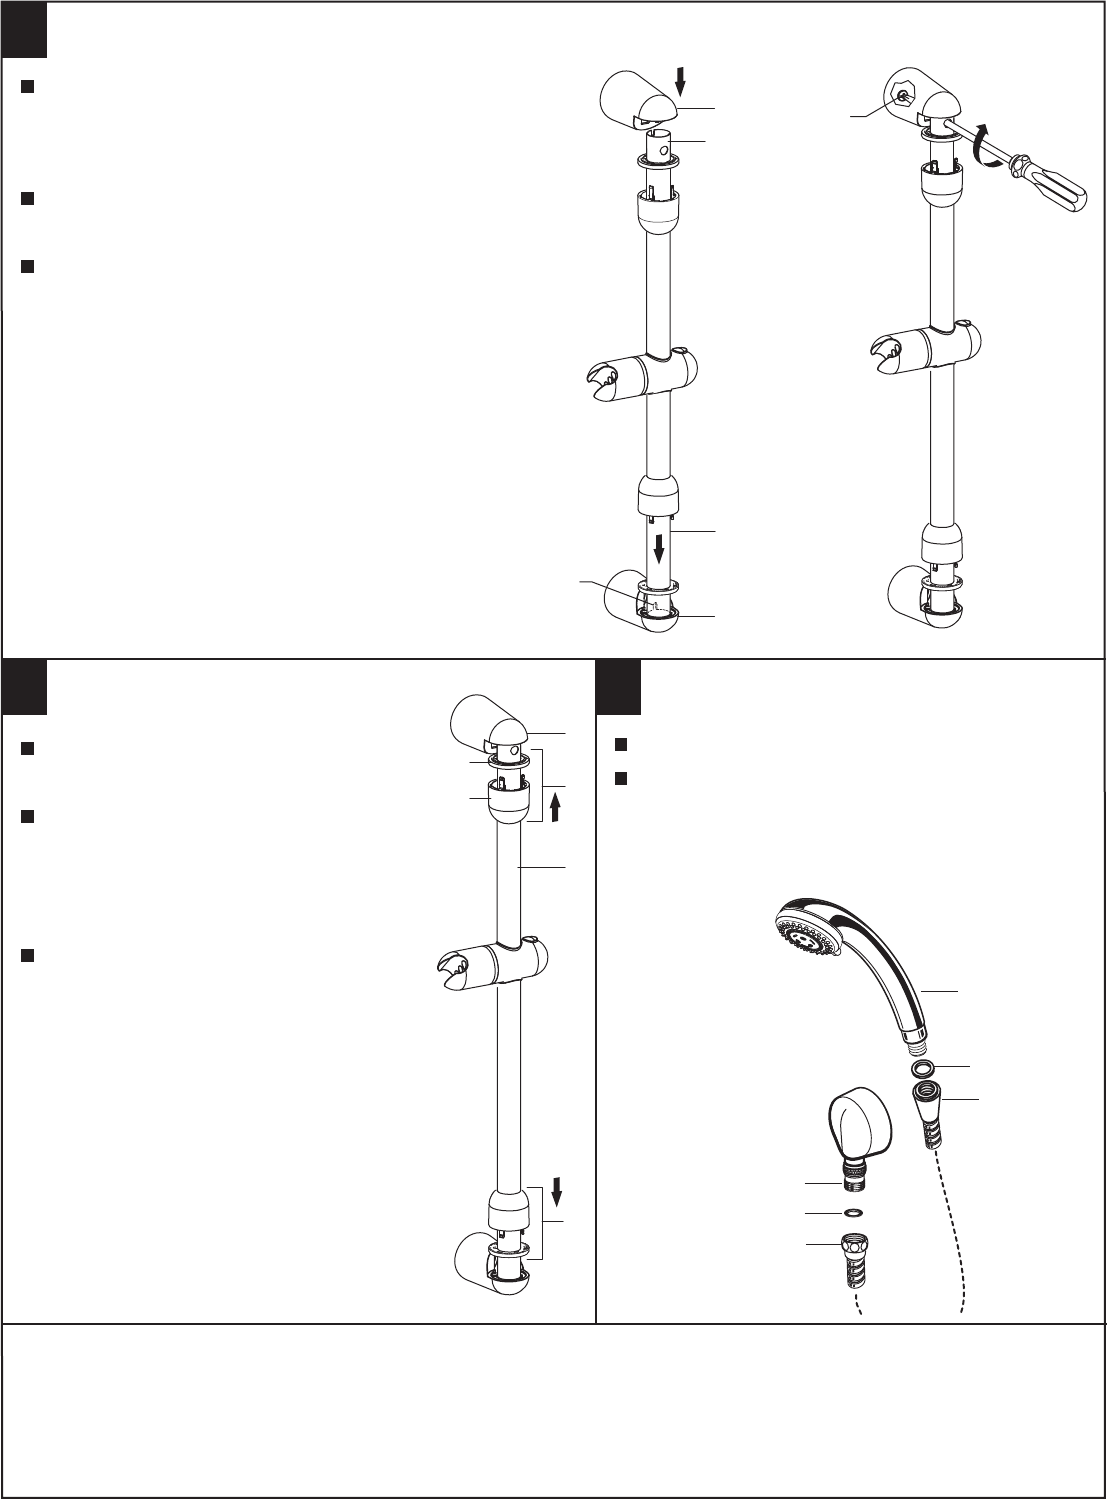
FINISH INSTALLATION
6
7
Install the SLIDE BAR (1) back into the lower MOUNTING
BRACKET (2). IMPORTANT: The slot at the bottom
of the slide bar must face toward the wall. Rotate
the slide bar until it locks into place and cannot be
turned. Fig. A.
Push top COVER (3) and MOUNTING BRACKET (4) down
onto top of SLIDE BAR (1). Fig. A.
Tighten MOUNTING SCREW (5) with phillips screw driver
to secure assembly to wall. Fig. B
Repeat above steps to snap the lower
ESCUTCHEON andSPACER (4) into place.
Align the ESCUTCHEON and SPACER
so that the spacer is sitting on the
ESCUTCHEON.
Rotate the upper ESCUTCHEON and
SPACER (1) on SLIDE BAR (2) until
the three snap arms align with the
holes in the cover. Push ESCUTCHEON
and SPACER (1) into COVER (3)
until it snaps in place.
SLIDE
BAR
TOP
Fig. A Fig. B
5
1
1
1
3
3
2
2
2
4
4
5
6
3, 4
CARE INSTRUCTIONS:
DO: SIMPLY RINSE THE PRODUCT CLEAN WITH CLEAR WATER. DRY WITH A SOFT COTTON FLANNEL CLOTH.
DO NOT: DO NOT CLEAN THE PRODUCT WITH SOAPS, ACID, POLISH, ABRASIVES, HARSH CLEANERS, OR A CLOTH
WITH A COARSE SURFACE.
SLOT
SPACER
ESCUTCHEON
INSTALL HOSE AND HAND SHOWER
Install SEAL (1) into COUPLING NUT (2). Connect
COUPLING NUT (2) to WALL SUPPLY NIPPLE (3)
and tighten.
INSTALL second SEAL (4) into SPRAY HOSE
END (5) and connect HAND SHOWER (6) to
SPRAY HOSE END (5).
Hand tighten.
8