6
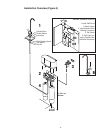
B. To pierce soft copper tubing, turn handle to the right (clockwise) several times until it
stops. The valve is now closed. Turning the handle to the left (counterclockwise) will open
the valve.
C. Assemble insert, plastic sleeve and compression nut as shown onto yellow tubing and
fasten securely to saddle valve.
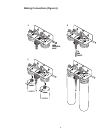
4) Making Connections (Refer to Figure 6, Page 12)
A. Connectyellow1/4”tubingfromsaddlevalvetothe“Push-In”ttingontheleftsideofthe
bracketassembly.THEYELLOWTUBEMUSTGOUPANDTHROUGHTHEBASEOF
THEBRACKET.
B. Connecttheblue1/4”tubingfromthebaseofthefaucetto the“Push-In”ttingat-
tached to the base of the shut-off meter.
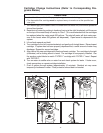
Installing Filter Cartridge & Replacing Filter Cartridges
C. Inordertoensureproperperformance,itisessentialthat“Filter1”beinstalledontheleft
and“Filter2”ontherightsideofthebracketassembly.Usethecolor/numbercodedlabels
tomatch“Filter1”cartridgewith“Filter1”head.
D. Metershouldbesetat“Start”.
5) Test System
A. Opencoldwatervalveunderthesink.
B. Thesystemwillpressurize.Checkforleaks.Ifanyleaksarepresent,immediatelyturnoff
water and refer to the Troubleshooting Section.
6) Flush Filter
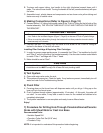
A. Pressing down on the faucet lever will dispense water until you let go. Lifting up on the
lever will lock the faucet open.
B. Flush5gallonsthroughsystem(approximately10minutes).Atthispoint,thewaterwill
run clear. In rare cases, it may take a week or more for the residual air bubbles to be
completely eliminated.
C. The system installation is now complete and ready to serve filtered water.
Enjoy!
7) Procedure for Drilling Hole Through Porcelain/Enamel/Ceramic
Sinks with Sheet Metal or Cast Iron Base
Recommended Tools:
•VariableSpeedDrill
•PorcelainCutterToolSet(9/16”size)
•Plumber’sPutty
NOTE: It is important to understand this procedure before beginning.
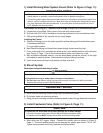
To reduce the risk associated with property damage due to water leakage:
• InstallationandUseMUST comply with all state and local plumbing codes.
CAUTION
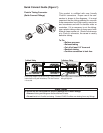
• Besuretoinstalltubingsotherearenosharpbendsandinstallenoughtubingforeaseofser-
vice.Refertotheencloseddiagram(Figure1,Page8)ontheuseof“Push-In”plasticttings.
• Failuretoroutetheyellowtubingthroughthebracketwillnotallowprotectiveshroudtobefas-
tened securely to the bracket.
IMPORTANT NOTES


