ELECTRIC BRAISING PANS - SERVICE PROCEDURES AND ADJUSTMENTS
F35410 (May 2003) Page 20 of 32
RIGHT SIDE REAR VIEW SHOWN
B. If additional adjustment is necessary,
push up on the tip of the switch actuator to
slightly bend the actuator around the
mating edge of the trigger (cam).
C. Verify pan will raise by operating lift
control switch.
D. Repeat the adjustment (as necessary) and
check for proper operation.
LID SPRING TENSION
ADJUSTMENT
1. Raise the lid and release at several positions
thru the range of travel.
A. If lid remains in place, no adjustment is
necessary.
B. If lid does not remain in place (springs up
or falls down), continue with procedure.
NOTE: For spring tension to be set correctly, each
spring must be adjusted the same amount.
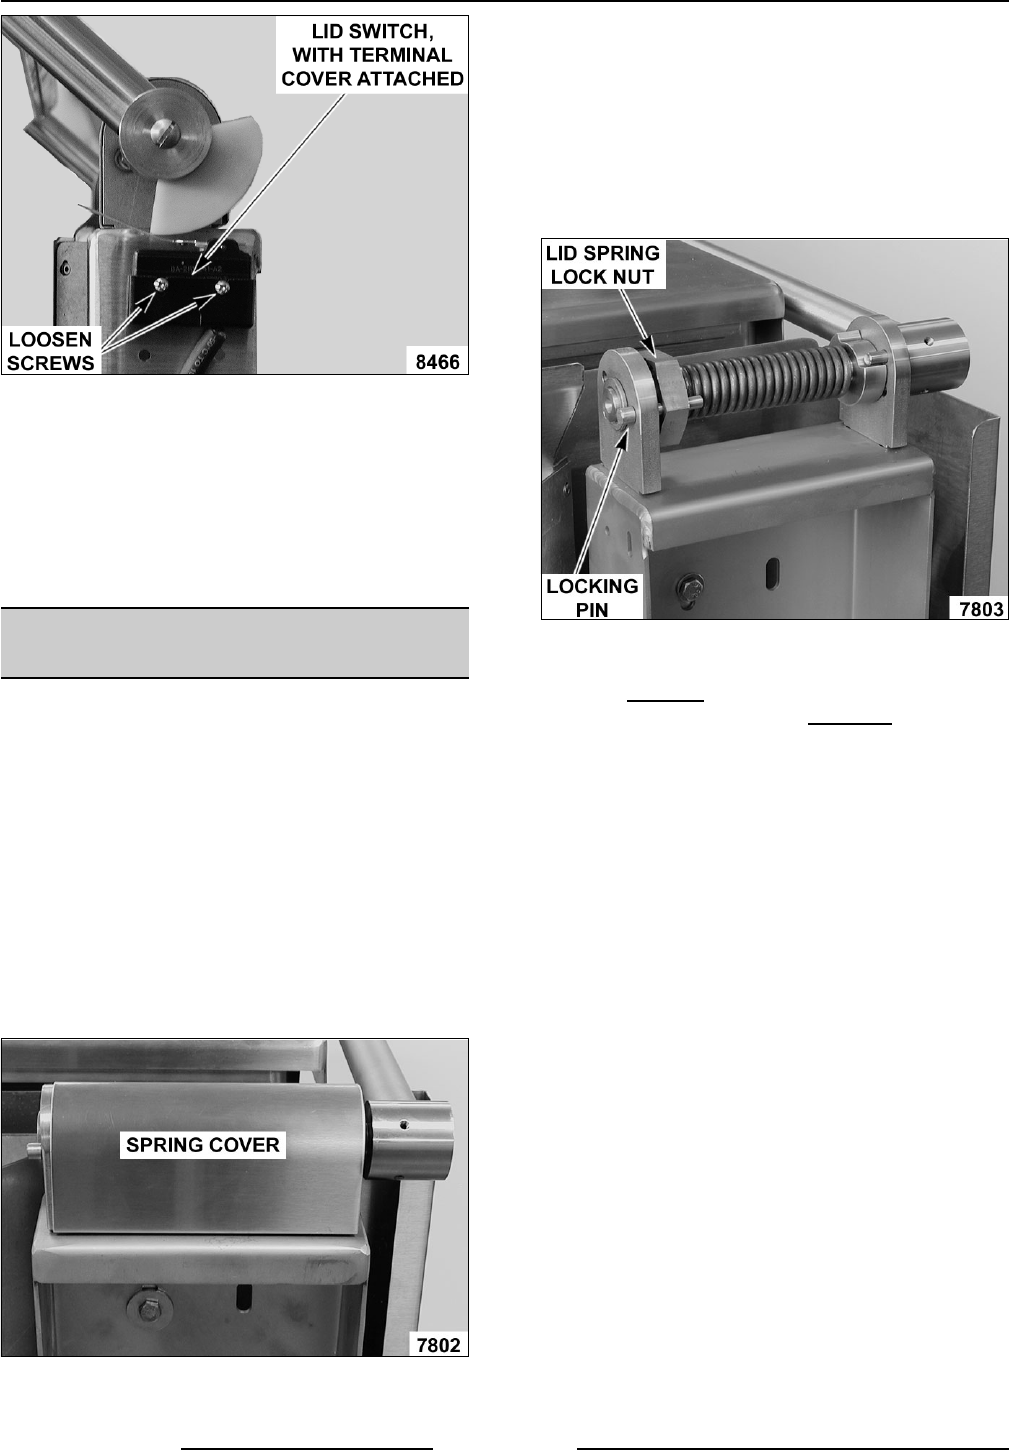
2. Remove spring covers by prying up at the
bottom. The covers are held in place by tabs
on the bottom of cover.
3. To adjust:
A. Place a 1 5/8" wrench on the lid spring
lock nut and apply a downward force until
locking pin can be removed. Continue to
hold lock nut in place.
CAUTION: Do not release wrench while locking
pin is removed or damage to the braising pan
may occur.
B. Apply additional downward force to
increase
spring tension; or slowly release
downwards force to decrease
spring
tension.
C. Rotate lid spring lock nut to the next hole
position then replace locking pin. Adjust
the spring tension, one position at a time.
D. Repeat tension adjustment on the
opposite spring.
4. Repeat step 1 to verify adjustment. Make
additional adjustments as necessary.
