– 10 –
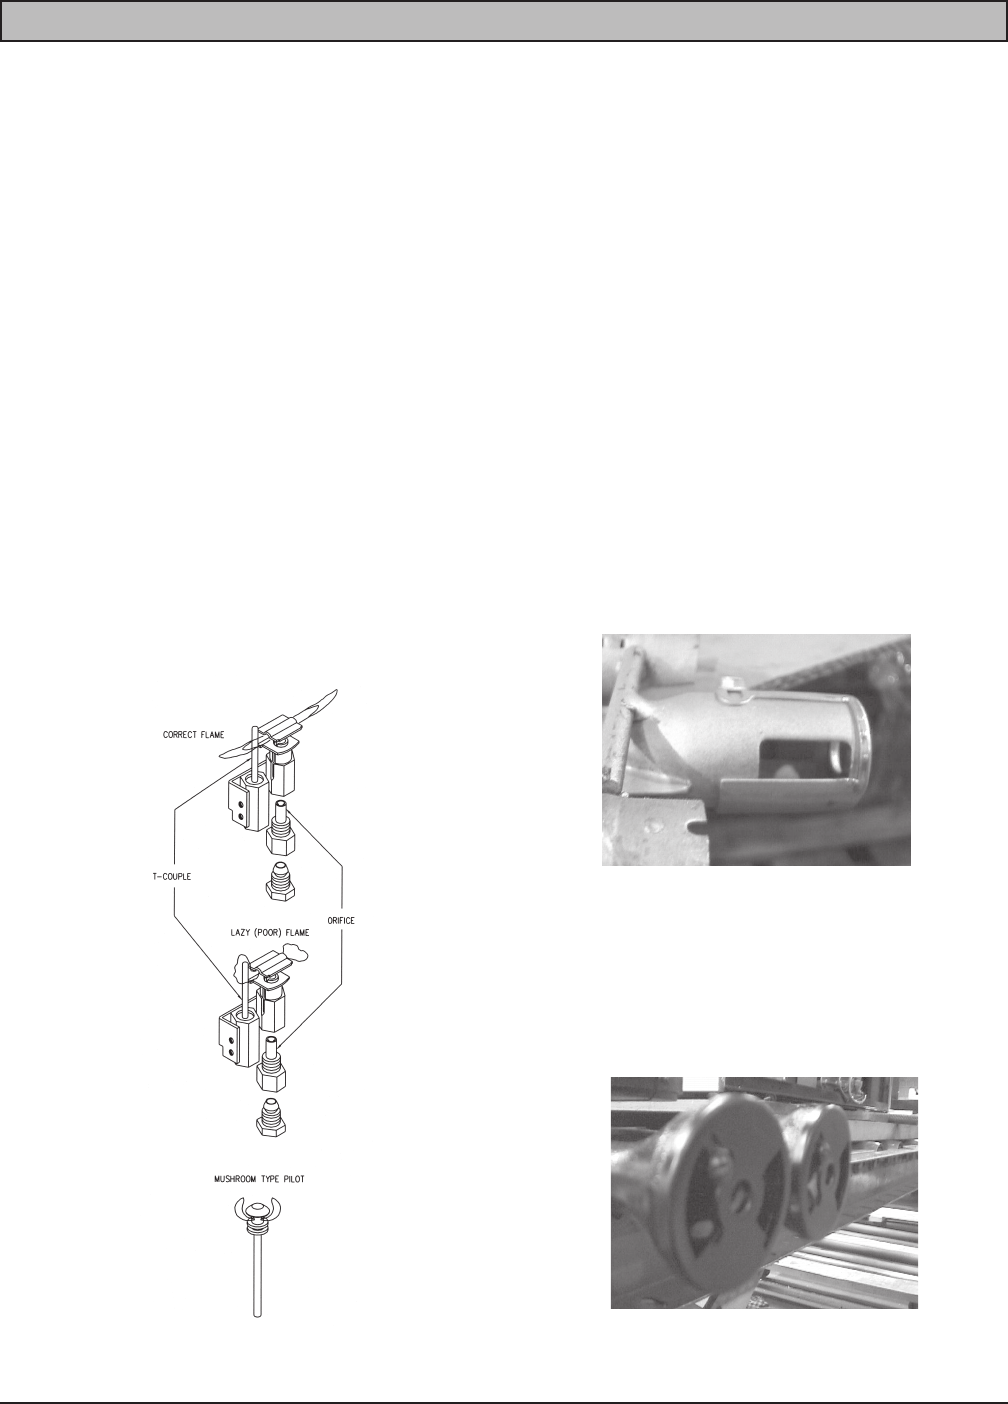
DIAGRAM #2
DIAGRAM #1
PILOT ADJUSTMENTS
After all connections/fittings have been checked for gas leaks and no leaks are found, the pilots can be lit. Locate
each pilot and the corresponding pilot adjustment valve. Light the pilots and adjust them up or down as necessary.
The flame should be only high enough to ignite the corresponding burner within 3 or 4 seconds maximum.
Mushroom head-type pilots are used on open burners, griddles and hot tops. The flame should be only about the
size of a dime. This type of pilot will burn yellow; that is the reason they should be as small as possible and still
be able to ignite the burner, within 3 or 4 seconds, maximum (Diagram #2).
Orifice pilots with thermocouples or flame switches are used on ovens. The flame should be large enough to
completely engulf the tip of the thermocouple/sensor and make the tip of the thermocouple/sensor glow red-hot.
Orifice pilot flames should be sharp, well-defined, two-tone blue when burning natural gas. However, when burning
propane (LP) there may be a tiny yellow tip to the flame. This yellow tip should be no more than 10% of the total
flame size (Diagram #1).
All gas burners should ignite within 3 to 4 seconds, maximum. All burners are tested at the factory prior to shipment.
However, fine tuning adjustments may be necessary to accomplish 3 to 4-second ignition at the installation site.
Most gas burners have an air shutter. There are two types of air shutters, the cap or disk type (Diagram #3) and
the sleeve type (Diagram #4). The cap or disk type is used on burners with cast iron venturis. The sleeve type is
used on tubular steel burners and/or burners with tubular steel venturis. All burners are tested and the air shutters
are set at the factory prior to shipment. However the factory cannnot make the fine tuning adjustments that may
be necessary at the actual installation.
DIAGRAM #3
DIAGRAM #4
