GR SERIES GAS FRYERS - SERVICE PROCEDURES AND ADJUSTMENTS
F25125 (March 2003) Page 14 of 24
NON FILTER READY SHOWN
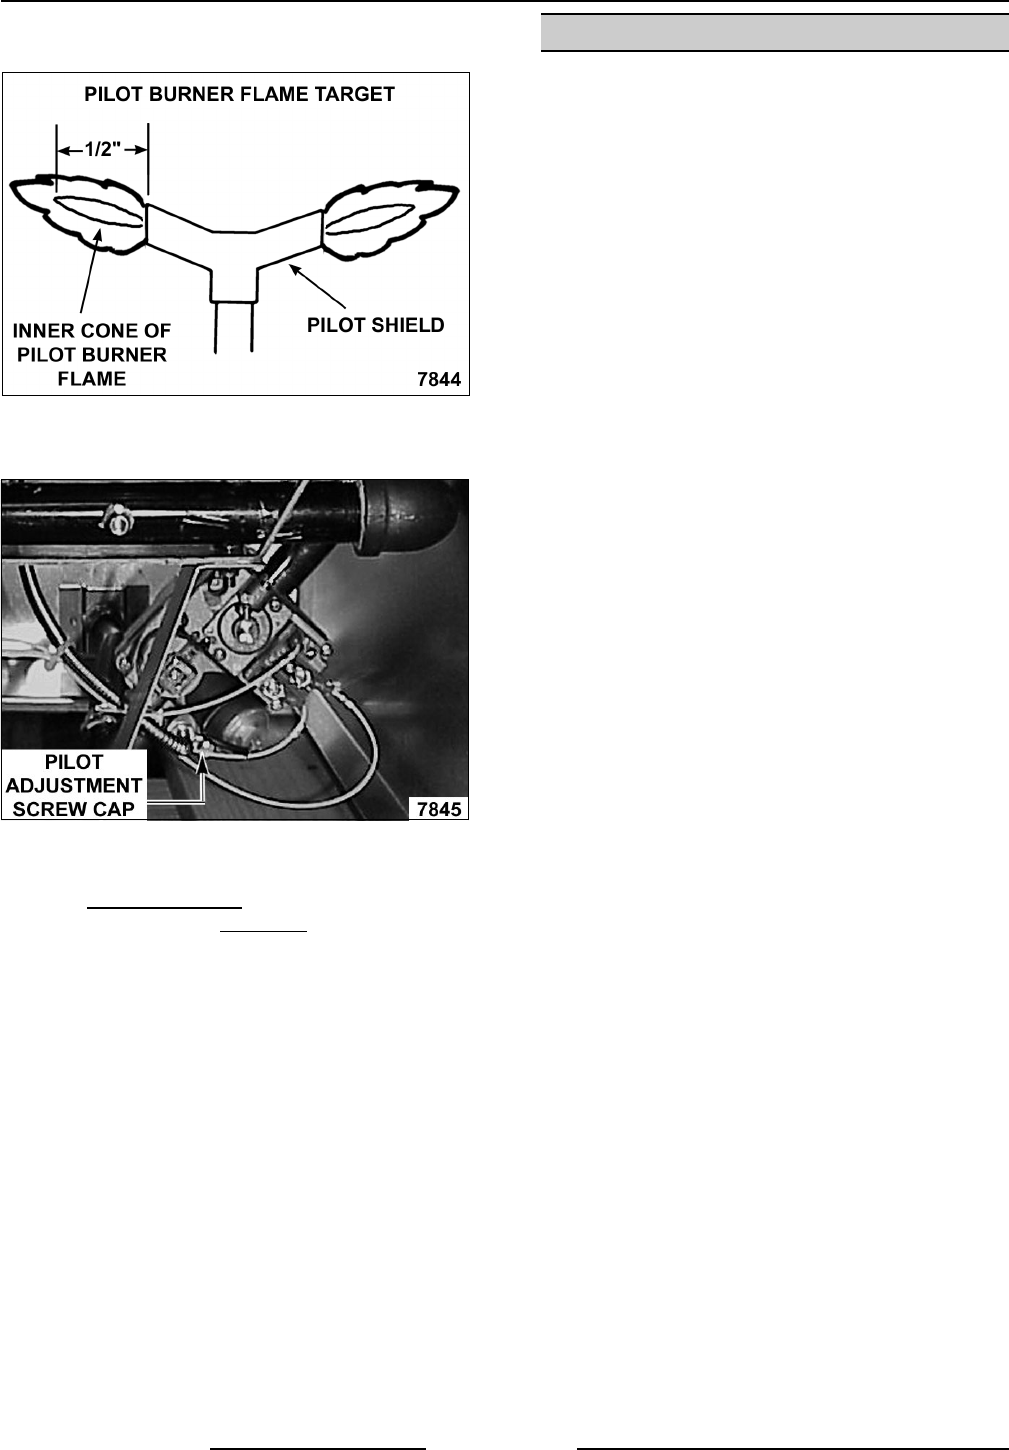
A. If adjustment is necessary, continue with
procedure.
4. Remove the adjustment screw cap from the
gas combination valve.
A. To increase pilot flame, turn the screw
counterclockwise
. To decrease pilot flame,
turn the screw clockwise
.
5. With the pilot burner lit, turn gas combination
valve knob/extension arm to on and set the
control thermostat to call for heat.
A. If main burners do not light or pilot burner
goes out, proceed to MILLIVOLT
CONTROLS TEST.
MILLIVOLT CONTROLS TEST
1. Verify millivolt control circuit wiring is correct
and connections are clean and secure.
2. Verify pilot burner flame is adjusted properly as
outlined under PILOT BURNER FLAME
ADJUSTMENT.
3. With control thermostat off and gas
combination valve knob/extension arm in the
pilot position, allow pilot to burn for 3-4 minutes
to stabilize voltage output from thermopile.
4. Verify thermopile output voltage.
A. Set VOM to DC millivolt scale and connect
meter leads to N.O. and COM terminals
on the high limit thermostat.
1) If 450 millivolts or greater is
measured, the thermopile is
functioning properly. Continue with
test.
2) If less than 450 millivolts is
measured, install a replacement
thermopile as outlined under
THERMOPILE in REMOVAL AND
REPLACEMENT OF PARTS.
5. Turn gas combination valve knob/extension
arm to on and set the control thermostat to call
for heat.
6. Verify main burners light and remain lit.
A. If main burners operate as described, the
millivolt controls are functioning properly.
B. If main burners do not light, continue with
test.
7. Verify control thermostat contacts are closing.
A. Connect meter leads to the TH terminal on
gas combination valve and COM terminal
on the high limit thermostat.
1) If 150 millivolts or greater is
measured, control thermostat is
functioning properly. Replace gas
combination valve as outlined under
GAS COMBINATION VALVE in
REMOVAL AND REPLACEMENT OF
PARTS.
