6 F-38251 (09-13) REV F
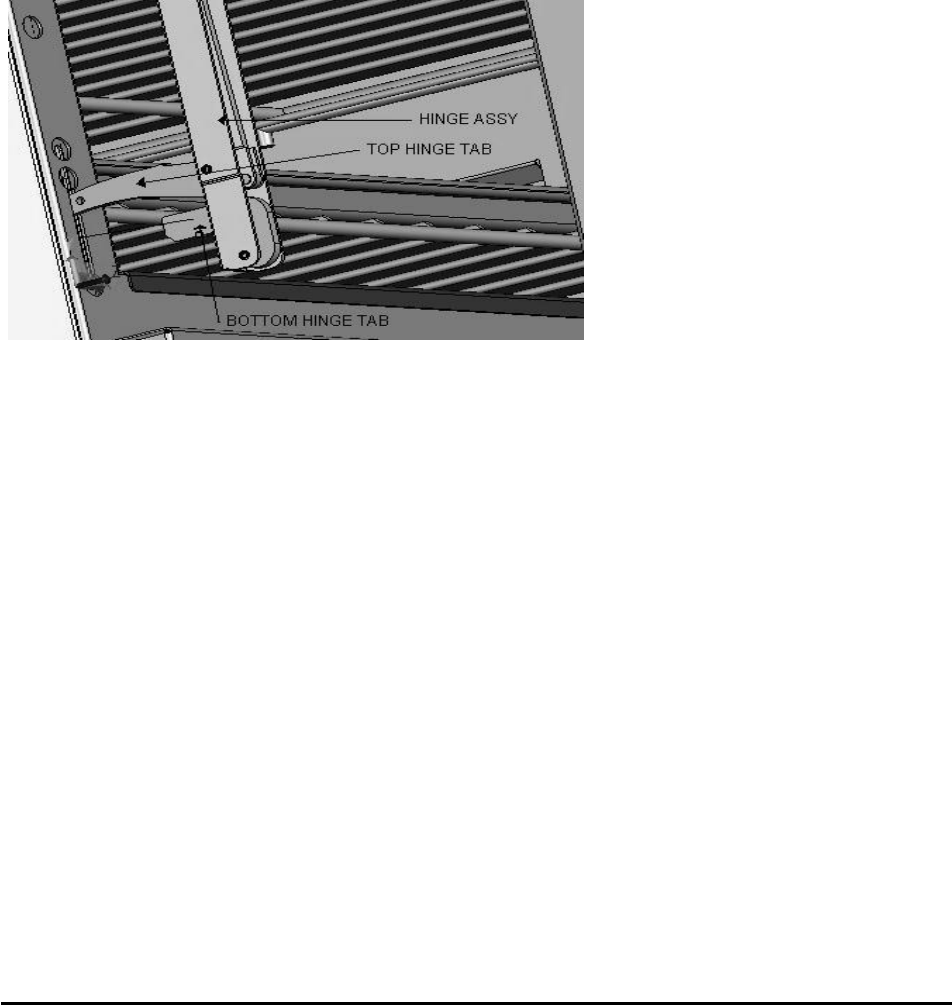
Door installation
1. Grasp door firmly at both sides.
2. Starting with either LH or RH side top hinge tab, angle door and slide top hinge tab into opening
between hinge stop roller and hinge stop pin.
3. Lift door up (compress door hinge as if opening the door) and position bottom tab downward about 30
degrees down from horizontal.
4. Push door inward, inserting downward angled bottom hinge tab into opening just above hinge stop pin.
* Bottom hinge tab must enter chassis at downward angle to engage.
5. Bottom hinge tab should engage on hinge stop pin.
6. Open door and pull door outward until bottom hinge tab locks on hinge stop pin.
7. Repeat above steps for opposite side.
8. Open and close door to make sure door hinges are locked in place and door operates smoothly.
LOCATION
The installation location must allow adequate clearance for servicing and proper operation. A minimum front
clearance of 40" (1016 mm) is required. 0" sides and rear clearance from combustible and non-combustible
construction is required except when hot top sections are incorporated. Ranges incorporating hot top
sections require a 0" sides and rear clearance from non-combustible construction and 6" from combustible
construction.
INSTALLATION CODES AND STANDARDS
Your Vulcan range must be installed in accordance with state and local codes, or in the absence of local
codes, with National Electrical Code ANSI/NFPA-70 (latest edition) available from The National Fire
Protection Association, Batterymarch Park, Quincy, MA 02269. In Canada refer to Canadian electrical code
C22.1 Part 1 (latest edition).
ASSEMBLY
Leg/Caster Assembly
The range is shipped fully assembled, except for the legs. The range is provided with 6"(152 mm)
adjustable stainless steel legs (hardware included), packaged in a box located inside of the oven. A set of
6"(152 mm) casters or 6” adjustable casters are available as an optional field installable accessories.
