59
Document
imaging camera
K
E
Y
S
T
O
N
E
A
U
T
O
S
E
T
E
X
I
T
ON / STANDBY
VOL / ADJ
E
N
T
E
R
M
E
N
U
I
N
P
U
T
F
A
N
T
E
M
P
L
A
M
P
O
N
1
2
OVERLAY
3
1
2
INPUT
INPUT
4
RGB picture
2
3
OVERLAY
CAMERA
ARM LIGHT
LOCK
W.BALANCE
CAMERA
GAIN
2
MENU
ON/STANDBYINPUT
L-CLICK R-CLICK
ENTER
KEYSTONE
AUTO
SET
EXIT
PIP
FREEZE
MUTECALL
RESIZE
VOLUME/ADJUST
LASER
STORE
CAMERA
ARM LIGHT
LOCK
W.BALANCE
GAIN
FOCU
S
Overlaying projection
• Handwriting in colors except blue and red cannot be displayed properly.
• Handwriting in fine lines may not be displayed properly.
• The depth overwritten can be adjusted from the menu screen.
Select the input source using the overlay
function by pressing INPUT.
Select the input source other than the camera input.
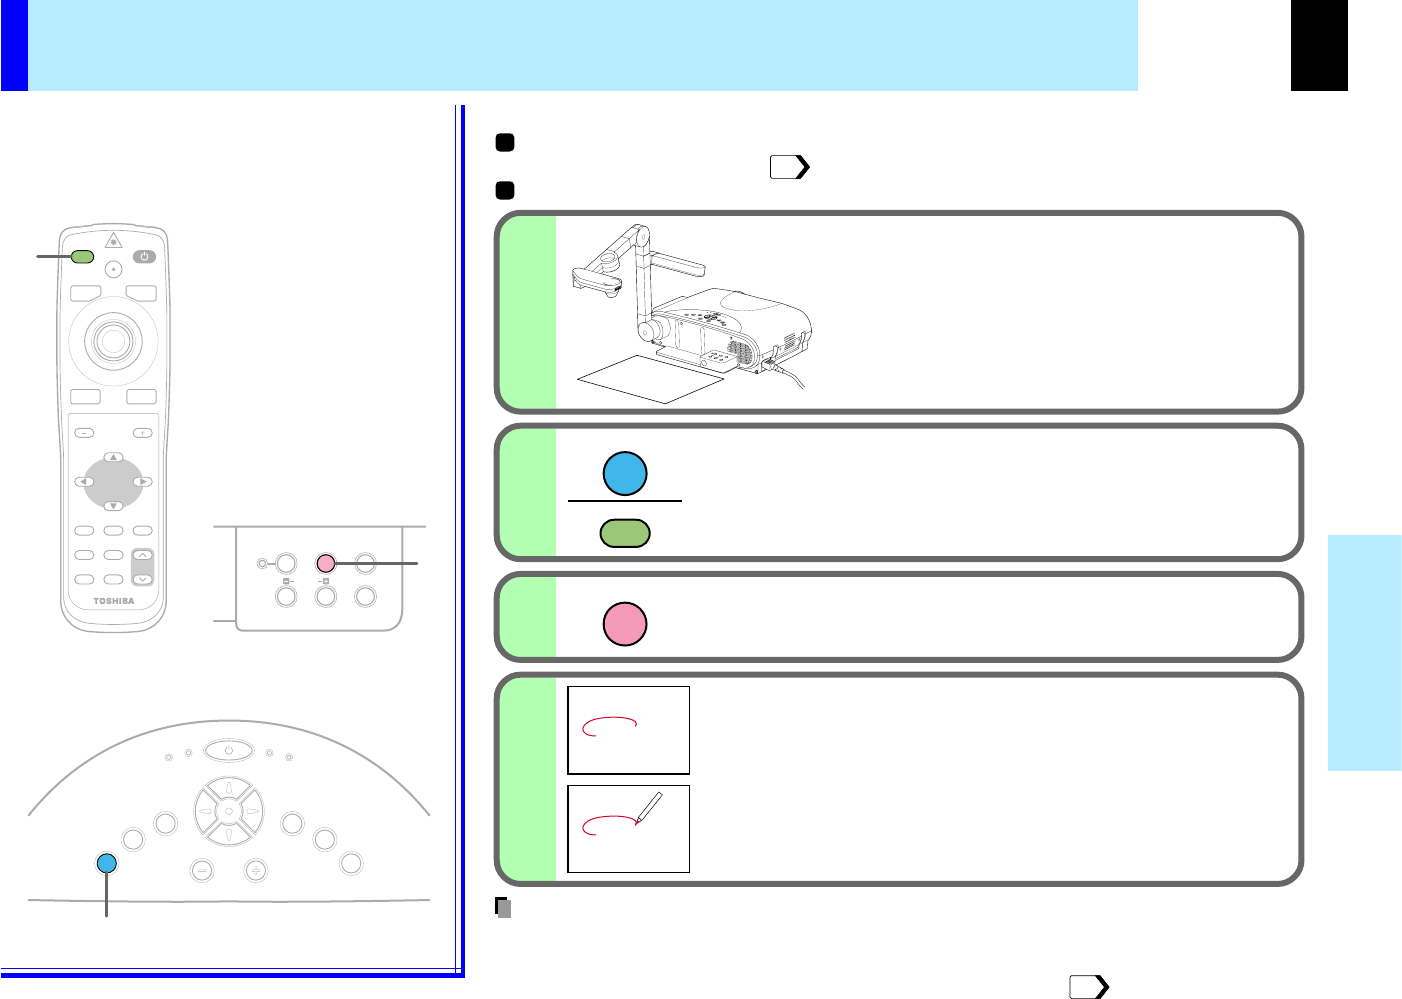
Set the white paper on a flat place
and set the camera so that paper is
projected to the full screen.
The white paper should be projected fully on the
screen.
Press OVERLAY
Draw any line on the paper with a red
or blue pen.
A drawn line is projected on the screen, overlapped
with the picture of the input source.
The position of a pen point can be confirmed on the
screen before drawing anything.
Screen
Paper
46
You can draw figures or letters with a pen on the
picture of RGB input or video input, by using the
overlaying function.
Remote control
Control panel
(Main unit side)
Camera control panel
Preparation
Project a picture on the screen as explained in the step "Picture projection with the
document imaging camera".
Prepare white paper and a red or blue pen.
56
Notes


