96
Dubbing From a DV Format
Tape to a DVD
You can record a DV format tape onto a disc. The
recorder controls the digital video camera. You
can fast forward, rewind, play in slow motion, and
stop the tape to select the scenes using the on-
screen menu.
To simply dub the entire contents of a DV format
tape (One Touch Dubbing), see page 98.
◆How titles and chapters are created
The dubbed contents on the disc become one title,
and the title is then divided into chapters at either
5 or 15-minute intervals, according to the “DVD
Auto Chapter” setting in the “Features” setup
(page 107).
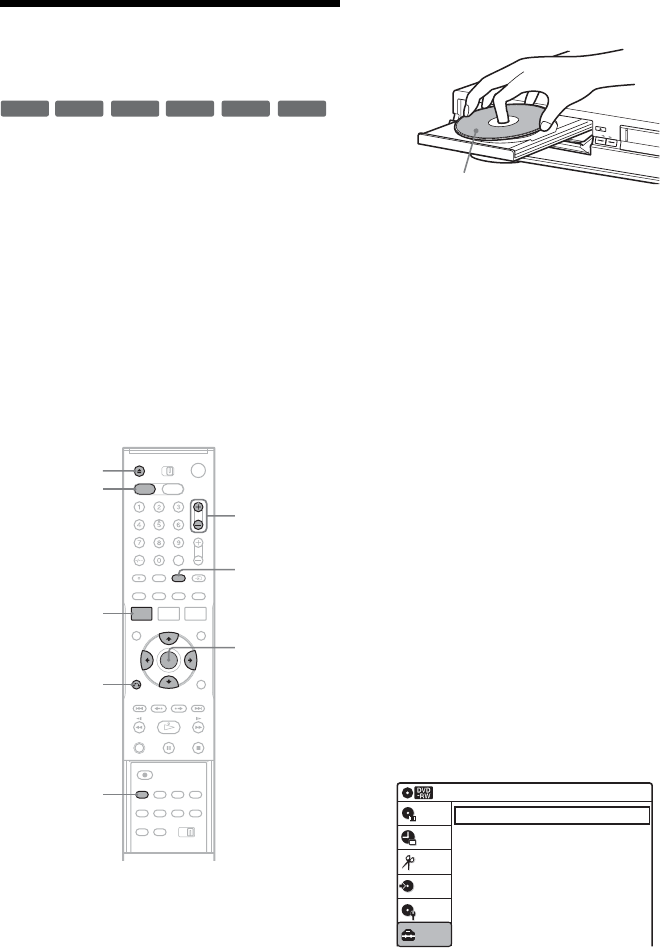
1 Press DVD to operate the DVD recorder.
2 Press Z (open/close), and place a
recordable disc on the disc tray.
3 Press Z to close the disc tray.
Wait until “LOAD” disappears from the front
panel display.
Unused discs are automatically formatted. For
the DVD-RW/DVD-R’s recording format
(VR mode or Video mode), see “Formatting a
new disc” on page 49.
4 Insert the source DV format tape into your
digital video camera.
For the recorder to record or edit, your digital
video camera must be set to video playback
mode.
5 Press INPUT SELECT repeatedly to select
“DV.”
6 Press REC MODE repeatedly to select the
recording mode.
For details about the recording mode, see
page 48.
7 Press SYSTEM MENU while the recorder is
in stop mode.
The System Menu appears.
8 Select “Setup,” and press ENTER.
The “Setup” display appears.
9 Select “Audio,” and press ENTER.
-
RWVR
-
RW
Video
+
RW
+
R
-
RVR
-
R
Video
REC MODE
INPUT
SELECT
Z
SYSTEM
MENU
M/m/</,,
ENTER
O RETURN
DVD
PROG +/–
Recording side facing down
Audio
Digital Out
Downmix
Audio DRC
Scan Audio
DV Audio Input
Line Audio Input
: On
: Dolby Surround
: Standard
: On
: Stereo 1
: Stereo
Setup
Disc Setting
Edit
Title List
Timer
Dubbing
10:10


