4
Preset Modes
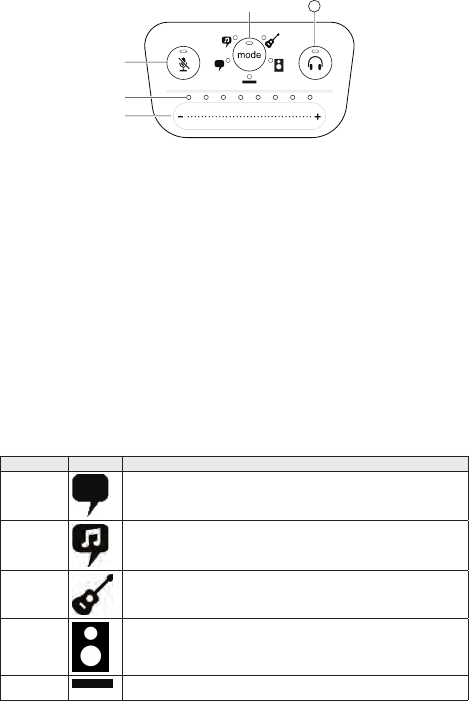
Five selectable modes optimize settings for equalization and compression to match your recording needs.
Set your volume level and scroll through the modes to find which setting sounds best. The preset settings
will not affect the microphone level.
Mode Icon Application
Speech
Use for speech in podcasting
Singing Use to capture solo or group vocal performances
Quiet and
Acoustic
Music
Suited for acoustic instruments and quiet music applications
Loud Music
or Band
Use when recording a band or other loud sources
Flat A completely unprocessed signal (no equalization or compression settings
used). Use when processing the audio after recording.
Touch Panel Interface Controls
① Volume Control Slider
Adjust microphone or headphone level by
sliding your finger across the control surface.
- Press the mode button to activate
microphone level.
- Press the headphone button to activate
headphone volume.
② LED bar
Displays microphone and headphone level.
The LED color indicates the level being
displayed or adjusted.
- Green: Microphone level
- Orange: Headphone level
③ Mute Button
Press to mute and unmute the microphone.
④ Mode Selector
Press to select preset mode.
⑤ Headphone Volume Selector
Press to select headphone level controls
(orange LED bar). Then use the volume control
slider to adjust headphone level. Press again
to return to microphone level display (green
LED bar).
Touch Panel
