Page 11
TO PLACE WORKPIECE ON SAW TABLES
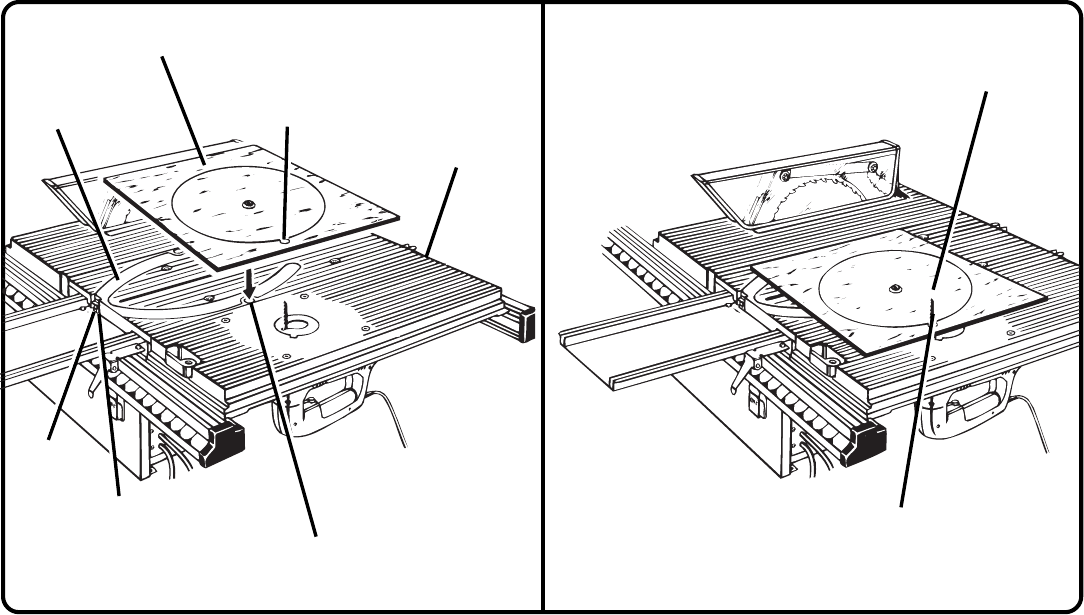
See Figure 15.
As mentioned previously there are many variables that influence a circle being cut or shaped. These variables must be
considered when placing workpiece on saw tables to begin a cut. The sliding miter table and accessory table must both be
used when making a cut or shaping. Also the rails may need to be adjusted, according to the application and size of the
workpiece. For large workpieces, the sliding miter table may need to be placed on the left side of the saw blade. In these
situations, the saw blade will need to be lowered below the table surface and the blade guard assembly removed. You will learn
from experience how to best make these set-ups.
For illustration purposes, we have shown the sliding miter table beside the accessory table. The rails have been moved
enough for both tables and the workpiece to fit on the right side of the saw blade.
1. Place workpiece with circle cutting collar attached on sliding miter table. Align the circle cutting collar with one of the holes
in sliding miter table and place it in position.
See Figure 15.
2. Adjust accessory table so that saw blade or router bit are aligned with pilot hole in workpiece.
3. Securely tighten sliding miter table and accessory table to rails.
4. Lock the sliding miter table by engaging the lock tab in the appropriate slot on the miter table base.
COMPLETED SET-UP FOR CIRCLE CUTTING
See Figure 16.
After completing set-up for circle cutting, it should be similar to the illustration shown in figure 16. Recheck all necessary steps.
Also recheck screws, tables, etc. for tightness.
CIRCLE CUTTING JIG (Cont'd)
Fig. 15 Fig. 16
WORKPIECE WITH CIRCLE
CUTTING COLLAR ATTACHED
SLIDING
MITER TABLE
PILOT HOLE
ACCESSORY TABLE
LOCK TAB
SLOT
PLACE CIRCLE CUTTING COLLAR IN HOLE
JIG SAW BLADE
PILOT HOLE
DIRECTION OF FEED
JIG SAW KIT SHOWN COMPLETELY ASSEMBLED


