OSD Menu
11
1. Picture menu
Description
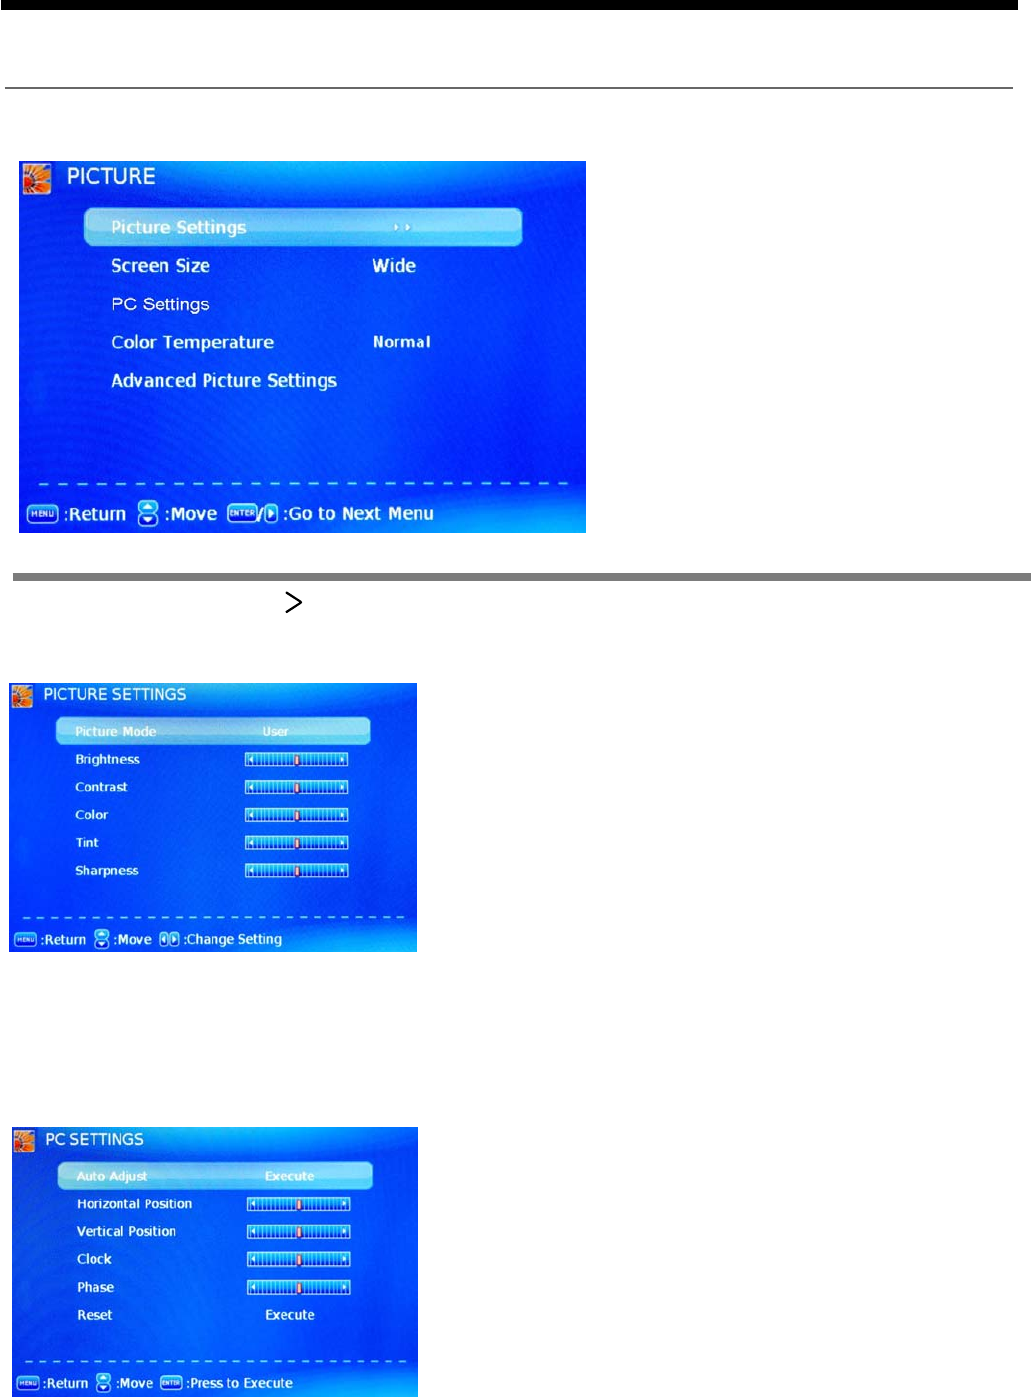
Picture mode: Select between Dynamic, Standard,
Movie, User and Power Saving.
You may select the picture mode directly by pressing
the PICTURE button on the remote control.
Picture Settings: Press button to enter the Picture Settings menu.
Screen Size: Select the displaying mode of the picture between Wide, Cinema, Zoom, Normal,
Just Scan.
PC Settings: If the video input signal comes from your PC, you may adjust the Vertical Position,
Horizontal Position, Clock, Phase or even perform an Auto adjustment.
Contrast: Control the difference between the bright and
dark regions of the screen picture.
Brightness: Adjust brightness of the picture.
Color: Adjust color of the picture.
Tint: Control the fresh tones to make them appear natural.
Sharpness: Set the amount of fine detail in the picture.
Color Temp.: Select between Normal, Cool and Warm.
Note: when select the "Power Saving", the
machine is in energy-saving status.
OSD Menu
Auto Adjust: Press OK button to setup the parameter of
the screen automatically.
Clock: Adjust the pixel clock frequency, until the image
size is maximized for the screen.
H/V Position: Adjust the transverse/vertical position of
the screen.
Phase: Adjust the phase of the ADC sampling clock
relative to the sync signal, until a stable image is obtained.
Reset: Press OK button to reset the settings.
