-11-
EN
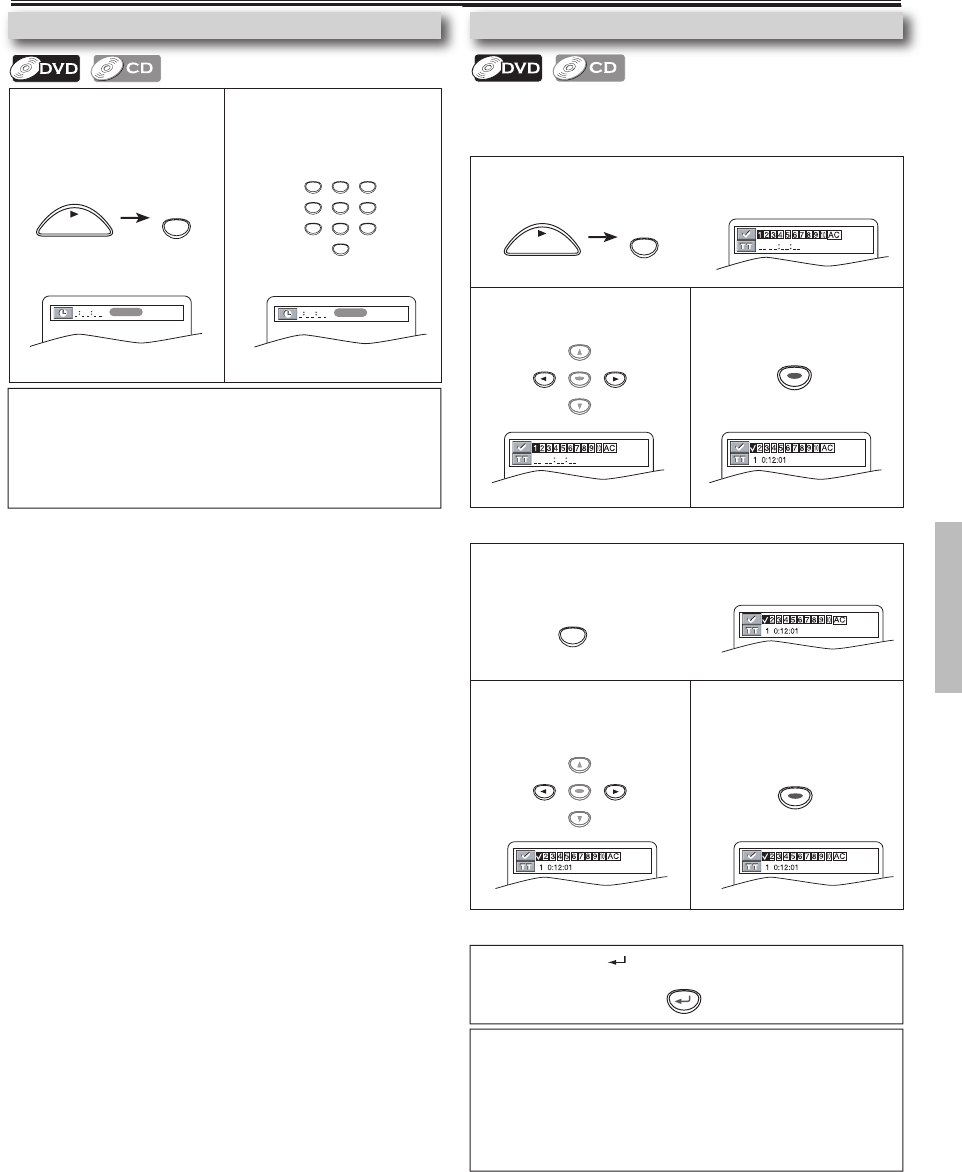
1 Press [SEARCH MODE]
repeatedly until the Time
Search display appears
during playback.
2 Press the desired time
location on the disc, using
the Number buttons within
30 seconds.
1 Press [SEARCH MODE] repeatedly until the marker display
appears.
2 Use [s / B] to select
markers.
3 Playback will restart from
the specific point which
you have set as the
desired marker.
1 Press [SEARCH MODE] repeatedly until the marker display
appears during playback.
2 Use [s / B] to select the
markers.
3 Press [ENTER] to set the
markers.
Using Time Search
Hint
• When there is no need to enter a number, “0” appears automati-
cally.
For example, “0 : 0
-
:
--
” appears in the Time Search display if the
total time of the title or track is less than 10 minutes.
• Press [CLEAR] to erase the incorrect input at step 2.
This feature allows you to assign a specific point on a disc to be
called back later.
To set a marker
1 Press [RETURN ] to exit the marker display.
Hint
• Opening the disc tray or putting unit in standby mode will erase all markers.
• Selecting “AC” at step 2 in the section “To set a marker” or “To return to the
marker later” will also erase all markers.
• To clear a marker, select the marker to be cleared at step 2 in the section “To
set a marker” or “To return to the marker later,” and then press [CLEAR].
• The marker display will disappear in about 30 seconds when there is no out-
put.
Search Function
To return to the marker later
Functions
To exit the marker display
Marker Setup
DVL245G_E6AC0UD.indd 11 2006/01/10 11:00:21


