4
UK Helpline 0870 060 2604
Replacement Parts 0870 167 6635 Ireland Helpline 1800 409119
Operating the
appliance
Assembly
WARNING: Do not plug in
the cleaner until it is
assembled.
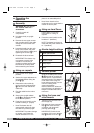
1 Carefully unpack all
components.
2 Lift cleaner body to upright
position.
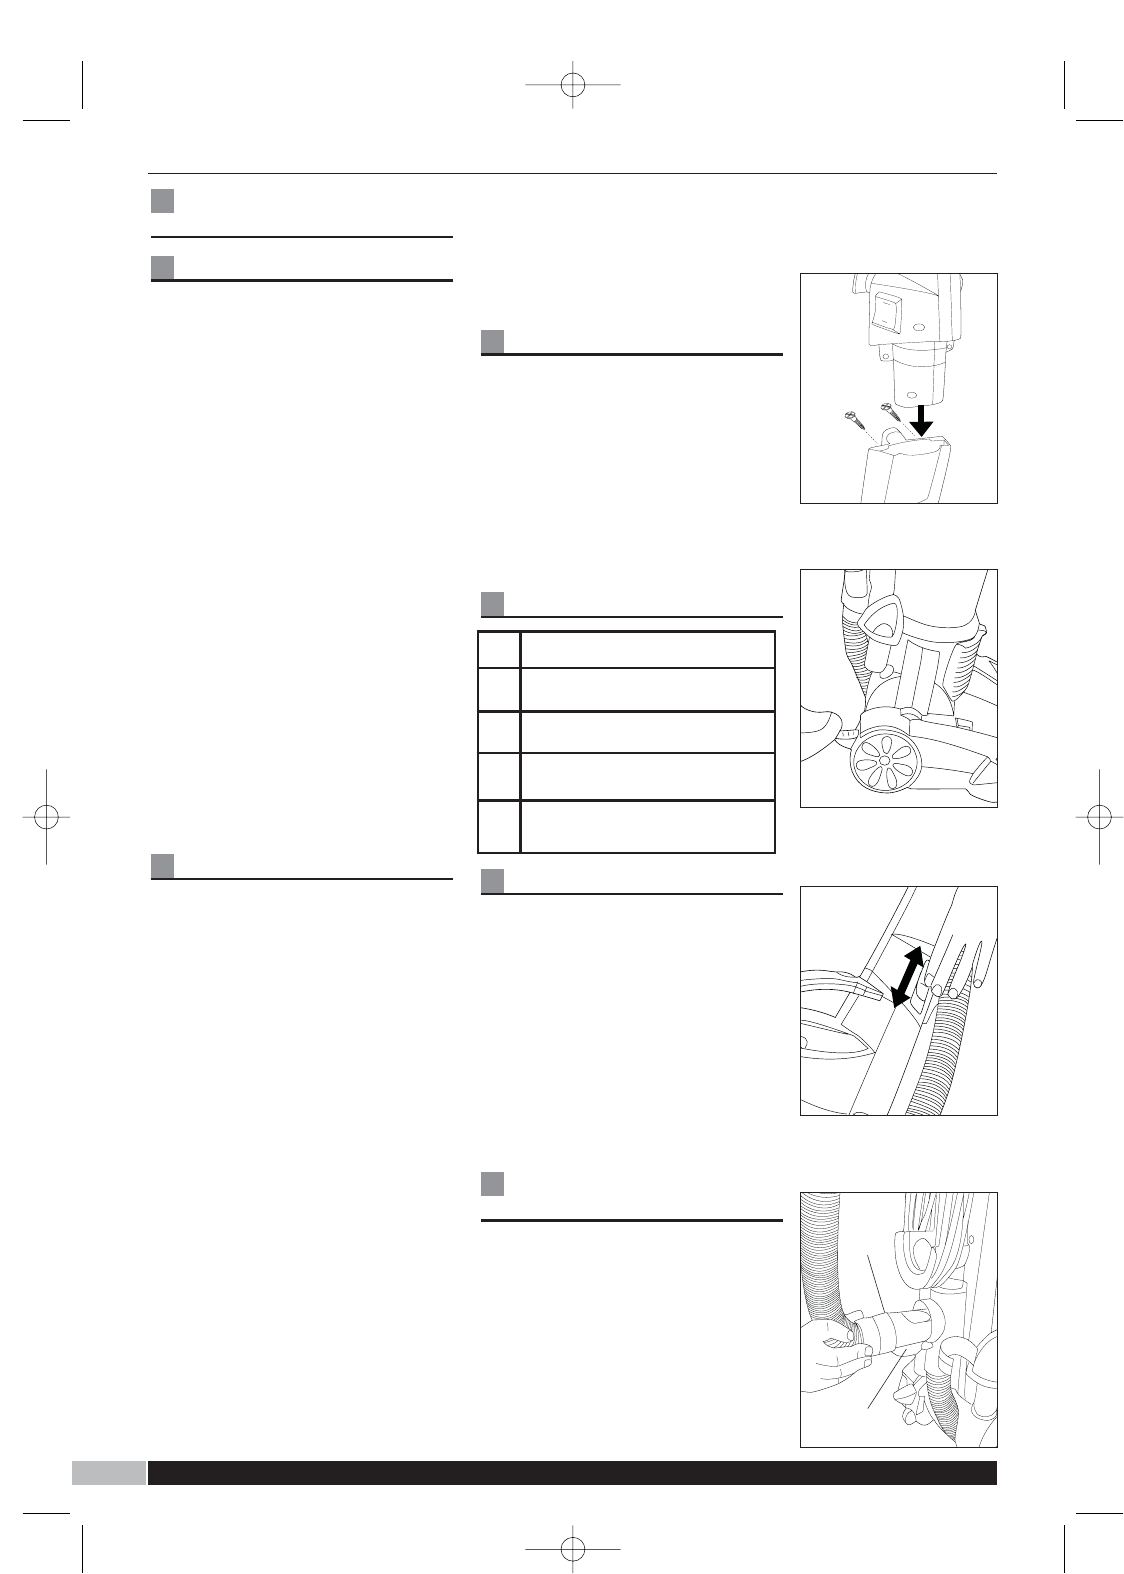
3 Remove the two upper screws
that are either side of the cable
storage and remove the dust
canister.
4 Insert the handle into the main
body of the cleaner and push
down firmly before re-fitting and
tightening the screws. A.
5 Re-attach the dust canister.
IMPORTANT: The cleaner may
not operate correctly if the
canister is not securely in
position so please ensure that
the handle is correctly fitted
before attaching the canister
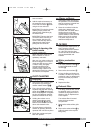
Using on carpets
1 Place cleaner in its upright
position.
2 Set the floor type adjustment to
the desired position using the
pedal „ B.
3 Release the mains cable by
turning the quick release cleat
Ë half a turn and extend the
cable fully.
4 Plug the cable into the mains
socket.
5 Step on the upright release
pedal ‚ to release the handle
to the desired position.
6 Press the control switch on the
handle to setting ‘II’ (carpet).
• Note: The beater bar will
automatically switch off when
the cleaner is parked upright.
IMPORTANT: To prevent damage
to carpets, never leave the
cleaner switched on in one
place for an extended period.
• Note: Never have the floor
nozzle set too low such that the
cleaner is hard to push.
Using on hard floors
Follow steps 1-5 from the
instructions for ‘Using on
carpets’
6 Press the control switch on the
handle to ‘I’ (hardfloor)
NOTE: The beater bar does not
rotate with the power switch set
to ‘I’ (hardfloor)
Nozzle height settings
Variable power
Slide the variable power switch
‹C upwards to increase the
suction power or downward to
decrease suction. This feature is
most useful when using the
hose and accessories. Use the
minimum setting when
vacuuming delicate
fabrics/curtains etc. When not
using the hose it is advisable to
keep the variable slider set to
maximum.
Using the hose and
attachments
1 Take the hose connector out of
the storage clip.
2 Pull down the hose connector
flap Ì and insert the hose
connector with its ‘mouth’
pointing upwards D.
IMPORTANT: Push the hose
connector fully in such that the
flap Ì latches on to the È
C
B
A
1
Wood and laminate
2
Short pile carpet and vinyl
3
Medium carpet
4
Deep carpet
5
Tools
D
Ì
„
È