Chapter 2
Configuration
8
USB Ethernet Adapter
Driver Installation for Mac OS X
NOTE: Do not click Cancel at any time during
the installation process. Doing so will prevent
your driver from being properly installed on
your computer.
If you have not yet done so, start your computer.1.
Connect the Adapter to your computer. Refer to 2.
Installing the Adapter, page 3.
The operating system will automatically detect the 3.
Adapter. When the message A new network interface
has been detected appears, insert the Installation
CD into your computer’s CD-ROM drive. Then click
Network Preferences.
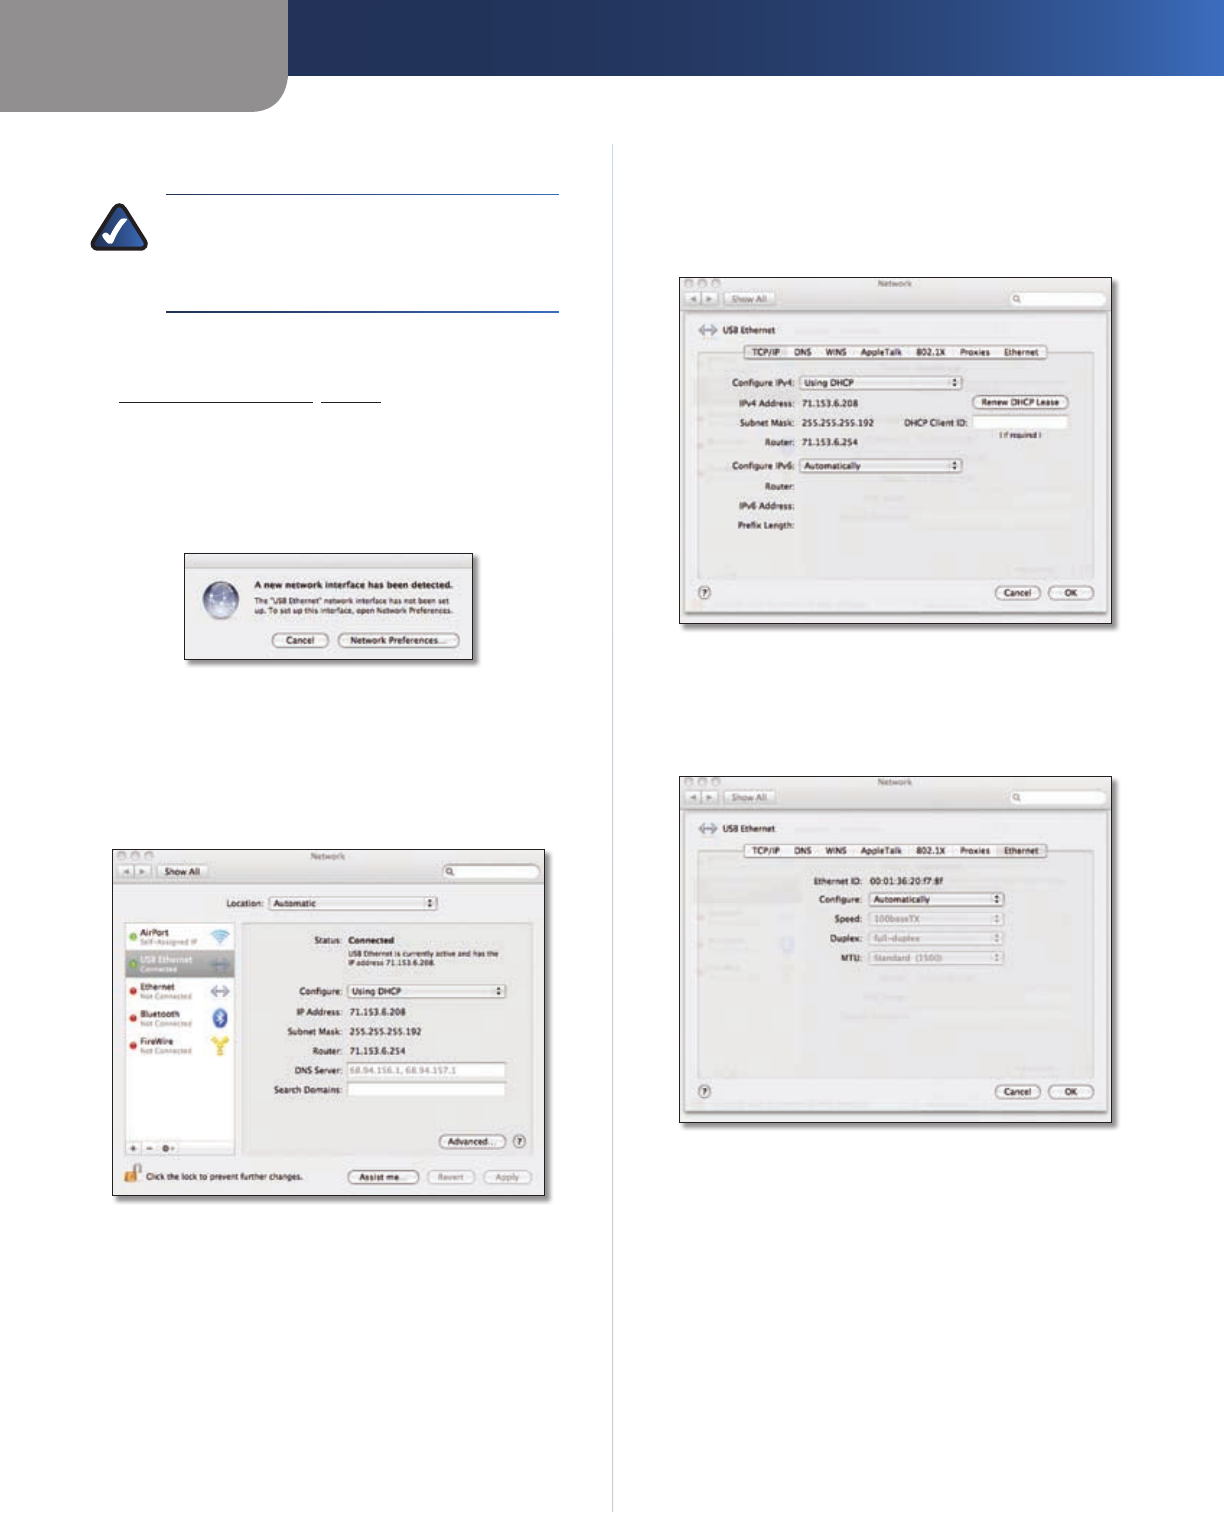
A new network interface has been detected
The 4. Network Preferences screen appears. The left side of
the screen contains a list of your computer’s network
interfaces. The Adapter’s interface will be listed as USB
Ethernet. Click Advanced to configure the interface’s
settings.
Network Preferences—Connected
Select the 5. TCP/IP tab, and then set the following
properties as indicated.
Configure IPv4 Set this to Using DHCP.
Configure IPv6 Set this to Automatically.
Advanced Network Preferences—TCP/IP tab
Click the 6. Ethernet tab, and then set the following
properties as indicated.
Configure Set this to Automatically.
Advanced Network Preferences—Ethernet tab
Click 7. OK to save the property settings and close the
Network Preferences screen.
Congratulations! The installation of the USB Ethernet
Adapter is complete.
For more information about networking under OS X,
refer to your Mac OS X documentation.


