EN
36
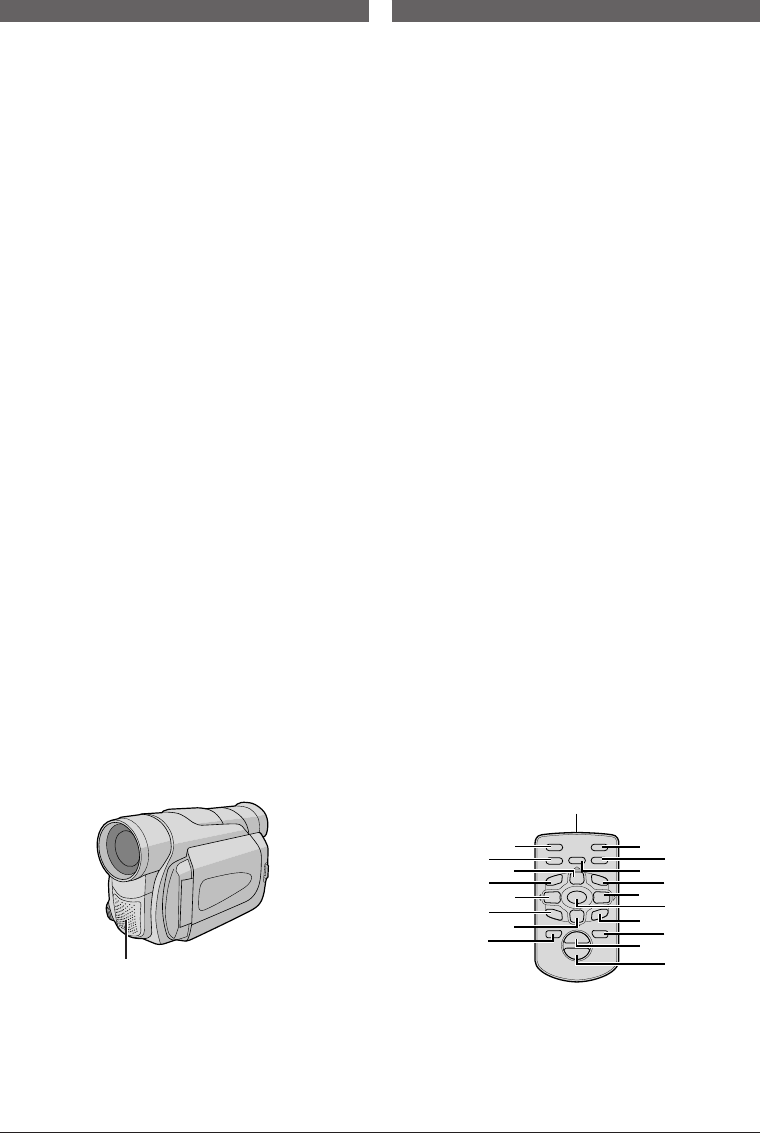
USING THE REMOTE CONTROL UNIT
Audio Dubbing
The audio track can be customized only when recorded
in the 12-bit mode (੬ pg. 28).
NOTES:
● Audio Dubbing is not possible on a tape recorded in
16-bit audio, on a tape recorded in the LP mode or on a
blank portion of a tape.
● To perform Audio Dubbing while watching on the
television, make connections (੬ pg. 16).
1 Play back the tape to locate the point where editing
will start, then press PAUSE (6) U.
2 While holding A.DUB (e) l on the remote control,
press PAUSE (6) U. “6e” E and “MIC” appear.
3 Press PLAY (
4
) k, then begin “narrating”.
Speak into the microphone.
•To pause dubbing, press PAUSE (6) U.
4 To end Audio Dubbing, press PAUSE (6) U, then
STOP (5) a.
To hear the dubbed sound during playback . . .
..... set “12bit MODE” to “SOUND 2” or “MIX” in the
Menu Screen (੬ pg. 32).
NOTES:
● Sound is not heard from the speaker during Audio
Dubbing.
● When editing onto a tape that was recorded at 12-bit, the
old and new soundtracks are recorded separately.
● If you dub onto a blank space on the tape, the sound may
be disrupted. Make sure you only edit recorded areas.
● If feedback or howling occurs during TV playback, move
the camcorder’s microphone away from the TV, or turn
down the TV’s volume.
● If you change from 12-bit to 16-bit in mid-recording and
then use the tape for Audio Dubbing, it is not effective
from the point where 16-bit recording began.
● During Audio Dubbing, when the tape moves to scenes
recorded in the LP mode, scenes recorded in 16-bit audio
or a blank portion, Audio Dubbing stops (
੬ pg. 52).
● To perform Audio Dubbing with a video unit connected to
the camcorder’s AV connector, first set “S/AV INPUT” to
“ON” in the Menu Screen (
੬ pg. 31). “AUX” appears
instead of “MIC”.
Insert Editing
You can record a new scene into a previously recorded
tape, replacing a section of the original recording with
minimal picture distortion at the in and outpoints. The
original audio remains unchanged.
NOTES:
● Before performing the following steps, make sure that
“TIME CODE” is set to “ON” in the Menu Screen
(
੬ pg. 31, 32).
● Insert Editing is not possible on a tape recorded in the LP
mode or on a blank portion of a tape.
● To perform Insert Editing while watching in the television,
make connections (੬ pg. 16).
1 Play back the tape, locate the Edit-Out point and
press PAUSE (6) U. Confirm the time code at this
point (੬ pg. 31, 32).
2 Press REW (
2
) O until the Edit-In point is located,
then press PAUSE (6) U.
3 Press and hold INSERT (w) P on the remote
control, then press PAUSE (6) U. “6w” 8 and the
Time Code (min.:sec.) appear and the camcorder
enters Insert-Pause mode.
4 Press START/STOP d to begin editing.
•Confirm the insert at the time code you checked in
step 1.
•To pause editing, press START/STOP d. Press it
again to resume editing.
5 To end Insert Editing, press START/STOP d, then
STOP (5) a.
NOTES:
● Programme AE with special effects (੬ pg. 23) can be
used to spice up the scenes being edited during Insert
Editing.
● During Insert Editing, the date and time information
changes.
● If you perform Insert Editing onto a blank space on the
tape, the audio and video may be disrupted. Make sure
you only edit recorded areas.
● During Insert Editing, when the tape moves to scenes
recorded in the LP mode or a blank portion, Insert Editing
stops (
੬ pg. 52).
Stereo microphone
9
0
2
3
4
6
we
5
T
W
R
T
O
Y
P
I
;
j
h
U
a
s
g
f
l
A
S
d
k
1 GR-D90/70A EN 35-40 03.2.4, 17:0836


