SECTION 6
GPS Receiver
Reference
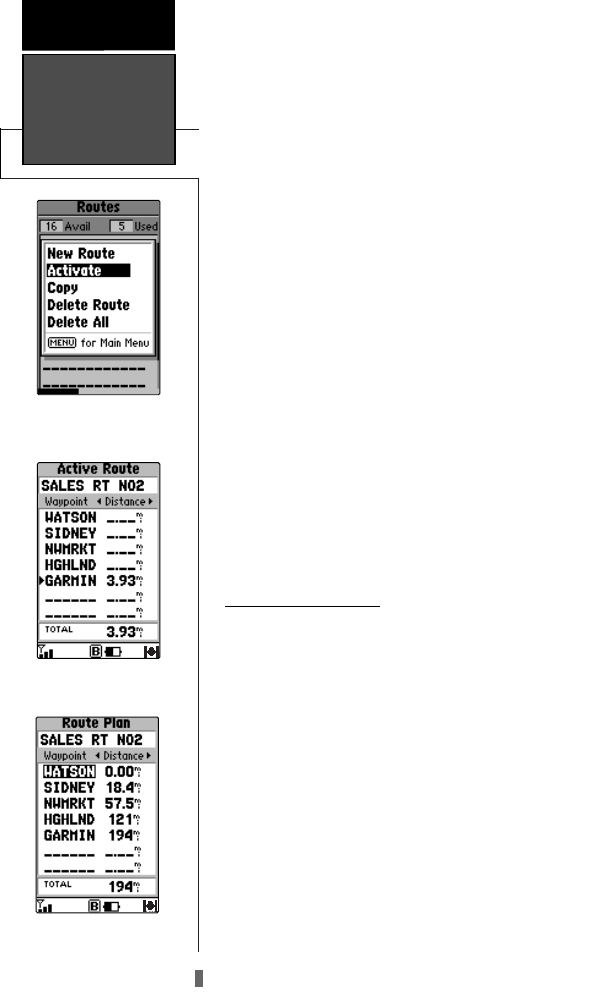
3. Highlight the desired route and press MENU to display the
Route Options.
4. Highlight Activate and press ENTER to navigate the route
in sequence.
To deactivate the route:
1. Press PAGE repeatedly to display the Active Route Page.
(See page 86)
2. Press MENU to display the Active Route Options.
3. Highlight Deactivate and press ENTER to stop navigating
the currently selected route.
The Route List also allows you to enter a 13-charac-
ter name for any listed route. By default the name
includes the first and last waypoints in the route.
To enter a custom route name:
1. Press MENU twice to display the Main Menu.
2. Highlight Routes and press ENTER. The Route List is dis-
played, showing all routes stored in memory.
3. Highlight the desired route and press ENTER to display the
Route Plan Page.
4. Highlight the name field and press ENTER to begin editing.
5. Use the arrow keypad to enter the desired name and press
ENTER when finished.
6.11.1 Route Editing
Once a route is added to memory you can review
and/or edit the route from the Route Plan Page. The
Route Plan Page shows the sequence of waypoints for
the selected route and provides additional route display
options.
To edit a route:
1. From the Route List, highlight the route you wish to edit and
press ENTER. The Route Plan Page appears for the select-
ed route.
2. To change a route waypoint, highlight the waypoint you wish
to change and press ENTER. Use the arrow keypad to
enter the new waypoint and press ENTER.
3 To review the information for a route waypoint, highlight the
desired waypoint and press MENU. A pop-up menu
appears with additional options. Highlight Review Wpt and
press ENTER to display information for the selected waypoint.
84
Activating the Selected Route
Activate Route Display
Editing a Route
NvTlkGPS.qxd 2/1/00 4:13 PM Page 24


