46
Video Wall Projection
1 Access one of the four projectors
via Internet Explorer.
(See “Controlling the Projector Using Internet
Explorer (Version 5.0 or later)” (page 26) for
the details.)
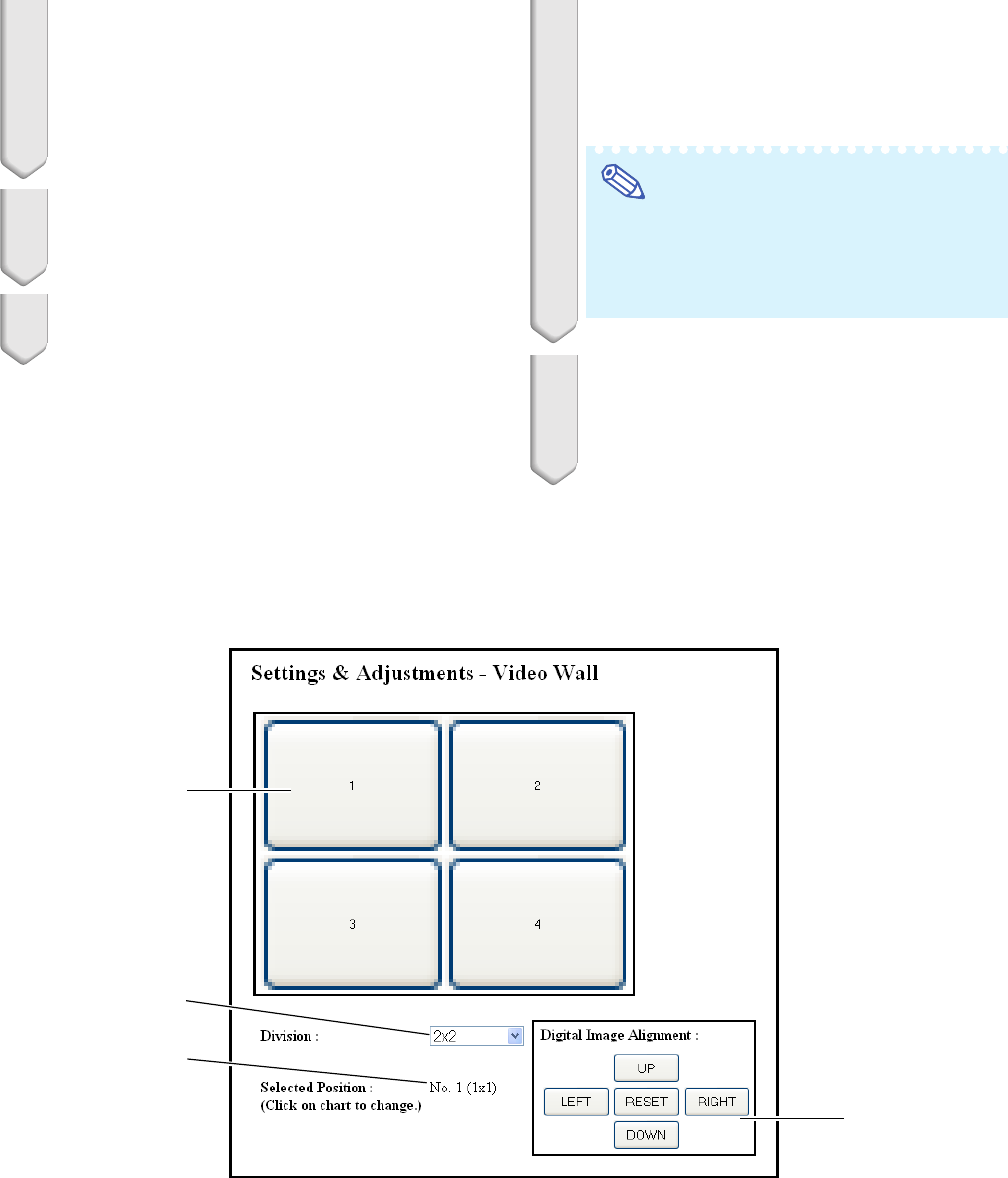
2 Click “Video Wall” on the menu.
• “Video Wall” display will appear.
3 Select “2 X 2” on “Division”.
1
2
3
4
11
11
1 Selects a position for each projector. (the assigning buttons)
22
22
2 Selects a number of positions where the video wall is divided.
33
33
3 Displays the current status for the video wall setup.
44
44
4 Adjusts the position of the projected image horizontally and vertically.
4 Click the assigning button for the
desired position.
• The projector will be assigned to the part of
the video wall.
Note
• For more details on the assigned position
and the actual position of the projector, see
“Assigning the Projected Image on the
Video Wall Setup” (page 47).
5 Repeat the same procedure from
the step 1 to 4 for the other three
projectors.
That completes the video wall setup. When
the same image signal is input to all the
projectors, the video wall projection starts.


