7
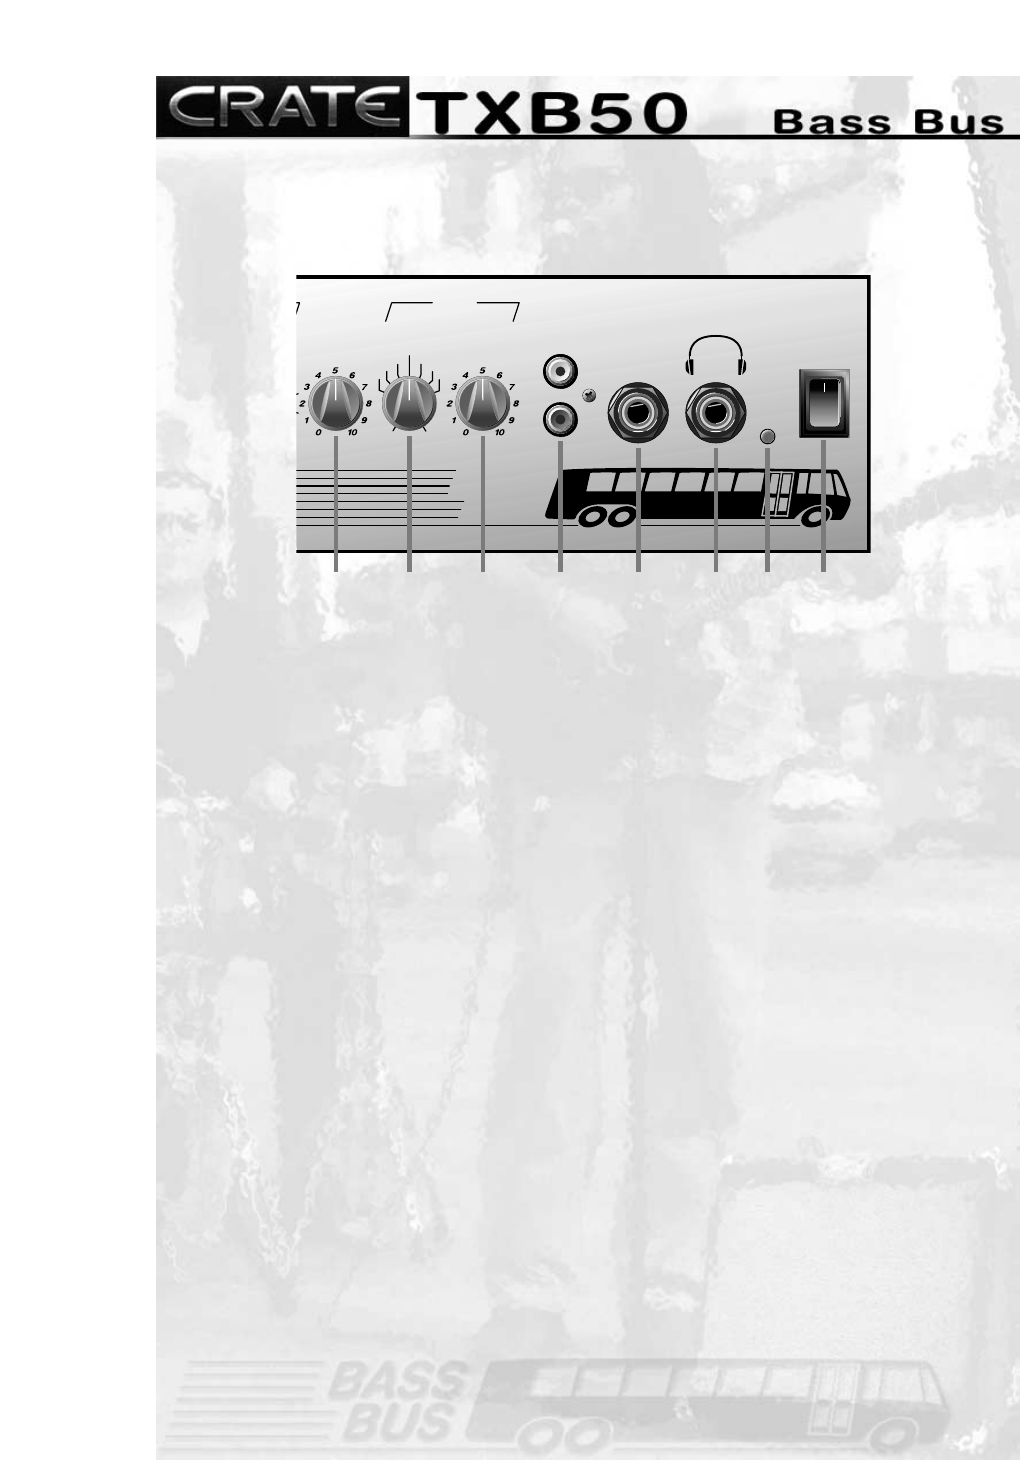
9. MASTER LEVEL: Use this control to
adjust the overall output of the amplifier.
10. DSP MODE: Use this control to select
the type of Digital Signal Processing
(DSP) effect applied to the signal. The
effects are as follows:
DELAY: Slapback delay effect
ECHO: Long delay effect with regeneration
CHORUS: Chorus effect
FLANGE Light flange effect
FUNK-WAH: Touch-sensitive wah-wah effect
OCTAVE: Adds secondary note one octave
lower than original note
CHO/HALL: Chorus effect with large hall reverb
ROOM: Small room reverb effect
HALL: Large hall reverb effect
11. DSP LEVEL: Use this control to adjust
the amount of DSP effect to be applied
to the signal. In the fully counterclock-
wise position, no effect is applied. As you
rotate the control clockwise the amount
of effect increases.
12. CD INPUT: Use these jacks to connect
the outputs of a CD player or tape player to
the amplifier. The output of the CD or tape
player may need to be attenuated for a
suitable mix with the input channels – see
the notes on page 10.
13. INSERT: Use this jack to connect an
external effects device to the amplifier, or
as an input for a drum machine or other line
level signal. This jack is wired as follows:
Tip = Line In (Return - from effect out)
Ring = Line Out (Send - to effect in)
Sleeve = ground
See page 8 for additional information.
14: HEADPHONES: Use this jack to con-
nect a pair of stereo headphones for pri-
vate practice sessions. The internal speak-
ers are disconnected when headphones
are used.
15. LED: When the power switch is on and
the battery is fully charged, this LED illumi-
nates yellow. The LED illuminates red when
the battery needs recharging.
16. POWER: Use this switch to turn the
amplifier on (top of the switch depressed)
or off (bottom of switch depressed).