99
OTHER RECORDING FUNCTIONS
Specifying ISO Sensitivity
You can change the ISO sensitivity setting for better
images in places where lighting is dim or when you are
using faster shutter speeds.
• ISO sensitivity is expressed in terms of values that
originally indicated the sensitivity to light for photographic
film. A larger value indicates higher sensitivity, which is
better for recording when available lighting is dim.
1.
In a REC mode, press [MENU].
2.
Select the “ REC” tab, select “ ISO” , and then
press [̈].
3.
Use [̆] and [̄] to select the setting you want
and then press [SET].
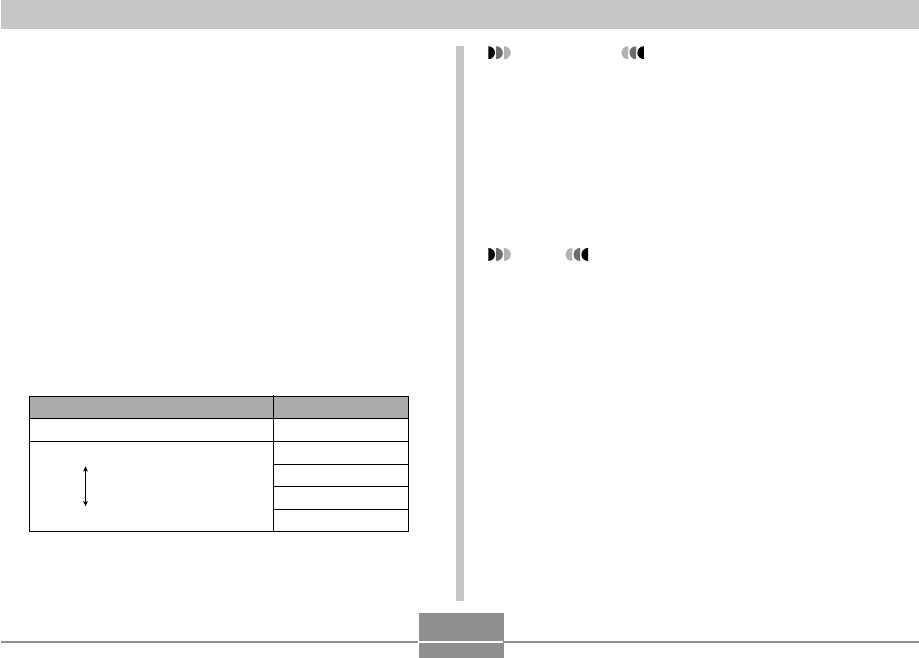
Select this setting:
Auto
ISO 50
ISO 100
ISO 200
ISO 400
To get this:
Automatic sensitivity selection
Lower sensitivity
Higher sensitivity
IMPORTANT!
• Under certain conditions, a high shutter speed in
combination with a high ISO sensitivity setting can
cause digital noise (graininess), which makes an
image appear rough. For clean, good-quality images,
use the lowest ISO sensitivity setting possible.
• Using a high ISO sensitivity setting along with the
flash to shoot a nearby subject may result in
improper illumination of the subject.
NOTE
• You can use the key customization feature (page
103) to configure the camera so the ISO sensitivity
setting changes whenever you press [̇] and [̈]
while in a REC mode.


