43
CONTENTS
SETTING UP
SEWING
UTILITY
STITCHES
MY CUSTOM
STITCH
TM
(CREATE YOUR OWN
STITCH DESIGNS)
EMBROIDERING
MAINTENANCE
ERROR
MESSAGES
SEWING CHART
PATTERNS
(PROGRAMMED
IN MACHINE)
BASIC STITCHING
1 Straight (Left) [straight stitch (left needle position)]: for
normal sewing
2 Straight (Mid) [straight stitch (center needle position)]: for
normal sewing
3 Triple stretch stitch: for reinforced stitching
4 Stretch stitch: for sewing stretch fabric
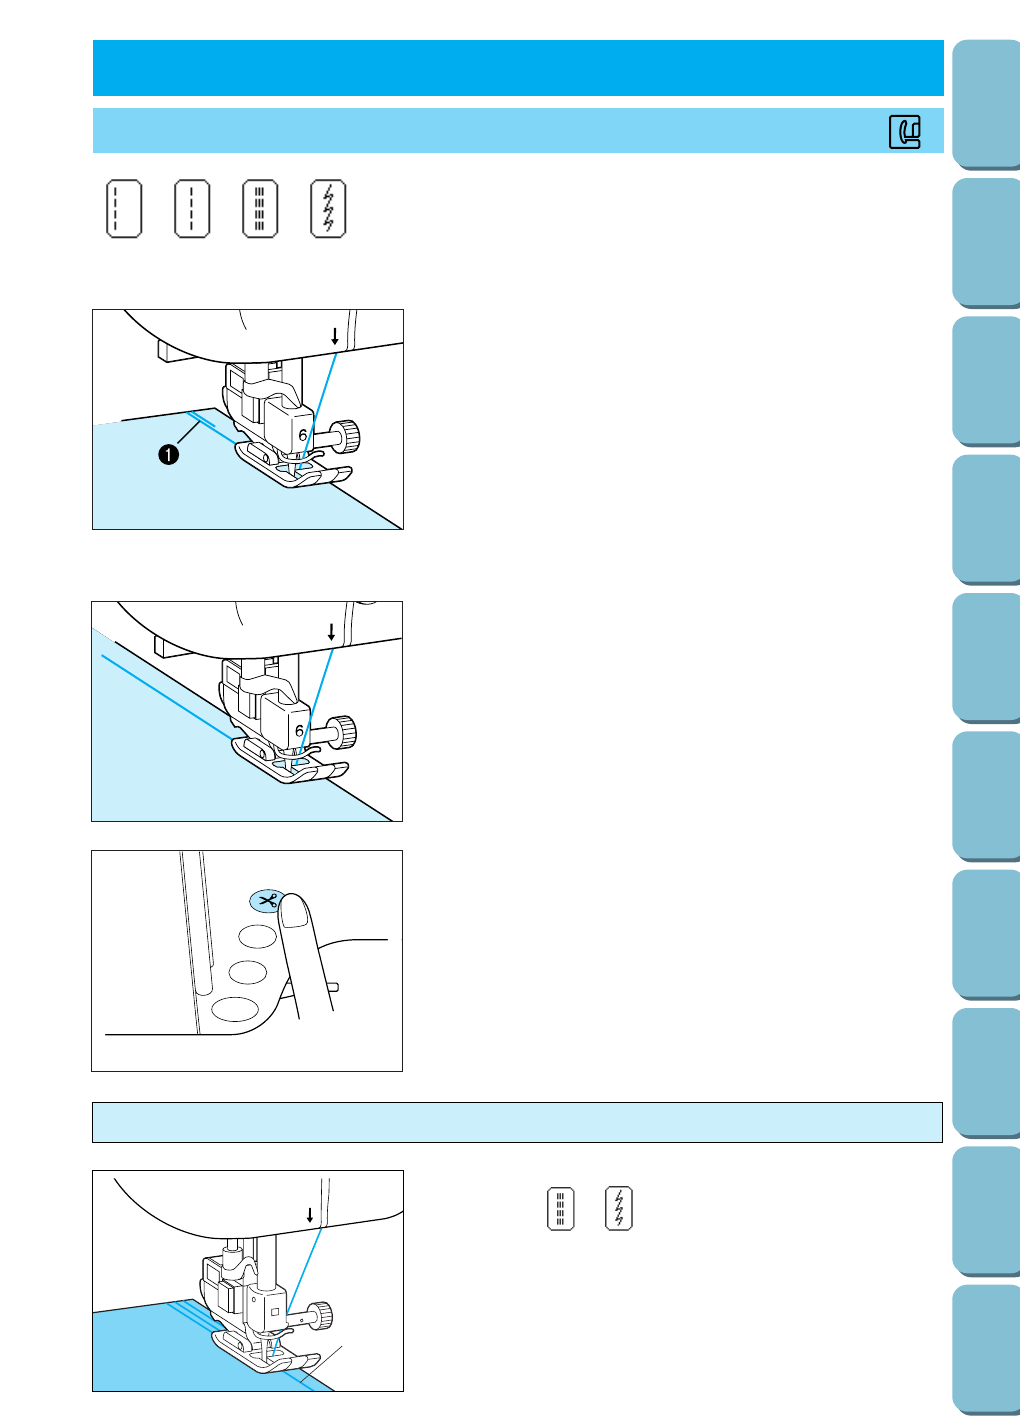
1. Baste or pin together the fabric pieces before sewing, attach
presser foot J, and lower the presser foot lever.
2. Press the reverse/reinforcement stitch button to sew
reverse/reinforcement stitches, and then press the start/stop
button to continue sewing.
1 Reverse stitches at beginning
Note
– Be sure to place the edge of the fabric at least 3 to 4 stitch
lengths behind the presser foot so that the reverse/
reinforcement stitches can be sewn.
– If automatic reverse/reinforcement stitching is turned on
before you start sewing, pressing just the start/stop button
automatically sews reverse/reinforcement stitches before
sewing.
3. Slow down the sewing speed near the end of the stitching,
and then press the reverse/reinforcement stitch button to
sew reverse/reinforcement stitches and stop the machine.
4. Press the thread cutter button to cut the threads.
Note
If automatic thread cutting and automatic reverse/reinforcement
stitching are turned on before you start sewing, pressing the
reverse/reinforcement stitch button at the end of the stitching
automatically sews reverse/reinforcement stitches, trims the
threads and stops the machine.
UTILITY STITCHES CHAPTER 3
Baste the fabric beforehand and sew along the basting using a
stretch stitch ( or ).
1 Basting
Note
Do not pull the fabric while sewing.
Reinforced stitching of stretch fabric


