5
NAV102 with NavMate
• Go To...: Choose your destination by searching for an address, choosing an entry from
the POI (point of interest) directory, selecting a location from the map, or by choosing a
destination from a saved list of recently visited locations or favorites (see “Selecting a
Destination” on page 7).
• Setup: Configure your navigation to suit your needs. Define general settings (e.g. time,
language, or system of measurement), configure your map (e.g. 2D or 3D mode, day or
night mode, map complexity) or load a map of a different region, set the route options
(e.g. choose to avoid or allow toll roads or ferries, or change the volume (see “Setup
Menu” on page 24).
• Office Address: Route to Office Address.
• Trip Computer: Display Speed, Trip, Odometer and Clock readings.
Navigation Screen
The map is the core component of your NAV102. During navigation, it is centered on your
current location by default, provided you have a GPS connection.
In Tracking mode, the map follows your actual position (GPS position), displaying information
about your geographic position, distance to your destination, etc. The GPS position is indicated
by a red/blue arrow.
You can also browse the map, view businesses and other Points of Interest (POI, and then
choose them for routing and navigating. The map knows two basic states: Tracking and
Browsing.
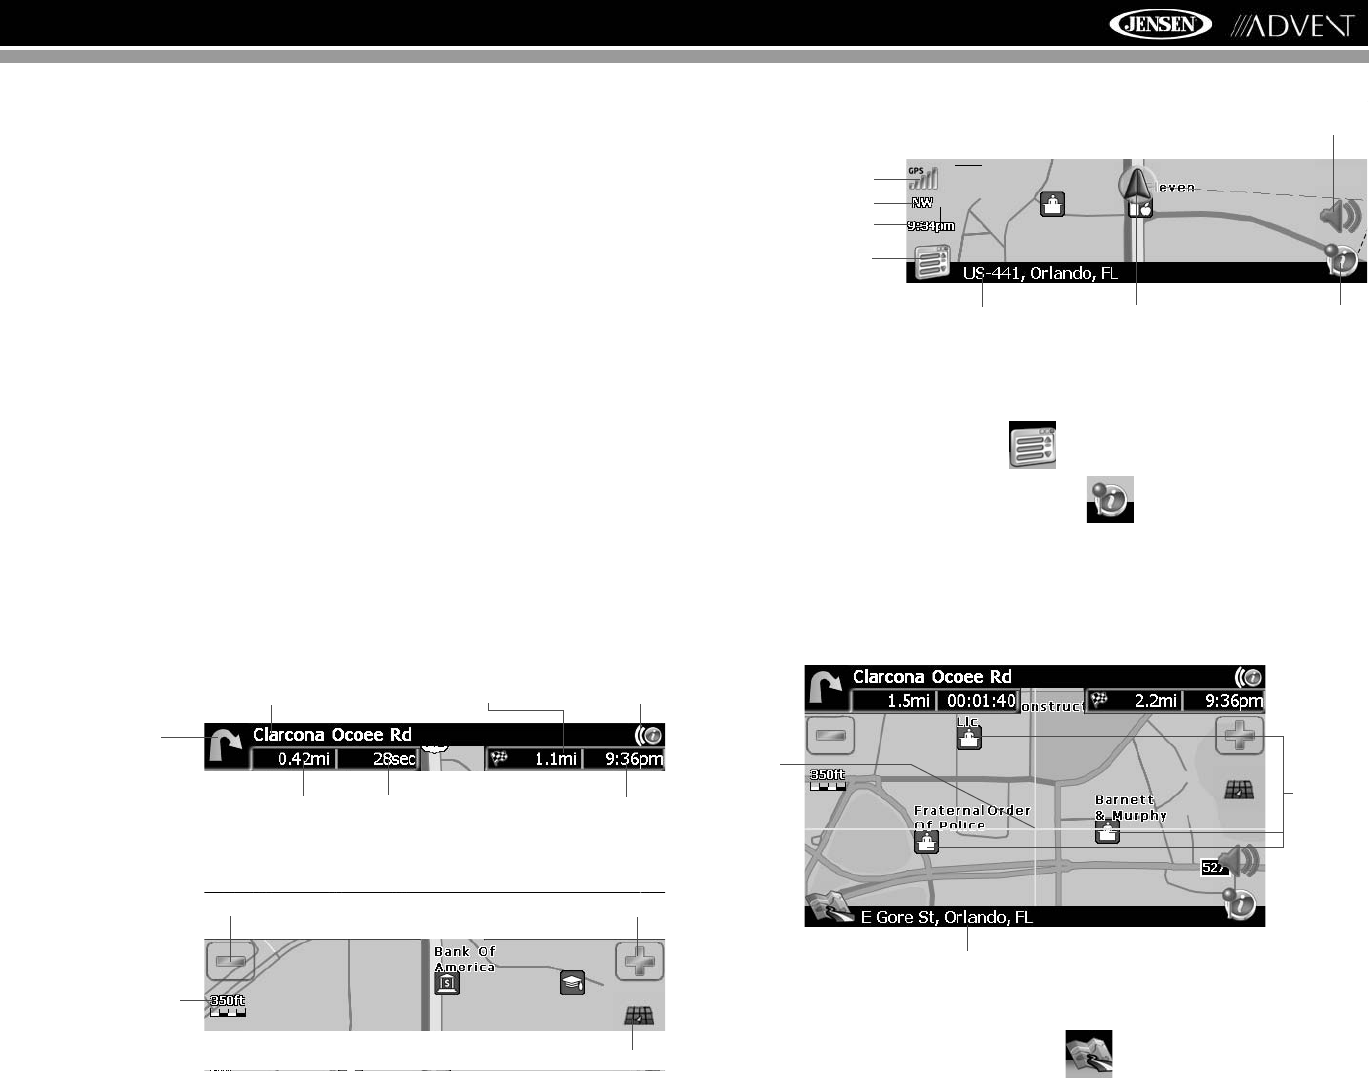
Map Tracking Screen
During navigation, the screen displays your route (in yellow) and your surroundings. A red/blue
arrow identifies your current position. The upcoming maneuver is visualized in the upper left
corner, along with the distance and approximate time before that turn. When you come up to a
turn, you will hear a voice command at the appropriate time.
On the left, additional information, including the current time, GPS signal strength and
compass orientation (N, S, E, W) is displayed.
• To zoom in or out, press the + or – icons.
• To return to the Main Menu, press the button.
• To add a POI destination to your route, press the button.
• For one-way streets, the transit direction is indicated with a red arrow.
• For more information about navigation, see “Navigating” on page 16.
Map Browsing Screen
Touch (and hold) the screen to access Map Browsing Mode. Use a stylus or your finger to
browse the map. Your position is identified as the center of the crosshair.
• To zoom in or out, press the + or – icons.
• To return to the map tracking mode, press the button.
Next Maneuver
Next Turn/Junction/Exit Number
Distance to
Destination
Distance to Next Maneuver
Time Before Next Maneuver
Estimated
Arrival Time
Repeat
Voice Promp
Map Scale
Zoom In
Zoom Out
Press for 2D/3D/Split Screen View
Current Time
Current Position
GPS Signal Strength
Menu Button
Compass Heading
Current Location Map Location
Mute Voice Prompts
Crosshair Location
Business
Icons
Crosshair


