


INSTALLATION INSTRUCTIONS
11
B
ecause each installation is unique to the property, it is
n
ot possible to give full details to suit every setting.
However the installation should comply with the
requirements of the Building Regulations and be made
using ‘best practice’ construction methods.
R
emember that many fireplace openings will have a
supporting lintel. Do not remove this without making
provision to support the remaining structure of the
building. The Elegance stove must not form any part of
the supporting structure.
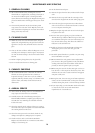
1. INSTALLING THE STOVE
1.1 Remove all packing and temporary transportation fixings
from the Elegance stove, check that no parts have been
left in the ashpan.
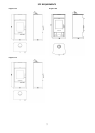
1.2 Lift the stove into position on the prepared hearth area,
taking care not to damage the hearth finish.
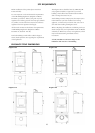
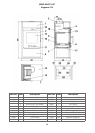
1.3
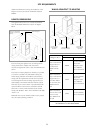
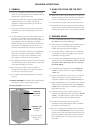
Connect the stove to the chimney system, using Stovax
enamelled flue pipe and seal the connecting joints.
Typical top and rear flue connections are shown.
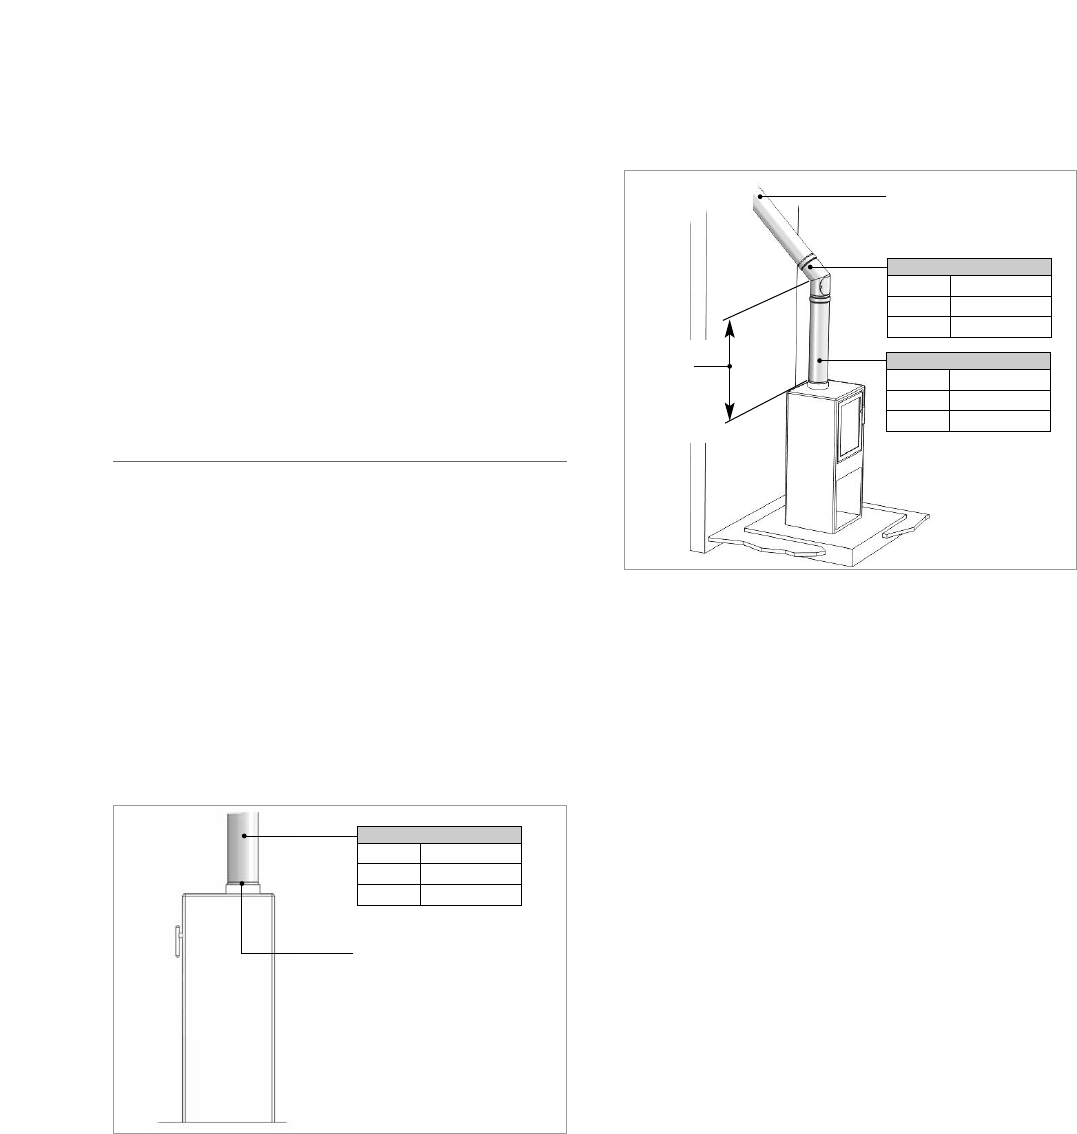
1.4 Top flue pipe installation
1.5
Connect a flue pipe by inserting it into the flue spigot
and sealing using fire cement.
1
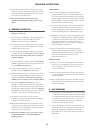
.6 Typical top flue installation. Flue to be installed in
a
ccordance with manufacture’s instructions.
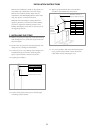
1.7 As it is not possible to fully sweep the flue through the
stove, provision must be made to clean the flue and
collect debris without removing the stove.
Seal Collar with Fire Cement
Flue Pipe 915mm (3ft)
Size Stovax Part No
5” 4502
6” 4602
F
lue Pipe 915mm (3ft)
S
ize Stovax Part No
5
” 4502
6
” 4602
1
35° Elbow
S
ize Stovax Part No
5
” 4512
6
” 4612
T
o chimney connection as
d
etailed in building regulations
600mm
m
inimum
1000mm
maximum
u
n-supported