


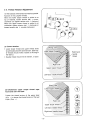
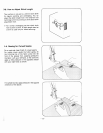

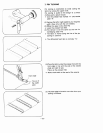

)
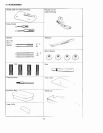
Set
the
needle
plate
for
roll
hemming
and
tigl2ten
the
screw
a
and
b
on
it.
.
Set
the
presser
foot
for
roll
hemming
and
tighten
the
presser
foot
thumb
screw
in
the
direction
of
arrow.
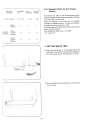
®
Put
the
upper
knife
back
where
it
was.
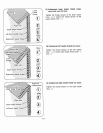
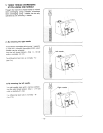
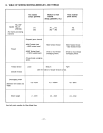
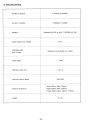
STANDARD
CHART
FOR
ROLL
HEMMING
ROLL
FINE
ROLL
HEMMING
HEMMING
BITE
WIDTH
5
-
6
mm
5
-
6
mm
STITCH
LENGTH
1
1.5mm
1
-
15mm
DIFFERENTIAL
FEED
N
N
RATIO
NEEDLE
THREAD
1
-
4
1
-
4
THREAD
UPPER
LOOPER
1-4
2-4
TENSION
THREAD
LOWER
LOOPER
5-8
1
2-4
THREAD
+
The
figures
in
the
above
chart
may
be
a
little
different
according
to
the
kind
of
the
fabric
and
the
threads.
(See
P.20
and
P11)
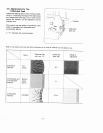
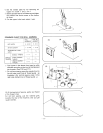
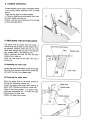
+
For
roll
hem
sewing,
pass
the
needle
thread
to
the
left
side
(solid
line)
of
thread
guide
a
as
illustrated.
(For
normal
sewing,
pass
it
to
the
right
side
(dotted
line)
of
thread
guide
a
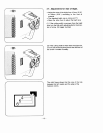
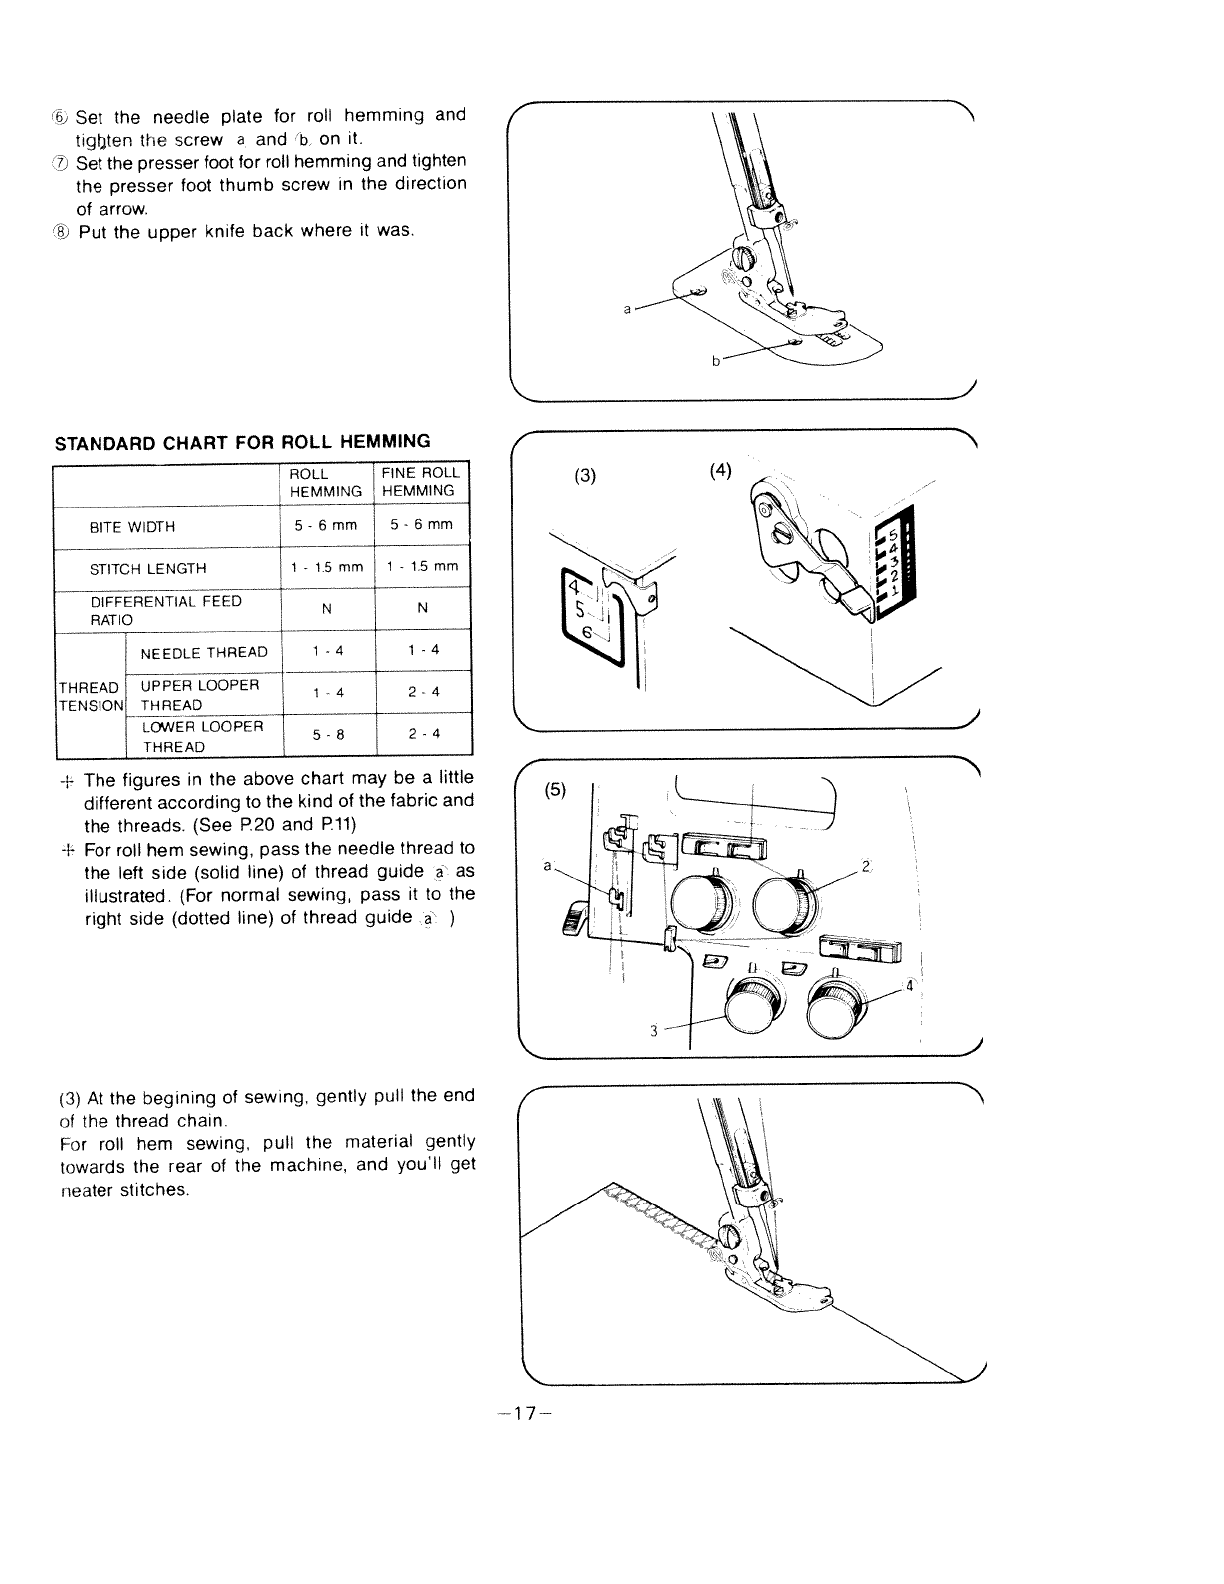
(3)
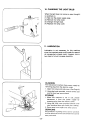
At
the
begining
of
sewing,
gently
pull
the
end
of
the
thread
chain.
For
roll
hem
sewing,
pull
the
material
gently
towards
the
rear
of
the
machine,
and
you’ll
get
neater
stitches.
I-
(3)
(4)
.1
—17—