6
OPERATING YOUR THERMOSTAT
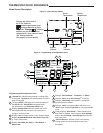
Choose the Fan Setting (Auto or On)
Set the FAN Switch to Auto or On.
Fan Auto is the most commonly selected setting and runs the
fan only when the heating or cooling system is on.
Fan On runs the fan continuously for increased air circulation
or to allow additional air cleaning.
Choose the System Setting
(Heat, Off, Cool, Auto, Emer)
Press the SYSTEM button to select:
Heat: Thermostat controls only the heating system.
Off: Heating and Cooling systems are off.
Cool: Thermostat controls only the cooling system.
Auto: Auto Changeover is used in areas where both heating
and cooling may be required on the same day. AUTO allows
the thermostat to automatically select heating or cooling
depending on the indoor temperature and the selected heat
and cool temperatures. When using AUTO, be sure to set the
Cooling temperatures more than 1° Fahrenheit higher than
the heating temperature.
Emer: (Heat Pump models) Thermostat controls only backup
heating system.
IMPORTANT!
Manual Operation for Non-Programmable
Mode
Press the SYSTEM button to select Heat or Cool and use
the
or buttons to adjust the temperature to your
desired setting. After selecting your desired settings you can
also press the SYSTEM button to select AUTO to allow the
thermostat to automatically change between Heat and Cool.
Manual Operation (Bypassing the Program)
Programmable Thermostats
Press or and then the HOLD button and adjust the
temperature wherever you like. This will override the program.
The HOLD feature bypasses the program and allows you
to adjust the temperature manually, as needed. Whatever
temperature you set in HOLD will be maintained 24 hours
a day, until you manually change the temperature or press
Run Sched to cancel HOLD and resume the programmed
schedule.
Program Override (Temporary Override)
Press or buttons to adjust the temperature. This
will override the temperature setting for two hours minimum
or until the next programmed time. To cancel the temporary
setting at any time and return to the program, press Run
Sched. If the SYSTEM button is pressed to select AUTO
the thermostat will change to Heat or Cool, whichever ran
last. If it switches to heat but you want cool, or it changes
to cool but you want heat, press both
and buttons
simultaneously to change to the other mode.
PROGRAMMING (For Programmable Model Only)
Set Current Time and Date
1) Press Menu and then Time button once. The display
will show the hour only.
2) Press and hold either the
or key until you reach
the correct hour and AM/PM designation (AM begins at
midnight, PM begins at noon).
3) Press Time once again. The display window will show
the minutes only.
4) Press and hold either the
or key until you reach
the correct minutes.
5)
Additional presses of Time will advance the display to
show the year, month and date of month. Press the
or key to change the display to the correct setting
for each.
6) Press Run Sched to exit the Time mode.
Enter the Heating Program
1) Press SYSTEM button to select “Heat” in the system
switch area indicating the active mode being pro-
grammed.
2) Press the Menu button and then press Schedule.
3) The top of the display will show the day(s) being pro-
grammed. The time and temperature (fl ashing) are also
displayed. “1” will also be displayed to indicate the pe-
riod.
4) Press
or key to change the temperature to your
selected temperature for the 1st heating period.
5) Press Time button, time will fl ash.
6) Press
or key to adjust the start time for the
1st period.
7) The time will change in 15 minute increments.
8) After you have set the time and the temperature for
the period to begin, press Schedule to advance to the
next program period.
INSTALLER/CONFIGURATION MENU
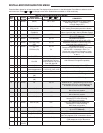
21) Select Filter Replacement Reminder and Set Run
Time – Select the “Change Filter” reminder On or
OFF. If selected On, press MENU to select the time
period from 25 to 1975 hours in 25 hours increments.
In a typical system, 200 hours (default) of run time is
approximately 30 days. After the selected time of blower
operation, the thermostat will display “Change Filter”
as a reminder to change or clean your air fi lter. When
“Change Filter” is displayed, press MENU or RUN
SCHED button to clear the display and restart the time to
the next fi lter change.
22) Select Reversing Valve Output – The O/B option is
factory set at “O” position. This will accommodate the
majority of heat pump applications, which require the
changeover relay to be energized in COOL. If the
thermostat you are replacing or the heat pump being
installed with this thermostat requires a “B” terminal, to
energize the changeover relay in HEAT, the O/B option
should be set at “B” position.


