


4
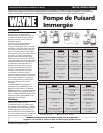
Operating Instructions and Parts Manual
6. The motor is equipped with an
automatic reset thermal protector.
7. While the pump is draining the
pit, verify that the discharge
piping is carrying the water to a
point several feet away from the
foundation.
8. If pump discharge line is exposed to
freezing temperature, the exposed
line must be pitched to drain.
Trapped water will freeze and
damage the pump.
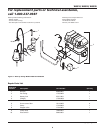
Operation - Back-up Pump
Always
disconnect the power source
before attempting to install,
service, relocate or maintain
the pump. Never touch sump pump,
pump motor, water or discharge piping
when pump is connected to electrical
power. Never handle a pump or pump
motor with wet hands or when standing
on wet or damp surface or in water.
Fatal electrical shock could occur.
Risk of
electrical shock! This pump
is supplied with a grounding
conductor and grounding
type attachment plug. Use a grounded
receptacle to reduce the risk of fatal
electrical shock.
Never cut off the round grounding
prong. Cutting the cord or plug will
void the warranty and make the pump
inoperable.
1. Test Backup Pump operation by
fi lling the sump with water while
the main pump is unplugged.
If the Backup Pump operates
properly, plug the charger into
the GFCI protected outlet to begin
charging the battery.
2. After installation, the standby
pump will start when the water
level rises above the depth that the
primary pump should start.
3. The control box has a DC charger
designed to shorten the recharging
time of your battery, and to prevent
overcharging. In addition, the
control box has a time delay which
keeps the pump from repeated,
short cycles when it shuts off. This
time delay feature will allow the
pump to run 20-25 seconds after the
switch reaches the off position.
4. The control box contains a multi-
colored indicator light. When AC
power is present, the light will
indicate the charging state, and
not refl ect actual battery voltage,
particularly with a defective
battery. In order for the indicator
light to provide an accurate
reading, steps “a” through “d”
must be followed.
a. Unplug main AC pump and the
charger--a power off alert tone
will sound for 30 seconds.
b. Lift and release the fl oat switch
to activate the standby pump.
c. When the pump stops, read the
test light:
Green: Indicates battery is
charged.
Yellow: Voltage is low,
indicating battery is partially
charged.
Red: Battery is completely
discharged or defective.
d. Plug in charger and main AC
pump.
When AC power is out, and when
pump has been running, the light
will indicate battery status.
5. A chirping sound from the control
box will accompany the red light,
indicating that the battery may
require attention or replacement.
Voltage is only an indicator of
battery condition and may not
refl ect the true condition of the
battery. See Maintenance for
instruction on assessing battery
condition.
6. A single thirty-second tone will
sound when power to the system
is interrupted. The unit will reset
automatically when power is
restored. A three-second tone will
sound every time the pump starts.
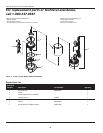
Maintenance - Primary Pump
Always
disconnect the power source
before attempting to install,
service, relocate or maintain
the pump. Never touch sump pump,
pump motor, water or discharge piping
when pump is connected to electrical
power. Never handle a pump or pump
motor with wet hands or when standing
on wet or damp surface or in water.
Fatal electrical shock could occur.
1. Let the pump cool for a minimum of
two hours before servicing because
the pump contains hot oil under
pressure and the motor is hot.
2. Disassembly of the motor prior to
expiration of warranty will void the
warranty. If repairs are required,
see troubleshooting chart.
3. Inlet should be kept clean and free
of all foreign objects and inspect
annually. A clogged inlet will
damage pump.
4. Pump should be checked monthly
for proper operation. Pump can be
checked for proper operation by
briefl y removing pump power cord
from the back of the water sensor
plug and inserting directly into the
grounded outlet. In this condition,
the pump will run continuously.
Once pump operation is verifi ed,
replace pump power cord into the
back of the water sensor plug.
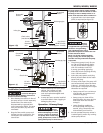
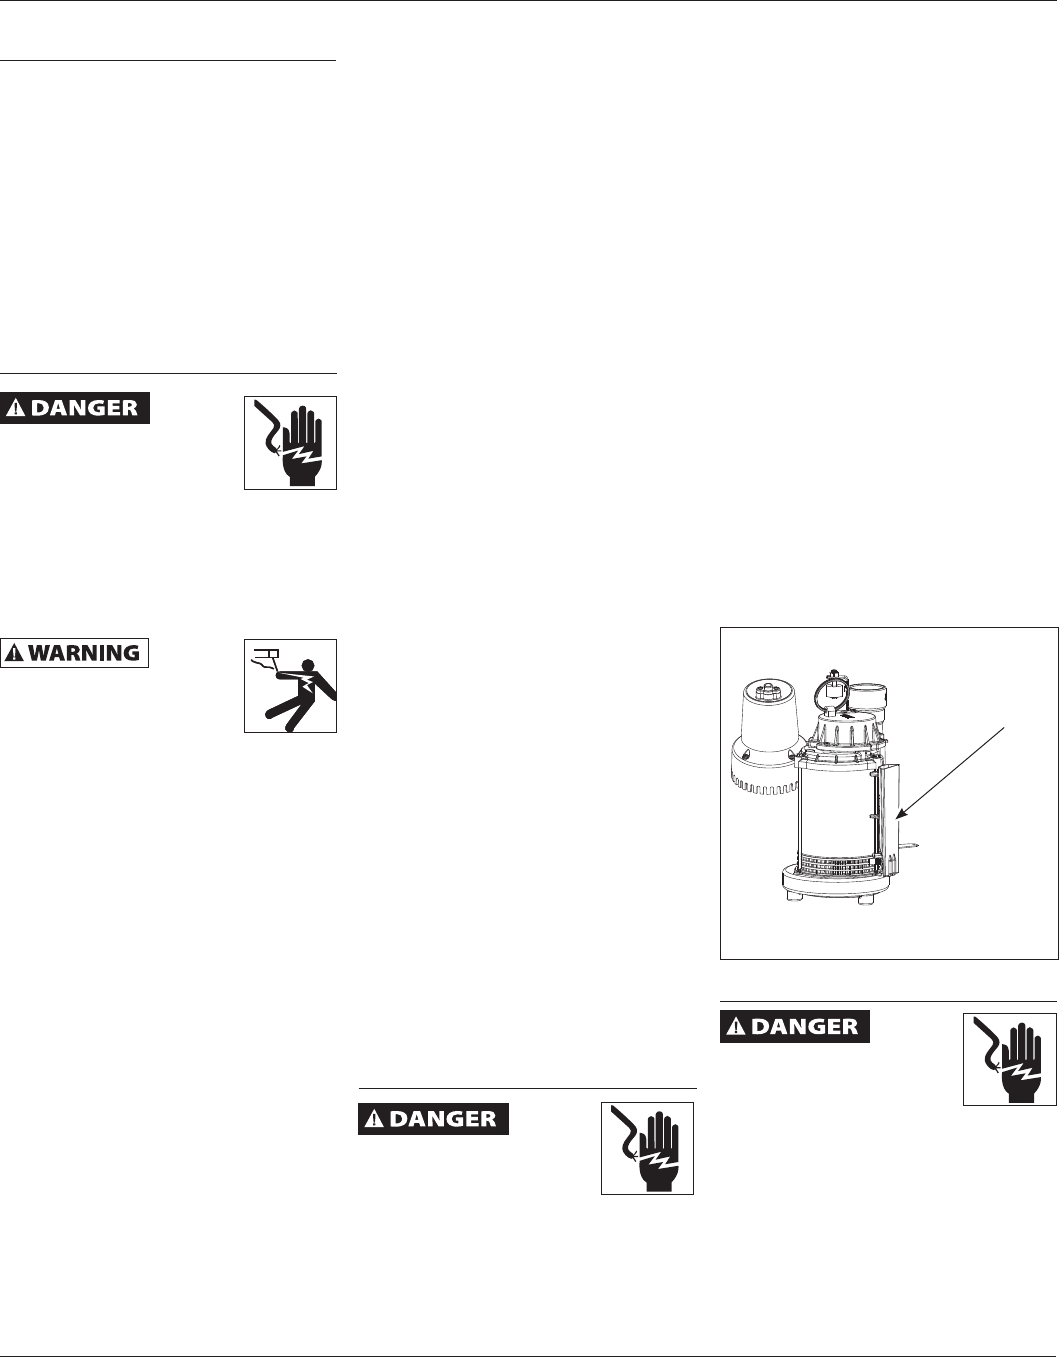
5. Wipe water sensor surface regularly
to prevent silt or other coatings
from building up on sensor face
(see Figure 3).
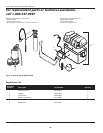
Maintenance - Back-up Pump
Always
disconnect the power source
before attempting to install,
service, relocate or maintain
the pump. Never touch sump
pump, pump motor, water or discharge
piping when pump is connected to
electrical power. Never handle a pump
or pump motor with wet hands or when
standing on wet or damp surface or in
water. Fatal electrical shock could occur.
1. Once a month, check battery
condition.
2. Unplug the wall charger.
www.waynepumps.com
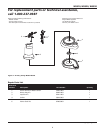
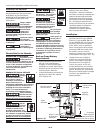
Figure 3
Working surface
of sensor to be
kept free of
foreign material.
Operation - Primary Pump
(continued)