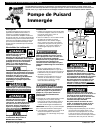
5. While the pump is draining the pit,
verify that the discharge piping is
carrying the water to a point several feet
away from the foundation.
If pump discharge
line is exposed to
freezing temperature, the exposed line
must be pitched to drain. Trapped
water will freeze and damage the
pump.
Maintenance
Always disconnect the
electrical supply before
attempting to install,
service, relocate or
perform any maintenance. If the power
source is out of sight, lock and tag in
the open (off) position to prevent
unexpected power application. Failure
to do so could result in fatal electrical
shock. Only qualified electricians
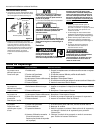
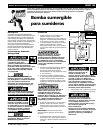
2. This pump is only for use on 120 Volt
(single-phase), 60 hz, 15 amp service and
is equipped with a 3-conductor cord and
3-prong, grounding type plug. Insert the
float switch cord plug directly into a
120 volt outlet.
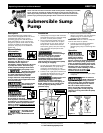
3. Insert the pump power cord plug
directly into the back of the float switch
cord plug (See Fig. 2).
4. Fill sump with water. The pump will
start automatically when the water has
filled the sump to the cut-in level. The
pump will stop when the water reaches
the cut-out level. See specifications for
cut-in/out levels. The pump will cycle
thereafter as required.
Do not operate the
pump unless it is
submerged in water. Dry running
causes pump failure.
The motor is
equipped with an
automatic reset thermal protector.
2
Operating Instructions And Parts Manual
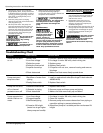
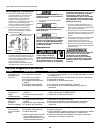
Troubleshooting Chart
Symptom Possible Cause(s) Corrective Action
Pump will not start
or run
Pump starts and
stops too often
Pump will not shut
off or thermal
protector turns off
Pump operates but
delivers little or no
water
1.Blown fuse
2.Low line voltage
3.Defective motor
4.Defective float switch
5.Impeller bound-up
6.Float obstructed
1.Backflow of water from
piping
2.Faulty float switch
1.Defective float switch
2. Obstacle in piping
3.Float obstructed
1.Low line voltage
2.Plugged impeller
3.Obstructed piping
4. Excessive lift height
(water has to go higher
than pump can handle)
1.If blown, replace with proper sized fuse or reset breaker
2.If voltage is under 108 volts, check wiring size
3.Replace pump
4.Replace float switch
5.If impeller will not turn, remove housing and remove
blockage
6.Make sure float moves freely up and down
1.Install or replace check valve (Blue Angel™ check valve kit
#66005-WYN)
2.Replace float switch
1.Replace float switch
2.Remove pump and clean pump and piping
3.Make sure float move freely up and down
1.If voltage is under 108 volts, check wiring size
2.Clean out impeller
3.Remove pump and remove obstruction from piping or
reposition piping to prevent obstruction
4.Reposition pump to a suitable position to decrease lift
height
should repair this unit. Improper repair
could result in fatal electrical shock.
1. Let the pump cool for a minimum of
two hours before servicing because the
pump contains hot oil under pressure
and the motor is hot.
2. Disassembly of the motor prior to
expiration of warranty will void the
warranty. If repairs are required, see
troubleshooting chart.
3. Inlet should be kept clean and free of all
foreign objects and inspected annually.
A clogged inlet will damage the pump.
4. Pump should be checked monthly for
proper operation.
This pump contains
dielectric oil for
cooling. This oil can be harmful to the
environment. Check the state
environmental laws before disposing
this oil.
www.blueangelpumps.com


