11
Installation And Start-Up Procedures
Each water conditioning appliance includes water test strips and 8' of drain line.
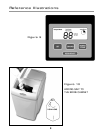
CAUTION: Be sure the controller is firmly “locked” onto the drive end cap assembly. The four tabs
on top of the drive end cap will allow the clips on the bottom of the controller case to lock onto the
end cap tabs. (See detail diagram on page 16. Fig. 11.)
1. Placement: Place your appliance in desired location. Turn off electricity and water supply to
water heater. Make sure inlet/outlet and drain connections meet the applicable local codes. Check
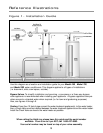
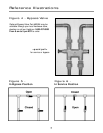
arrows on valve to be sure water flows in proper direction. See figures 1, 2, & 3.
CAUTION: DO NOT PLUMB APPLIANCE IN BACKWARD. See page 6
2. Drain Line: must be a minimum of 1/2"-5/8” I.D. tubing and should make the shortest run to a
suitable drain. The drain line may be elevated up to 8 feet from the discharge on the appliance as
long as the water pressure in your appliance is 40 psi or more. If drain line is 25' or longer, increase
drain line to 5/8" I.D. Also, the end of the drain line must be equal in height or lower than the control
valve. See figure 1.
3. Flushing: Before placing your appliance in service, it is very important to flush the cold water
lines of any debris. Turn on water supply, open the nearest cold water tap and let the water run for 2
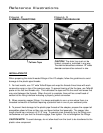
to 3 minutes or until the water flows clear. Then put the by-pass in the Service position. See figures
4 through 6.
4. Check Leaks. Close faucet and check for leaks. If leaks are found, turn off main water supply
and open the nearest cold water faucet to depressurize lines. Close faucet to eliminate siphoning
action. Repair leaks. Turn on water supply and electricity to water heater. Place the bypass valve
in the Service position. See figures 4 and 6.
5. Connect Overflow Line. The overflow line must end at a drain that is at least 3" lower than the
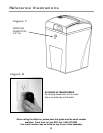
bottom of the overflow fitting. It is a gravity line and cannot be run overhead. See figure 7.
6. Complete The Installation. Open a cold water tap and allow the appliance to flush for 20 minutes
or until approximately 72 gallons has passed through the appliance per NSF requirements.
7. Plug In Transformer. See figure 8.
When calling the HelpLine, please have this guide and the serial number
available. From 8 am to 5 pm EST, call 1-800-437-8993.
Your serial number may be found on top of your valve assembly.


