


10
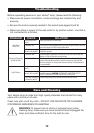
Your Verilux lamp is made from high quality materials that will last for many
years with a minimum of care.
Clean only with a soft dry cloth – DO NOT USE SOLVENTS OR CLEANERS
CONTAINING ABRASIVES OR AMMONIA.
Care and Cleaning
Before requesting service on your Verilux
®
lamp, please read the following:
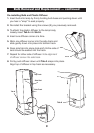
• Make sure all power connectors, cords and plugs are inserted fully and
securely.
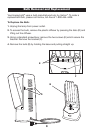
• Be sure the bulb is securely seated in the socket (see pages 8 and 9).
• Make sure there is power to the wall outlet or try another outlet – one that is
not connected to a dimmer.
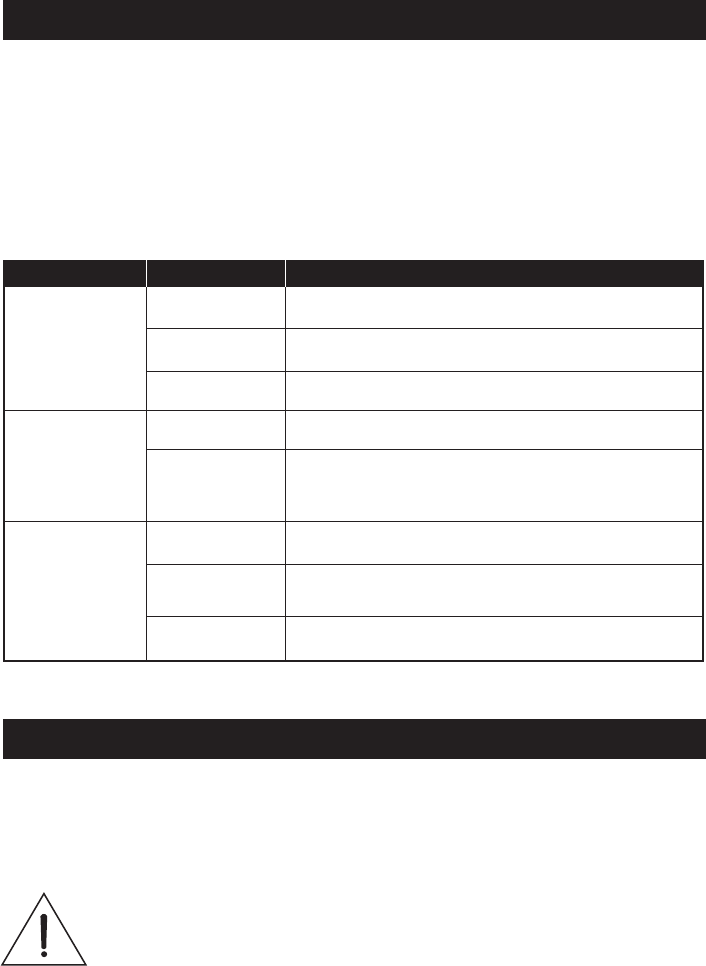
Troubleshooting
PROBLEM CHECK SOLUTION
Light Won’t
Come On
Blackening/Darkening
at Ends of Bulb
Light Flickers
Has the plug come
loose?
Is the bulb old?
Is the bulb connected
securely into socket?
Is the bulb new?
Is the bulb old?
Has the plug come
loose?
Is the bulb connected
securely to the socket?
Is the lamp connected
to a dimmer switch?
Insert plug securely into wall outlet.
Check bulb for blackening/darkening at bottom of spiral where it joins the
base (an indicator of bulb life) and replace bulb.
Be sure the bulb is securely seated into socket, repeat the bulb
installation process.
Sometimes when a new bulb is turned on for the first time the tube will
darken, but this will fade after a few minutes.
With older bulbs, darkening of the tube indicates end of bulb life (this
doesn’t affect operation except to reduce the amount of light available
since the phosphor in that area has become inactive). Bulb replacement
is recommended.
Insert plug securely into wall outlet.
Connect lamp plug only to wall outlet without dimmer switch.
Be sure the bulb is securely seated into the socket, repeat the bulb
installation process. CAUTION: DISCONNECT LAMP FROM OUTLET
PRIOR TO REPEATING THE BULB INSTALLATION PROCESS.
WARNING: To prevent risk of shock or personal injury when
cleaning lamp, make sure you have turned off and unplugged the
lamp, and allow suffi cient time for the bulb to cool.