


– 106 –
EN-10 10
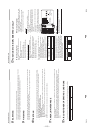
Super Digital Inverter
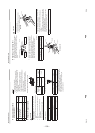
Refrigerant Piping
New refrigerant (R410A)
When using the conventional piping kit
• When using the conventional piping kit with no indication of applicable refrigerant types, be sure to use it with a wall
thickness of 0.8 mm
for Ø6.4 mm, Ø9.5 mm, and Ø12.7 mm, and with a wall thickness of 1.0 mm for Ø15.9 mm. Do not use
the conventional piping kit with a wall thickness less than these thicknesses due to insufficient
pressure capacity.
When using general copper pipes
•Use general copper pipes with a wall thickness of 0.8 mm for Ø6.4 mm, Ø9.5 mm, and Ø12.7 mm, and with a wall thickness
of 1.0 mm for
Ø15.9 mm.
Do not use any copper pipes with a wall thickness less than these thicknesses.
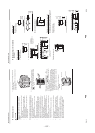
Flare nuts and flare machining
• The flare nuts and flare machining are different from those for the conventional refrigerant.
Use
the flare nuts supplied with the air conditioner or those for R410A.
• Before performing flare machining, carefully read “REFRIGERANT PIPING”.
11 11-E
N
Super Digital Inverter
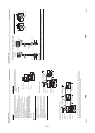
4
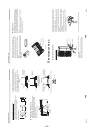
INSTALLATION CONDITIONS
Before installation
Be sure to prepare to the following items before installation.
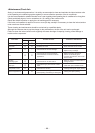
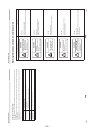
Length of refrigerant pipe
*Caution during addition of refrigerant
When the total length of refrigerant piping exceeds 30 m,
add 40g/m of refrigerant up to a maximum total length of
piping at 75m. (Max. amount of additional refrigerant is
1,800g
.)
Charge the refrigerant accurately. Overcharging may
cause serious trouble with the compressor.
•Do not connect a refrigerant pipe that is shorter than 3 m.
This may cause a malfunction of the compressor or other
devices.
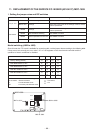
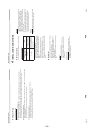
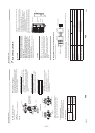
Airtight test
1. Before starting an airtight test, further tighten the spindle
valves on the gas and liquid sides.
2. Pressurize the pipe with nitrogen gas charged from the
service port to the design pressure (4.15MPa) to
conduct an airtight test.
3. After the airtight test is completed, evacuate the nitrogen
gas.
Air purge
• To purge air, use a vacuum pump.
•Do not use refrigerant charged in the outdoor unit to
purge air. (The air purge refrigerant is not contained in
the outdoor unit.)
Electrical wiring
•Be sure to fix the power wires and indoor/outdoor
connecting wires with clamps so that they do not come
into contact with the cabinet, etc.
Earthing
• Proper earthing can prevent charging of electricity on the
outdoor unit surface due to the presence of a high
frequency in the frequency converter (inverter) of the
outdoor unit, as well as prevent electric shock. If the
outdoor unit
is not properly earthed, you may be exposed
to an electric shock.
•Be sure to connect the earth wire. (grounding work)
Incomplete earthing can cause an electric shock.
Do not connect earth wires to gas pipes, water
pipes,
lightning rods or earth wires for telephone wires.
Test Run
Turn on the leakage breaker at least 12 hours before starting
a test run to protect the compressor during startup.
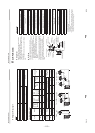
Length of refrigerant pipe
connected to indoor/
outdoor unit
Item
3 to 30 m
Addition of refrigerant is
unnecessary at the local site.
*31 to 75 m
<Addition of refrigerant>
Add 40g of refrigerant for
every 1m of piping that
exceeds 30
m.