– 147 –
15-4. Replacements of Main Parts <Hi-Wall type>
15-4-1. Indoor Unit
No.
Part name
Front panel
Procedure
1) Stop operation of the air conditioner, and turn off
the power supply.
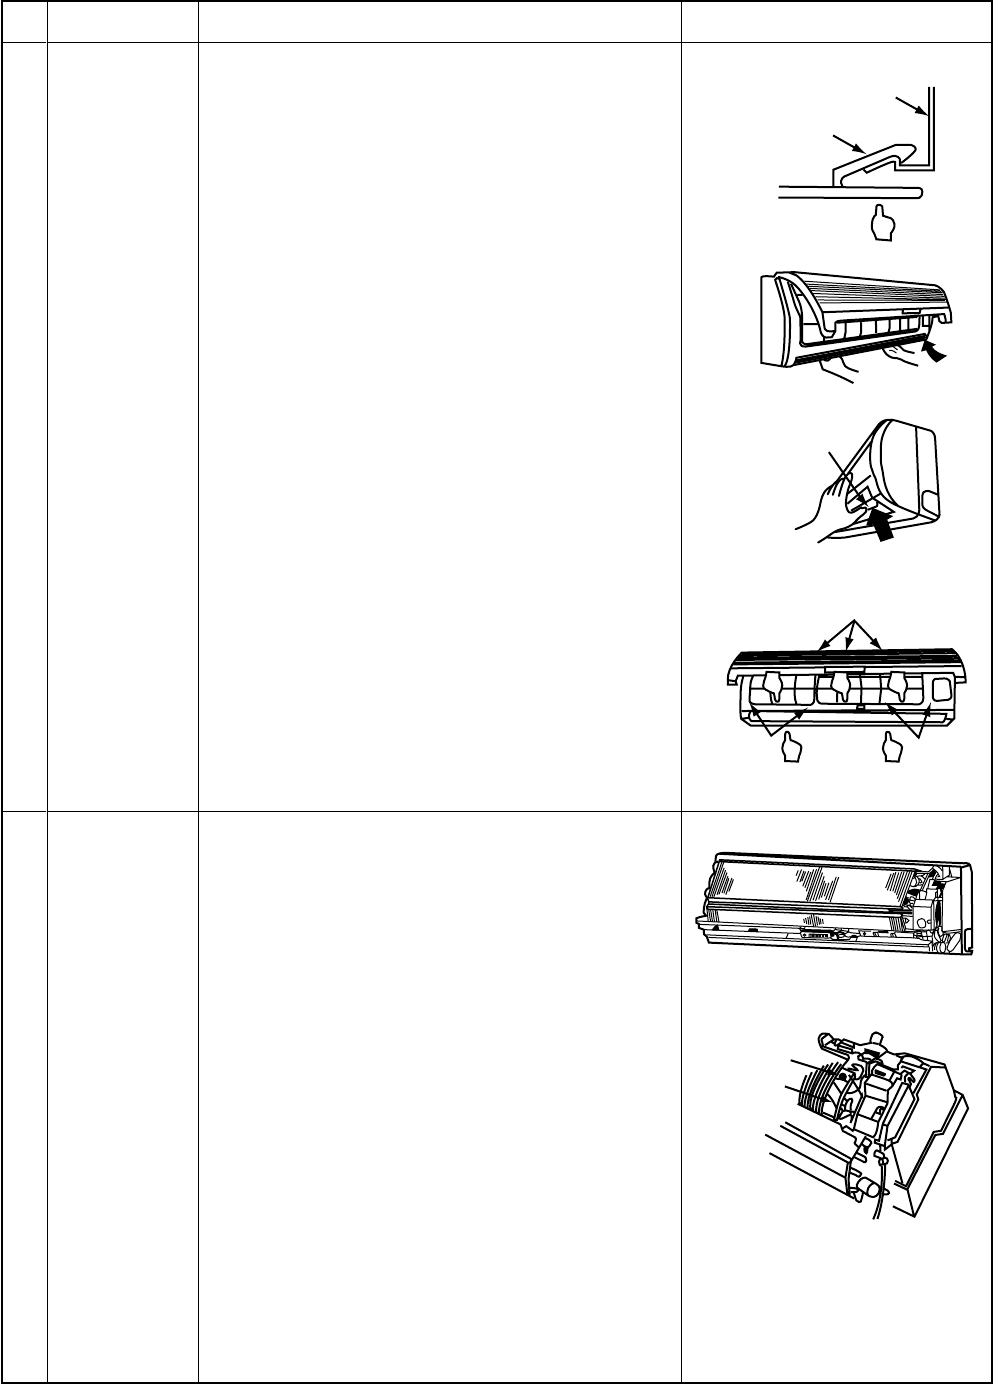
2) Push “PUSH” part at the lower side of the front
panel, and then take off claws of the front panel
from the installation board.
3) Open the suction grille and take off the front
panel fixing screws (4 pcs.).
4) After turning the side grille as shown in the right
figure, perform the following works.
5) Push the electric parts box with right thumb while
pulling both sides of the front panel toward you.
<Attachment of front panel>
1) Turn the side grille as shown in the right figure.
2) Push 3 positions at center of the discharge port
and 2 positions at lower center of the discharge
port, and then hook the hooking claws (3 posi-
tions) at upper surface of the front panel to the
rear board.
3) Tighten 4 screws.
• Insufficient hooking or pushing may cause
falling of dewdrop or discomforting noise.
When removing the front panel without turning
the side grille, the front panel may be broken.
Remarks
Screw
Drain guide
1) Perform work of item 1 of .
2) Remove the drain guide.
3) Take off screws for earth lead wire attached to
the end plate of the heat exchanger.
4) Disconnect connectors for fan motor and louver
motor from the microcomputer assembly.
5) Remove the display unit at the center of the set
from the main body.
Electric parts
box assembly
Installation board
Front panel
Upper hooking claws
(3 positions)
Fixing
screws
Fixing
screws
Side grille


